


Operation
6 3A2799A
Operation
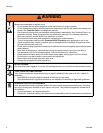
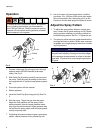
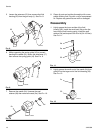
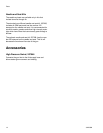
1. Connect a fluid hose (A) to the gun inlet. Use high
pressure swivel 207946 if desired (order sepa-
rately). See Fig. 2.
2. With SwitchTip (8) and tip guard (9) removed, start
the pump. Flush the pump according to the instruc-
tions supplied with it. Use the lowest pressure possi-
ble.
3. Prime the system with the material.
4. Relieve pressure.
5. Install the SwitchTip (8) and tip guard (9). See FIG.
2.
6. Start the pump. Trigger the gun onto test paper.
Adjust the fluid pressure until the spray is com-
pletely atomized. Use the lowest pressure neces-
sary to get the desired results. Higher pressure may
not improve the spray pattern and will cause prema-
ture tip and pump wear.
7. If adjusting the pressure does not give a good spray
pattern, relieve pressure and try another tip size.
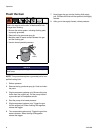
8. Use a full-open, full-close trigger action. Hold the
gun about 14 in. (350 mm) from and at right angles
to the work surface. Don’t swing the gun in an arc.
Practice to find the best length and speed of stroke.
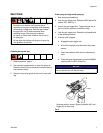
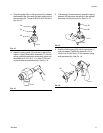
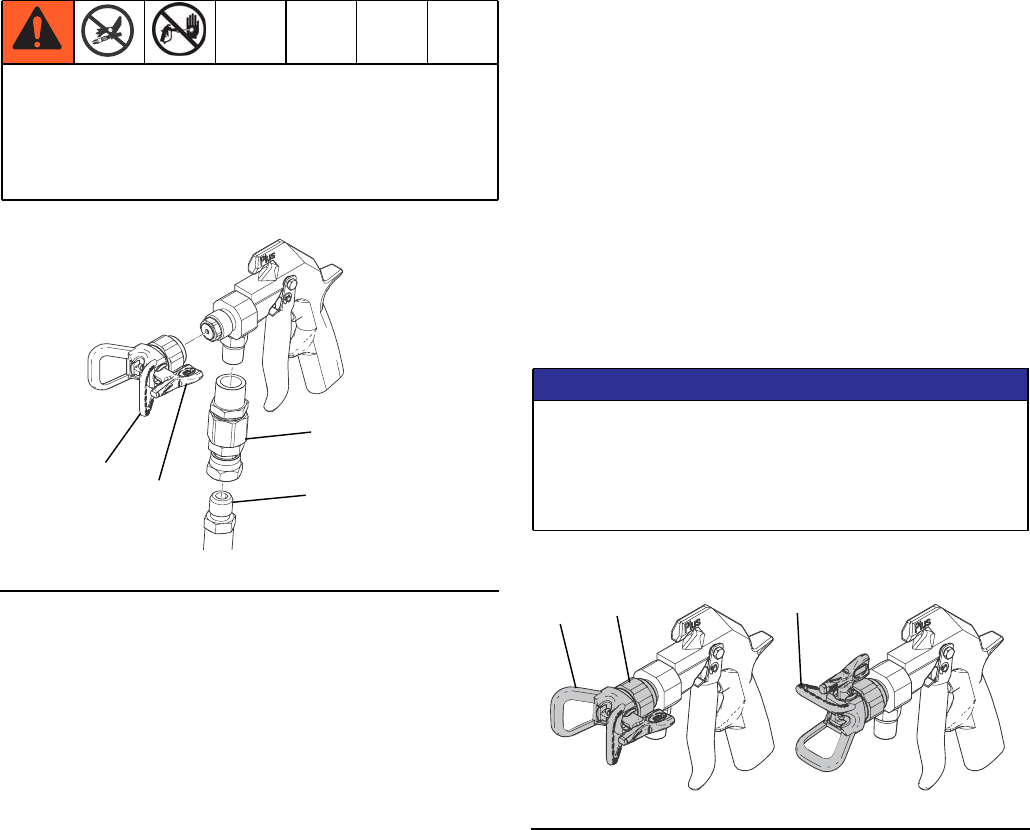
Adjust the Spray Pattern
1. To adjust the spray pattern direction, relieve pres-
sure. Loosen the tip guard retaining nut (B). Rotate
the tip guard as necessary to achieve a vertical or
horizontal spray pattern. See FIG. 3. Tighten the nut.
2. The spray tip orifice and spray angle determines the
coverage and size of pattern. When more coverage
is needed, use a larger spray tip rather than increas-
ing fluid pressure.
To reduce the risk of component rupture, and serious
injury, including fluid injection, do not exceed the
gun’s 7250 psi (500 bar, 50 MPa) maximum working
pressure or the maximum working pressure of lowest
rated component in the system.
FIG.2
A
9
8
ti19266a
Swivel
NOTICE
Openings in the tip guard reduce material buildup on
the guard while spraying. Damage to the sharp edges
of the openings causes material to collect in the dam-
aged area. To prevent this, never hang the gun by the
tip guard.
FIG.3
A
B
C
ti19267a