


NOTE: When increasing to a wide, flat pattern,
increase supply of fluid to gun to maintain
same coverage over larger area.
Direction of spray pattern (horizontal or vertical) is
changed by loosening lock ring and turning air cap to
the desired position. TIGHTEN LOCK RING HAND
TIGHT. DO NOT OVERTIGHTEN.
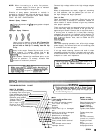
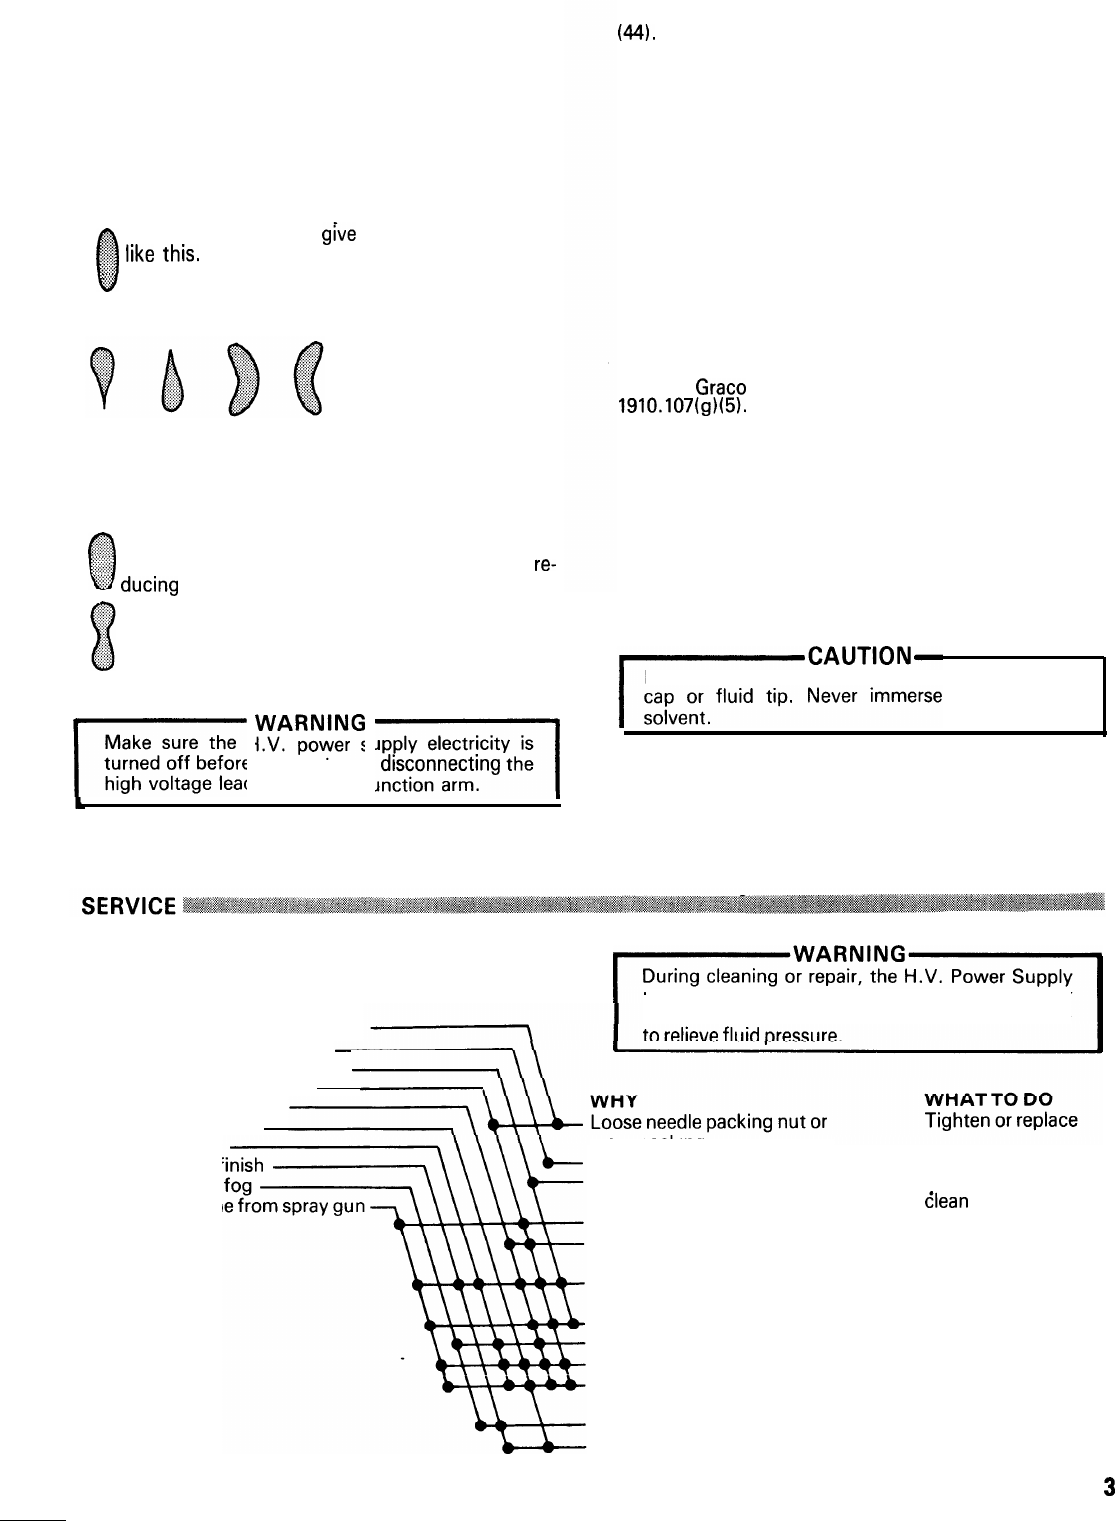
Normal Spray Pattern
.::>:
0
Proper adjustment will grve a spray pattern shaped
##
Iike
this.
$$:i:
$:::.
Improper Spray Patterns
Heavy on top or bottom, right or left. Caused by
paint buildup on air cap or fluid tip, partially plug-
ged air holes or fluid tip. To remedy, clean the cap
or tip.
&$
Heavy in the center. Caused by too much, or too
0
@$
thick material. To remedy, reduce flow by
re-
<is?
ducing fluid pressure or thinning the paint.
Split pattern. Caused by insufficient paint, or too
much air pressure. To remedy, increase fluid
pressure or reduce air pressure.
Make sure the H.V. power supply electricity is
I
WARNING
I
turned off before connecting or drsconnectrng the
high voltage leads at guns or junction arm.
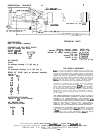
Connect high voltage cable to the high voltage adapter
(44.
When all adjustments are made, -trigger air, atomizing
air, fluid pressure, and fan pattern,-you can turn on
the high voltage and begin operation.
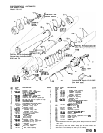
Care of Gun
Good housekeeping is important. Clean the gun and
work area daily. A buildup of conductive residue on
either exterior or interior surfaces of gun may interfere
with proper operation.
Flush out the gun with an approved solvent at the end
of the work day. Wipe the outside of the gun with an
approved gun cleaner. Remove the air cap and clean it.
If ionizing wire of needle (41) is bent after cleaning,
straighten wire so that it is centered in fluid stream. For
an approved solvent or gun cleaner, see your local sup-
plier or Grace Branch. Also, refer to OSHA 29 CFR
1910.107(g)(5).
Cleaning
After each spraying operation, turn off the high voltage
power supply, and solvent flush until all remaining paint
is removed from hose and gun.
If air cap needs cleaning, remove and soak in clean
compatible solvent (not over 15 minutes) and scrub with
a fine bristled brush. To clean out holes in air cap, use a
toothpick or other soft implement.
Never use metal instruments to clean holes in air
entire gun in
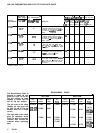
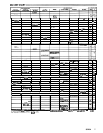
TROUBLESHOOTING CHART
WHAT’S WRONG
Fluid needle packing nut leakage
Air leakage from front of gun
Fluid leakage from front of gun
Spitting or fluttering spray
Defective spray pattern
“Orange Peel” finish
must be turned off. Before removing air cap or
spray tip, shut down paint pump and trigger gun
Streaks in finish
Runs or sags in f
Excessive spray
Fluid won’t corn
worn packing
Air valve not seating properly
Fluid needle not seating
properly
Fluid low
Loose fluid tip or damaged
seat
Loose air cap, dirty or damaged
fluid nozzle or air cap
Needle worn or damaged
Too much air pressure
Insufficient air pressure
Poorly mixed and/or strained
fluid
Fluid thinned out too much
Improper thinner
Clean,lubricate,service
Loosen packing nut,
clean
or replace
Check fluid supply
Tighten,clean,replace
Tighten,clean,clear
replace
Replace
Use least necessary
Increase air pressure
Properly mix and
strain
Properly thin fluid
Use proper thinner
307434
3