


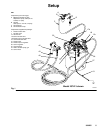
7308455
System Component Information
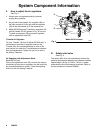
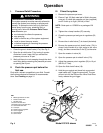
I. How to use the AirPro gun
See Fig. 2.
1. Make all fluid and air adjustments at the pressure
pot for maximum efficiency. Refer to page 8.
2. If you make adjustments at the gun, take note of
what you do. Then, if the results are not satisfac-
tory, you can easily return the gun to its previous
adjustment. Steps 3 and 4 explain the gun adjust-
ments. Refer to your gun manual for more informa-
tion.
3. Adjusting Air Spray Gun: Use the fan pattern
adjusting valve (E). Normal adjustment is with the
valve turned out fully clockwise and then turned in
two full turns.
a. Turn counterclockwise to widen spray pattern.
b. Turn clockwise to narrow spray pattern.
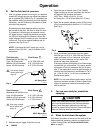
Adjusting HVLP Spray Gun: Use the fan pattern
adjusting valve (E).
a. For a round spray pattern, turn the pattern
adjusting valve fully in (clockwise).
b. For an oval (flat) spray pattern, turn the
pattern adjusting valve fully out (counterclock-
wise).
4. The fluid adjusting valve (F) is used in systems
that do not have a fluid regulator. As this package
includes a pressure pot regulator (33), use it to
adjust fluid flow. Turn the valve (F) out until full
trigger travel is obtained.
5. The gun has a built-in lead and lag operation.
When triggered, the gun emits air before the fluid
is discharged. When the trigger is released, the
fluid stops before the air flow stops. This helps
assure the spray is atomized and prevents fluid
buildup on the air cap.
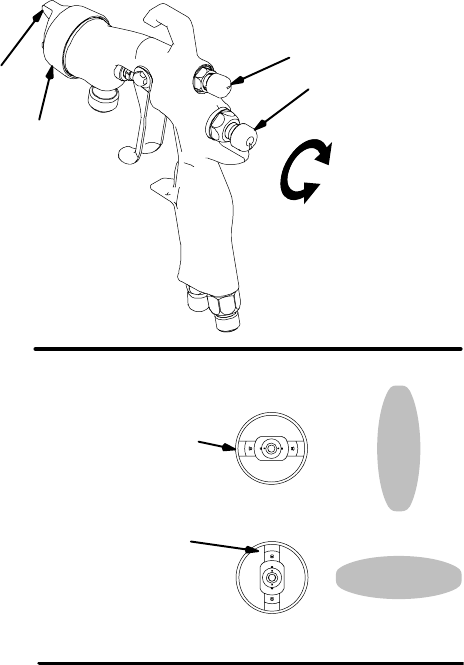
6. Loosen the air cap retaining ring (G) and rotate the
horns (H) of the air cap to obtain the desired spray
position. Tighten the retaining ring snugly, but do
not over-tighten it. See Fig. 2 and 3.
7. Clean and lubricate the gun as instructed in your
separate gun manual.
Fig. 2
E
F
G
H
TI2120A
CW
CCW
Fig. 3
Air cap horns shown
horizontal which produces
a vertical spray pattern
Air cap horns shown
vertical which produces
a horizontal spray
pattern
TI2122A