30897216
Displacement Pump Service
210208 Displacement Pump
Disconnect the Displacement Pump
1. Flush the pump if possible. Stop the pump on the
down stroke.
2. Follow the Pressure Relief Procedure Warning
on page 10.
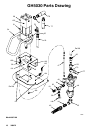
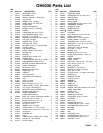
3. Reference Roof Rig Parts Drawings, page 30.
4. Remove the suction tube and fluid hose from the
displacement pump.
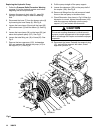
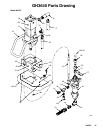
5. Unscrew the three tie rod locknuts (48). See ap-
propriate sprayer parts drawing.
6. Unscrew the shouldered nut (35). Pull the
displacement pump (46) off the tie rods (47).
7. Screw the jam nut (90) up onto the connecting rod
(91).
8. Remove the lower cotter pin (89) and unscrew the
connecting rod (91) from the connecting rod cou-
pling (36, page 30).
9. Refer to separate pump manual for displacement
pump repair i nstructions.
Reconnecting the Displacement Pump
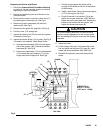
1. Screw the connecting rod (91) into the connecting
rod coupling (36, page 30) and replace the lower
cotter pin (89). Screw the jam nut (90) all the way
down. See appropriate sprayer parts drawing.
2. Mount the displacement pump (46) onto the tie
rods (47).
3. Scre w the shouldered nut (35) onto the hydraulic
moto r (29). Screw the tie rod locknuts (48) onto
the tie rods (47) and torque to 35--50 ft-lb (47--68
N.m).
4. Reattach the hoses to the displacement pump.
5. If the grounding wire was disconnected before
service, be sure to reconnect it before operating
the sprayer.
6. Start the pump and operate it slowly to check the
tie rods for binding. Adjust the tie rod locknuts, if
necessa ry to eliminate binding.


