308-125 13
Spray
T
ip and T
ip Guard
WARNING
To
reduce the risk of fluid injection or splashing in
the eyes or on the skin, completely relieve the fluid
pressure before installing, cleaning, or changing
tips. See the
Pressure Relief Procedure
on page
8.
Installation
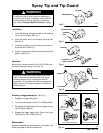
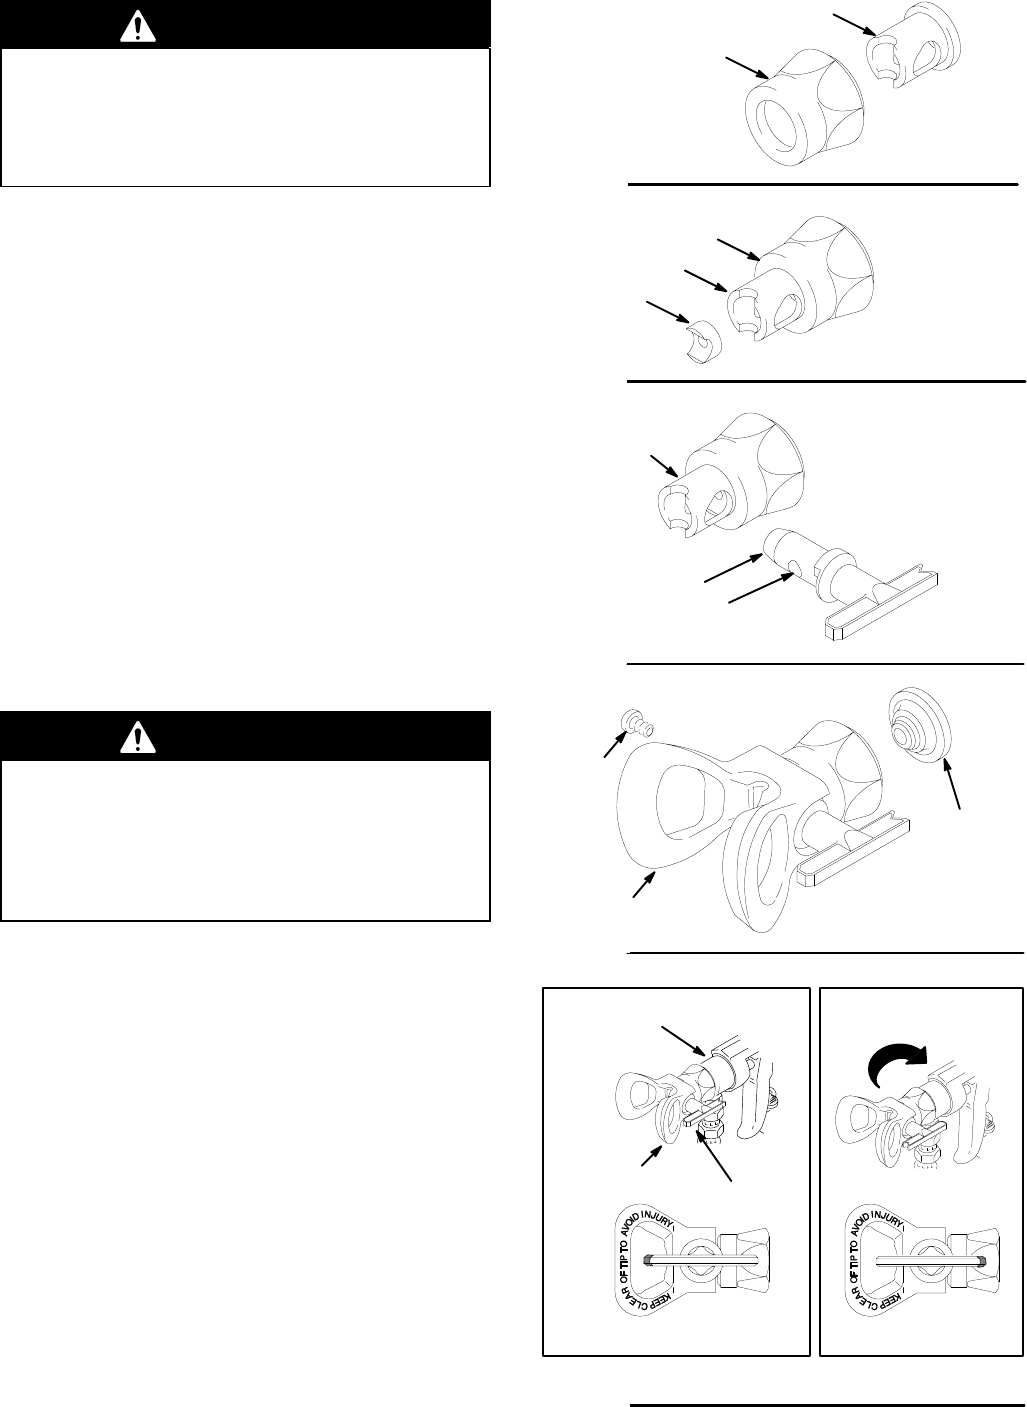
1. Insert
the housing through the back
of the retaining
nut
and pull it forward. See Fig. 7.
2. Install the metal seal in the housing, flat side first.
See
Fig. 8.
3. Install
the cylinder tip in the housing so its small ori
-
fice
faces front. See Fig. 9.
4. Snap
on
the tip guard. Install the screw and the white
gasket.
See Fig. 10.
Operation
Be
sure the tip arrow handle is in the FULL SPRA
Y posi
-
tion
before operating the gun. See Fig. 10.
WARNING
Keep clear of the nozzle. High pressure fluid from
leaks or spray can penetrate the skin and cause
extremely serious injury
, including the need for
amputation. The tip guard provides extra protection
against injection, but does not prevent it. Never cut
of
f the tip guard.
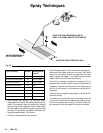
Clearing a clogged spray tip See
Fig. 1
1.
1.
Engage the trigger safety latch.
2. Turn
the arrow handle to the FULL CLEAN position.
3. Disengage
the
trigger safety latch and trigger the gun
into
the waste container
.
4. Engage the trigger safety latch. Return the arrow
handle
to the FULL SPRA
Y position.
Maintenance
Replace
the gasket and seal
whenever you replace a tip;
these
parts wear at about the same rate.
0464
HOUSING
RETAINING
NUT
Fig.
7
0465
HOUSING
RETAINING
NUT
SEAL
Fig.
8
0466
HOUSING
CYLINDER
TIP
SMALL ORIFICE
Fig.
9
0467
GASKET
SCREW
TIP GUARD
Fig.
10
FULL
CLEAN POSITION
FULL SPRA
Y POSITION
GUN NOZZLE
SwitchTip
HANDLE
RAC IV
DripLess
TIP GUARD
0093
Fig.
1
1


