


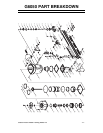

G6050 Round Head Framing Nailer Kit
-7-
Operating Nailer
Adjusting Depth
Besides damaging your workpiece,
deflection can cause injury if your free
hand is securing the workpiece in the
location that the nail deflects.
4. Press the trigger. If the nail drove into
the wood far enough, continue with
your intended operations. If the nail
either went too far or not far enough,
adjust the depth.
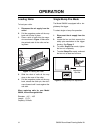
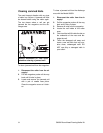
Figure 3. Example of nail deflection.
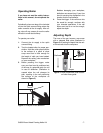
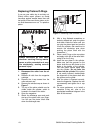
Figure 4. Depth adjustment slide located
on nailer nose guide.
If you have not read the safety instruc-
tions in this manual, do not operate the
nailer.
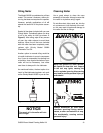
Periodically, place one drop of the included
oil into the quick connect fitting where the
nailer connects to the air supply. After oil-
ing, wipe off any excess oil near the nailer
exhaust to avoid dust build-up.
To operate your nailer:
1. Connect the air supply to the quick
connect fitting.
2. Test the loaded nailer for proper pen-
etration. Hold the nailer perpendicular
to the surface of a piece of clean
scrap wood that is thick enough for
the length of nails you have loaded.
Depress the safety yoke mechanism
on your workpiece.
3. Before pressing the trigger, make
sure your free hand is positioned out
of the way of a potential path of a nail
in case of deflection. (Deflection is
caused when the nail changes its
path, resulting in the nail puncturing
the surface of the workpiece as
shown in Figure 3.)
The nose of the gun houses a cap screw
with a stepped slide plate (illustrated in
Figure 4) for setting the depth that the nail-
er drives nails into the workpiece.
Shallower
Deeper