


-18-
G7211/7212 24" Bandsaw
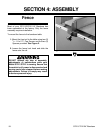
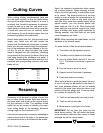
Stacked Cuts
One of the benefits of a bandsaw is its ability to
cut multiple copies of a particular shape by stack-
ing a number of workpieces together.
Before making stacked cuts, it is essential to
ensure that both the table and the blade are prop-
erly adjusted to 90°. Otherwise, any error will be
compounded with each piece cut from the top to
the bottom of the stack.
To complete a stacked cut:
1. Align your pieces from top to bottom to
ensure that each piece has adequate scrap
to provide a clean, unhampered cut.
2. Using brads in the waste portion of each
piece, secure all the pieces together.
3. Lay out the shape you intend to cut on the
face of the top piece.
4. Make relief cuts perpendicular to the outline
of your intended shape in areas where
changes in blade direction could strain the
woodgrain or cause the blade kerf to bind.
5. Cut the stack of pieces as though you were
cutting a single piece. Follow you layout line
with the blade kerf on the waste side of your
line.
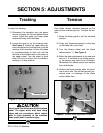
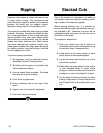
Ripping is the process of cutting a board into two
or more thinner boards. The maximum board
width that can be ripped is limited by the distance
between the blade and the support column.
Maximum cutting width for this bandsaw is 24".
The important consideration when ripping is blade
selection. Generally, the wider the blade, the bet-
ter. In most applications, a hook or skip tooth style
will be sufficient. Also, since most ripped lumber
will be planed or sanded smooth, you can choose
blades with fewer teeth-per-inch. While blades
with fewer teeth-per-inch produce rougher cuts,
these types of blades offer larger gullet capacities
for clearing sawdust, less heat buildup, and yield
more horsepower per tooth.
To perform ripping operations:
1. The bandsaw must be adjusted correctly.
See Blade Tension/Tracking section.
2. The table must be square to the blade. See
Table Adjustment Section.
3. Use the widest blade available. The blade
must also be in good condition.
4. Use a fence to guide work.
5. Draw a reference line on the edge of the
board.
6. Support ends of the board if necessary.
7. Feed work slowly and evenly.
Ripping