


H4380 Buffer -9-
Buffing & Polishing
For buffing and polishing, Grizzly offers a broad
line of buffing wheels and polishing compounds.
Please refer to our current catalog for more infor-
mation on these. To buff or polish with the buffer:
1. Make sure the power cord is unplugged and
remove the
5
⁄8" hex nuts at the end of each
shaft. Facing the machine, the left-hand shaft
has left-handed threads. The right-hand shaft
has right-handed threads.
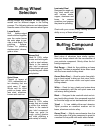
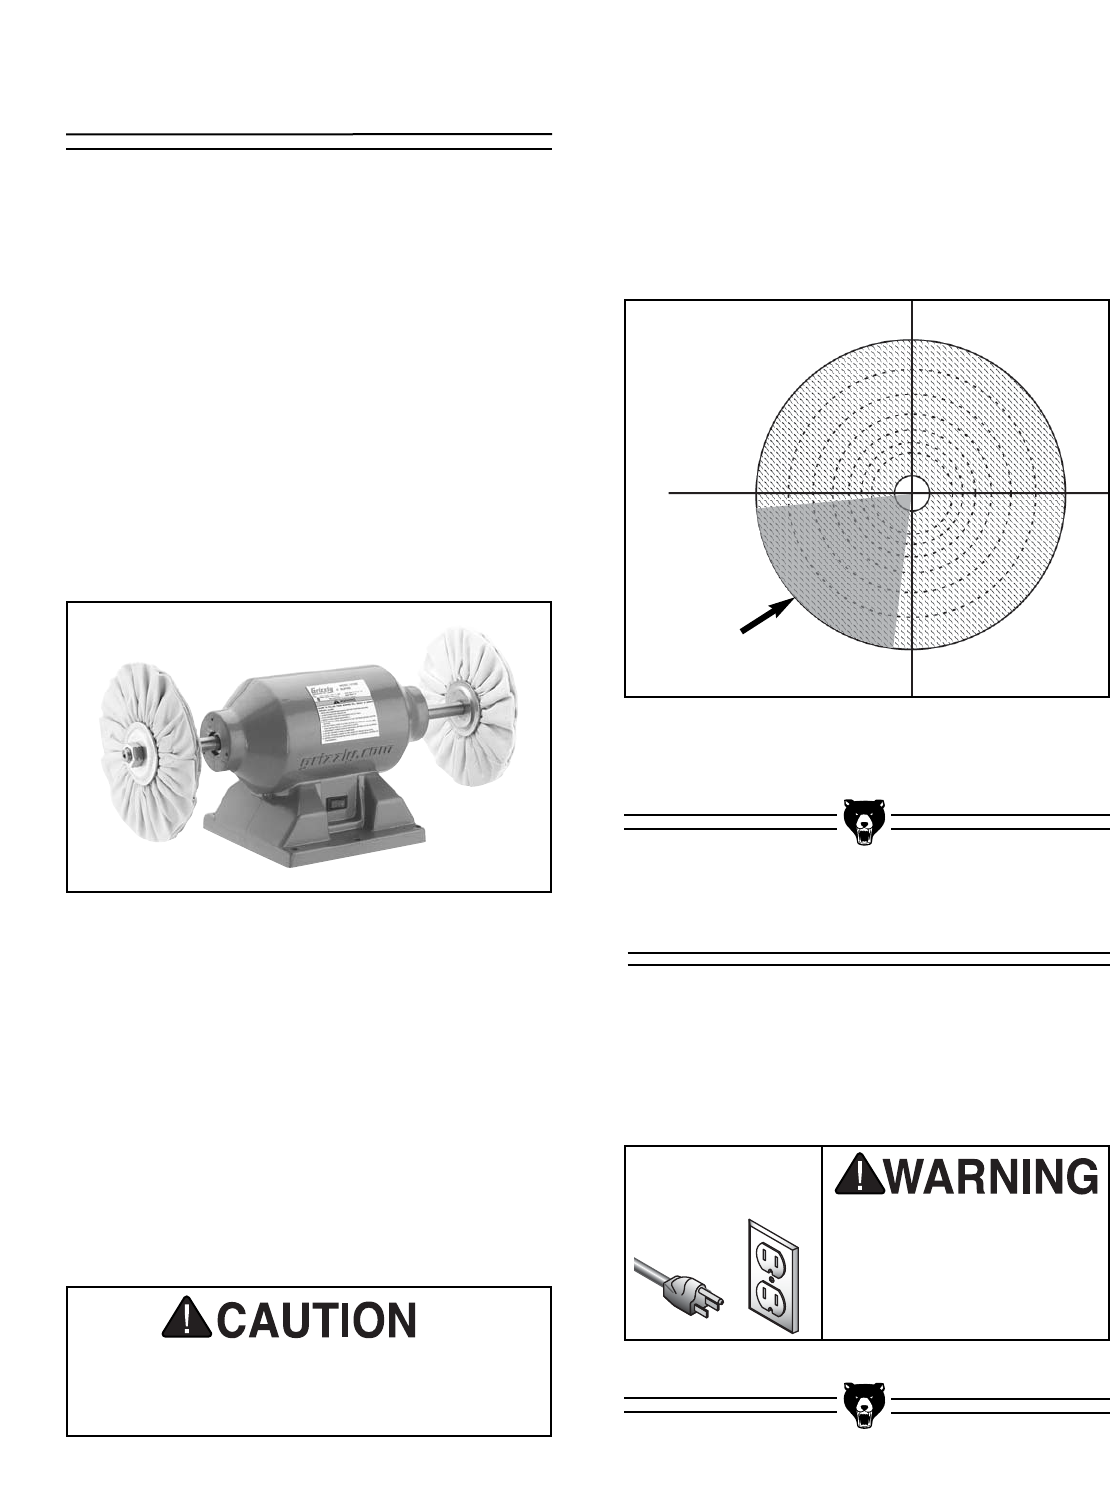
2. Sandwich a buffing wheel between the two
wheel flanges provided and slide the assem-
bly onto the shaft. Use only the wheel flanges
supplied with this machine. The buffing
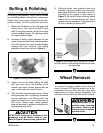
assembly should look similar to Figure 2.
Figure 2. Buffing wheels mounted.
Disconnect power to the
machine when removing
the wheels. Failure to do
this may result in serious
personal injury.
!
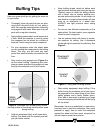
DO NOT buff on the top of the wheel or the
workpiece may be thrown back at you.
Refer to Figure 3 before using your buffer.
5. With both hands, firmly grasp the item to be
polished. Lightly and evenly move the work-
piece back and forth on the edge of the buff-
ing wheel in the grayed in area shown in
Figure 3. Be careful when polishing plated
metals; there is a chance that the thin plated
material may be damaged. A light pressure is
all that is needed for quality work.
3. Tighten the hex nut while holding the shaft
with your other hand. The direction of the
threads and motor rotation ensure that the
nuts on both sides will not self loosen.
4. Plug the buffer into the power source. Select
the appropriate stick of polishing compound
for your application, turn ON the buffer and
apply the compound to the rotating face of
the wheel. Always wear safety glasses
because particles of polishing compound or
buffing wheel may fly off.
Wheel Removal
To remove the buffing wheels, ensure that the
switch is turned OFF and the power cord is dis-
connected! Hold the shaft with one hand while
loosening the nut with a wrench. Remember, the
left-hand nut and shaft have left-handed threads.
Front
Figure 3. Illustrated from a side profile, shows
the only portion of the wheel that should be used
during buffing.
Make
Contact
Here