


Model H6155 Rotary Mini Grinder -7-
Use low RPM settings when work-
ing with plastics or other materi
-
als with low melting points. Melted
plastics can liquefy, be thrown into
the air, and stick to the operator,
causing serious personal injury.
High RPM Uses
High RPM's are best for general carving,
cutting, routing, and grinding. The grinder
removes material quicker at higher RPM's.
Low RPM Uses
Low RPM's are best for grinding and cut-
ting materials that have low melting points.
Plastics in particular often melt from the
heat generated by high speed bits. Low
RPM's are also best for polishing and buff-
ing with the felt accessories included.
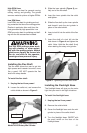
Installing the Flex Shaft
The flex shaft allows the user to get into
tight spaces and is easier to control; more
like a pencil. DO NOT operate the flex
shaft with sharp bends.
To install the flex shaft:
1. Unplug the tool from power!
2. Loosen the collet nut, and remove the
collet shield as shown in Figure 3.
3. Slide the inner spindle (Figure 3) par-
tially out of the flex shaft.
4. Insert the inner spindle into the collet
and tighten.
5. Slide the flex shaft up the inner spindle
and thread it onto the mini grinder in
place of the collet shield.
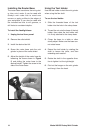
6. Insert a tool bit into the collet of the flex
shaft.
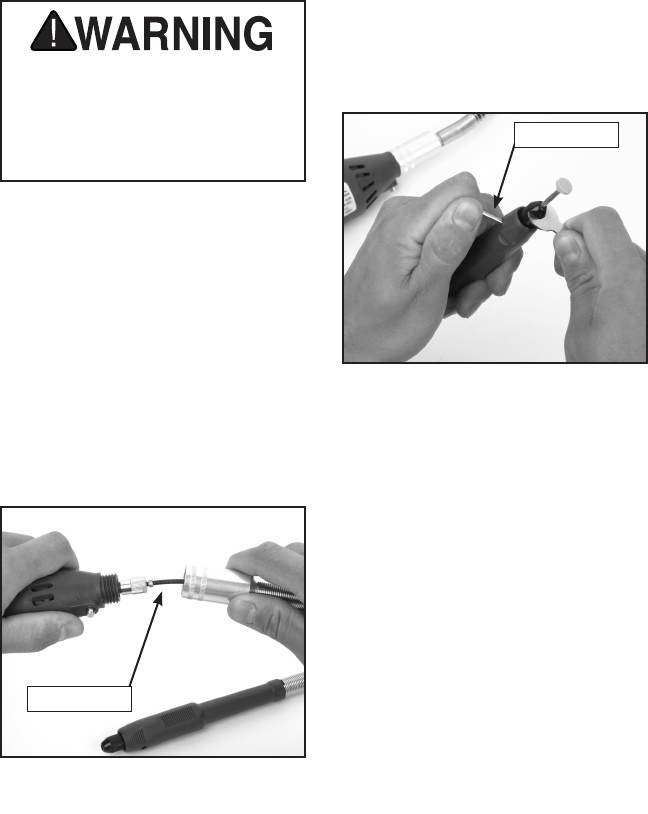
7. Insert the shaft of a tool bit into the
hole shown in Figure 4 and tighten the
collet. Note: Hold the flex shaft firmly
when starting the rotary mini grinder.
Figure 3. Flex shaft components.
Figure 4. Tightening the flex shaft collet.
Installing the Flashlight Base
The flashlight base will give you the extra
light that you need in low light situations.
To install the flashlight base:
1. Unplug the tool from power!
2. Remove the collet shield.
3. Screw the flashlight base onto the mini
grinder in place of the collet shield.
4. Turn the flashlight base ON/OFF with
the small switch on the face of the
flashlight base.
Inner Spindle
Tool Bit Shaft