


-14-
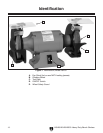
H8148/H8149/H8150 Heavy Duty Bench Ginders
Bench Load
Refer to the Machine Data Sheet for the weight
and footprint specifications of your machine.
Some
workbenches may require additional rein-
forcement to support both the machine and the
workpiece.
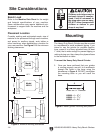
Placement Location
Consider existing and anticipated needs, size of
material to be processed through each machine,
and space for auxiliary stands, work tables or
other machinery when establishing a location for
your new machine. See Figure
5 for the minimum
working clearances.
Children and visitors may be
seriously injured if unsuper
-
vised. Lock all entrances to
the shop when you are away.
DO NOT allow unsupervised
children or visitors in your
shop at any time!
Site Considerations
Figure 5. Minimum working clearances.
�
Mounting
The Heavy-Duty Bench Grinder must be mounted
to a workbench to avoid accidental tipping. If you
intend to use the grinder for portable applica
-
tions, mount it to a heavy plywood base (at least
1" thick) that is wide enough to prevent tipping or
rocking during use, then clamp the plywood base
to the workbench or table.
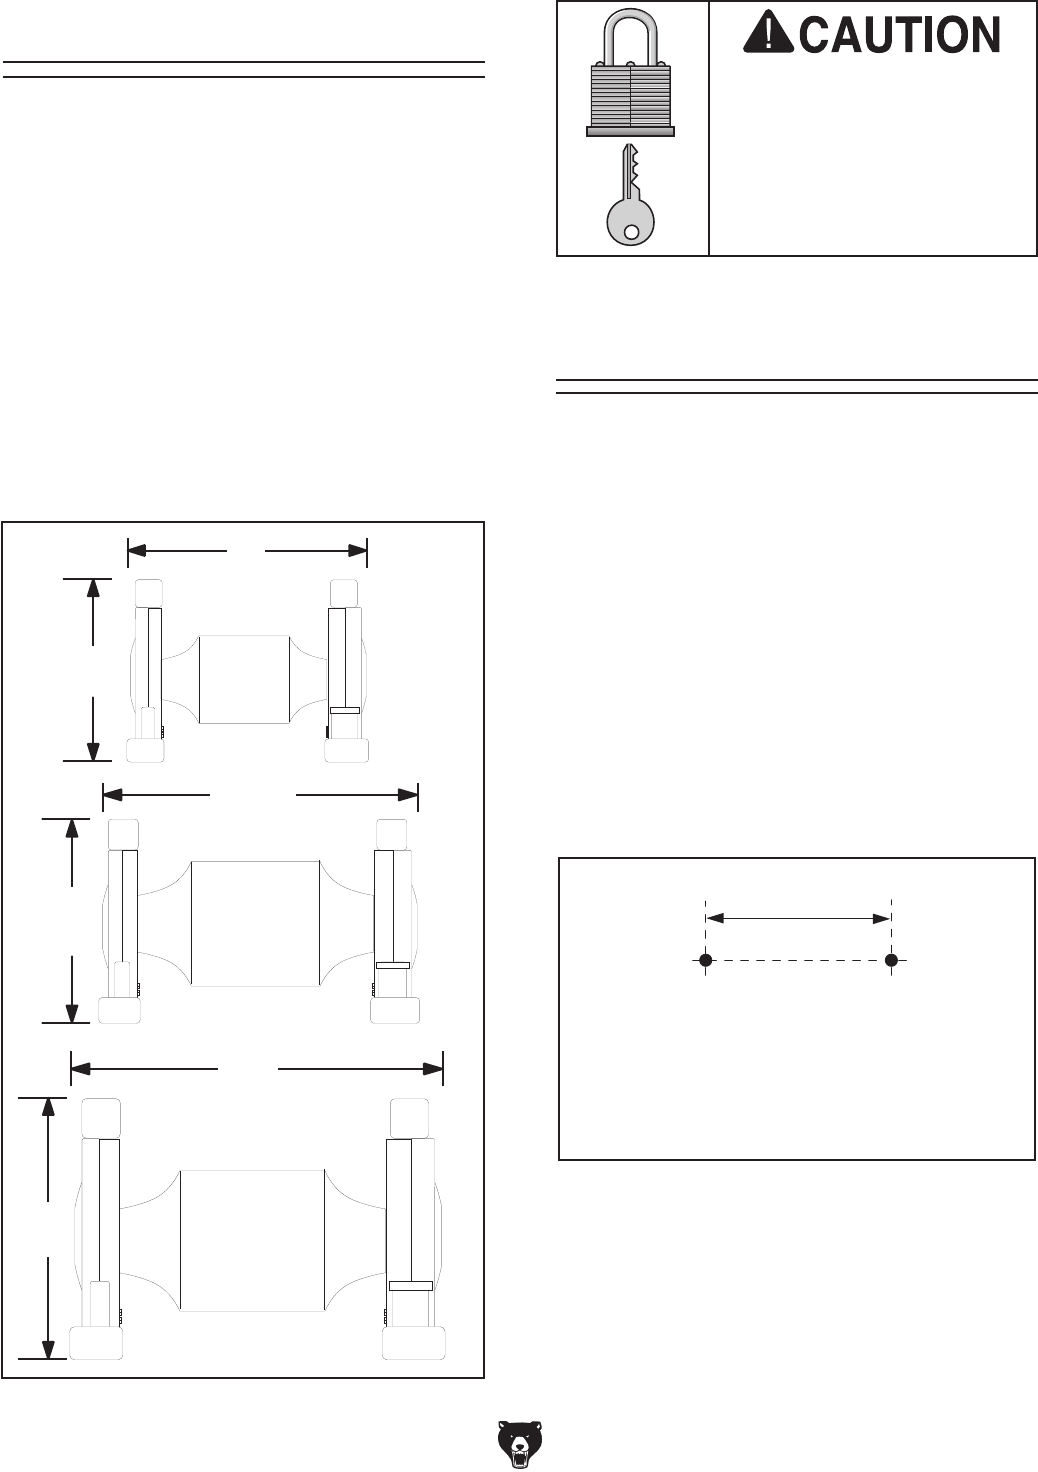
To mount the Heavy-Duty Bench Grinder:
1. Once you have confirmed that your grinder
is running properly, mount it to a workbench
through the holes in the base using the
dimensions in
Figure 6. DO NOT overtighten
the mounting bolts or you will crack the
base.
Figure 6. Bench grinder mounting bolt pattern.
A
Holes are
5
⁄16" Diameter
H8848: A = 6
5
⁄16"
H8849: A = 7
5
⁄16"
H8850: A = 8
3
⁄4"
Model
H8148
Model
H8149
Model
H8150