


H8154 AC/DC Stick/TIG Welder
-11-
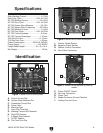
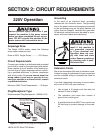
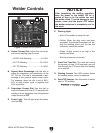
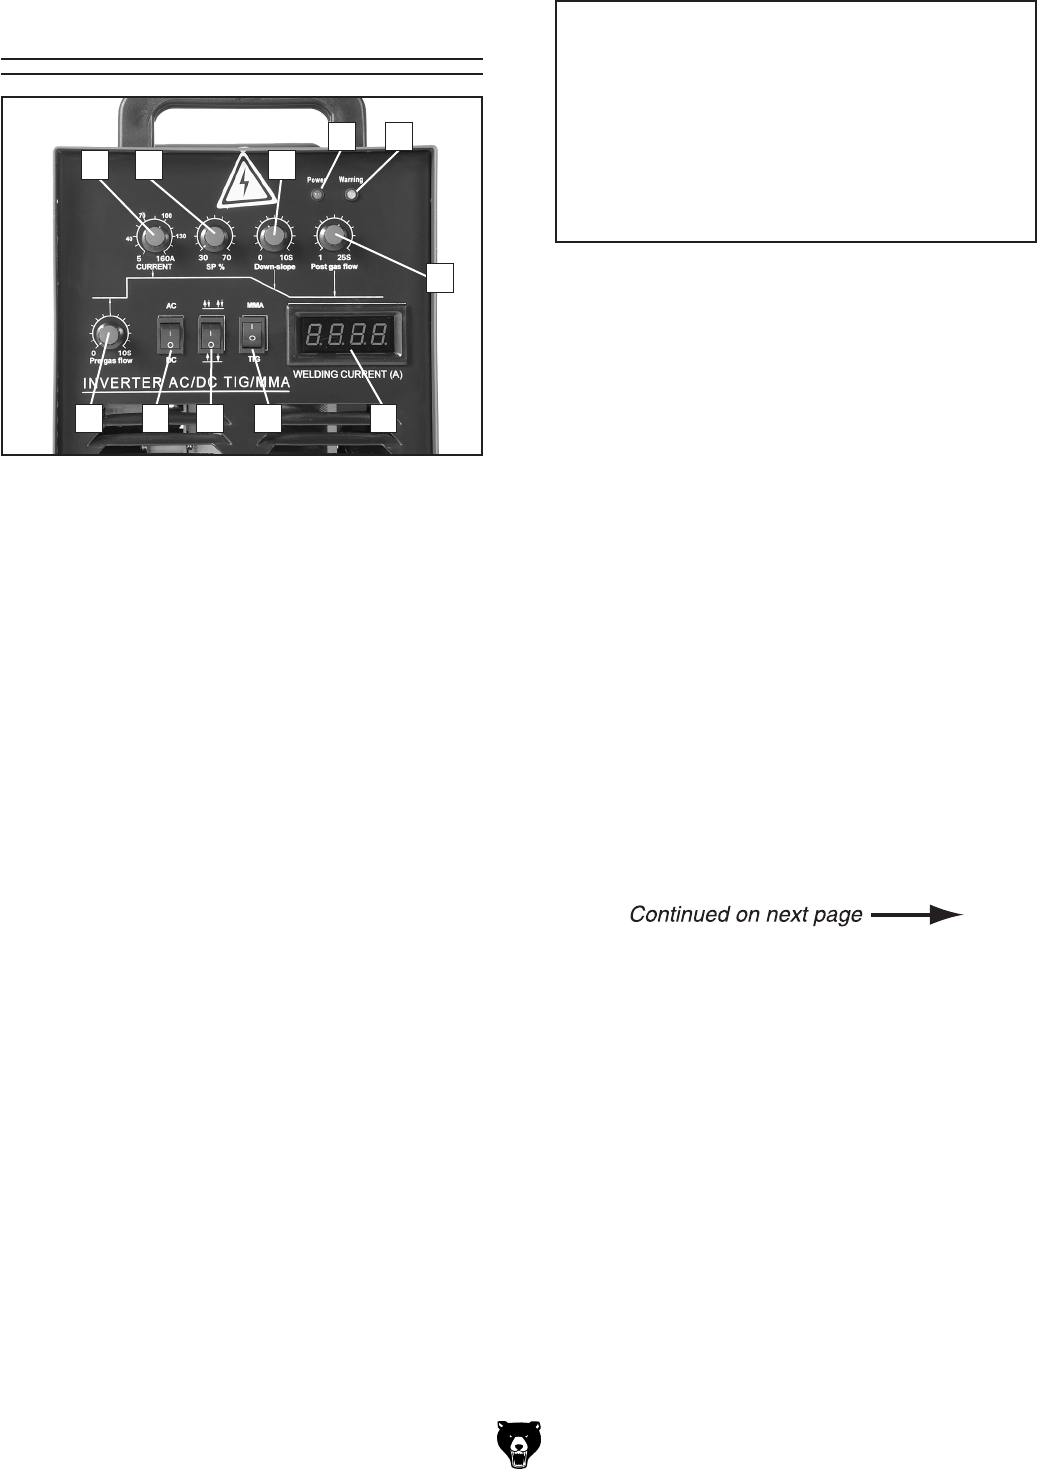
Welder Controls
NOTICE
After completing the welding operation,
keep the power to the welder
ON for a
period of time to let the welder fan cool
the welder down. To avoid damage to
your
welder, never shut the power
OFF before
the welder enclosure is completely cool to
the touch.
A. Output Current Dial: Adjust this control for
the correct welding output current.
—AC/DC Stick Welding ....................
5–130A
—AC TIG Welding ..........................
20–160A
—DC TIG Welding ...........................
5–160A
B. Square Wave Percentage: Use this dial to
adjust the deposition and penetration of the
AC TIG arc. The dial is incremented in per
-
centage of the positive square wave cycle.
For example, when the dial is set at 60%,
40% of each current cycle is negative and
60% is positive.
C. Downslope Current Dial: Use this dial to
control the amount of time (0–10 seconds) the
welding current decreases from the selected
output current to
OFF.
D. Power Light: This will light when the power
is turned
ON.
E. Warning Light:
—Not Lit: The welder is ready for use.
—Yellow: When the duty cycle has been
exceeded, the internal thermostat will dis
-
able the welding circuit until the fan has
sufficiently cooled the welder.
—Green: Output current is too high or the
welder has failed.
—Red: Input current is incorrect.
F. Post-Flow Time Dial: This knob will control
the amount of time (0–25 seconds) gas will
flow through the TIG torch after the welding
arc is shut off.
G. Welding Current: This LED readout shows
the welding output current in amperes.
H. Stick/TIG Selector: Use this switch to select
stick or TIG welding.
Figure 7. Model H8154 controls.
A B C
D E
F
GHK IJ