


Operation
12. Adjust the needle valve to set the pump cycle rate
at 1 stroke every 15 seconds.
13. Turn the heater dial to 3. Whenever the heater set-
ting is changed, allow the fluid to circulate and sta-
bilize before checking the temperature (about IO
minutes) .
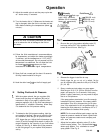
A CAUTION
Be sure the fluid is circulating whenever the heater
is on to reduce the risk of damage to the fluid or
the heater.
14. Follow the fluid manufacturer’s recommendations
for temperature, and adjust the heater accordingly.
If unknown, set the temperature to 110°F (43°C)
at the outlet thermometer. Do not proceed until the
temperature has stabilized. Do not allow the fluid
to exceed 140°F (60°C) unless your fluid
manufacturer recommends higher temperatures.
15. Spray fluid into a waste pail for about 10 seconds
to bring heated material to the gun.
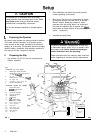
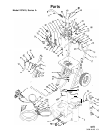
16. Hook the drain hose (13) on the fluid supply pail.
IV.
Setting Fiuid and Air Pressure
.
1.
With the system primed, the gun regulator (6b)
closed, and the pump air regulator (6a) set as
instructed in Step 10 on page 8, adjust the fluid
pressure regulator (44) to the fluid manufacturer’s
specifications, if available. Otherwise, follow Step
2 to determine the fluid pressure setting.
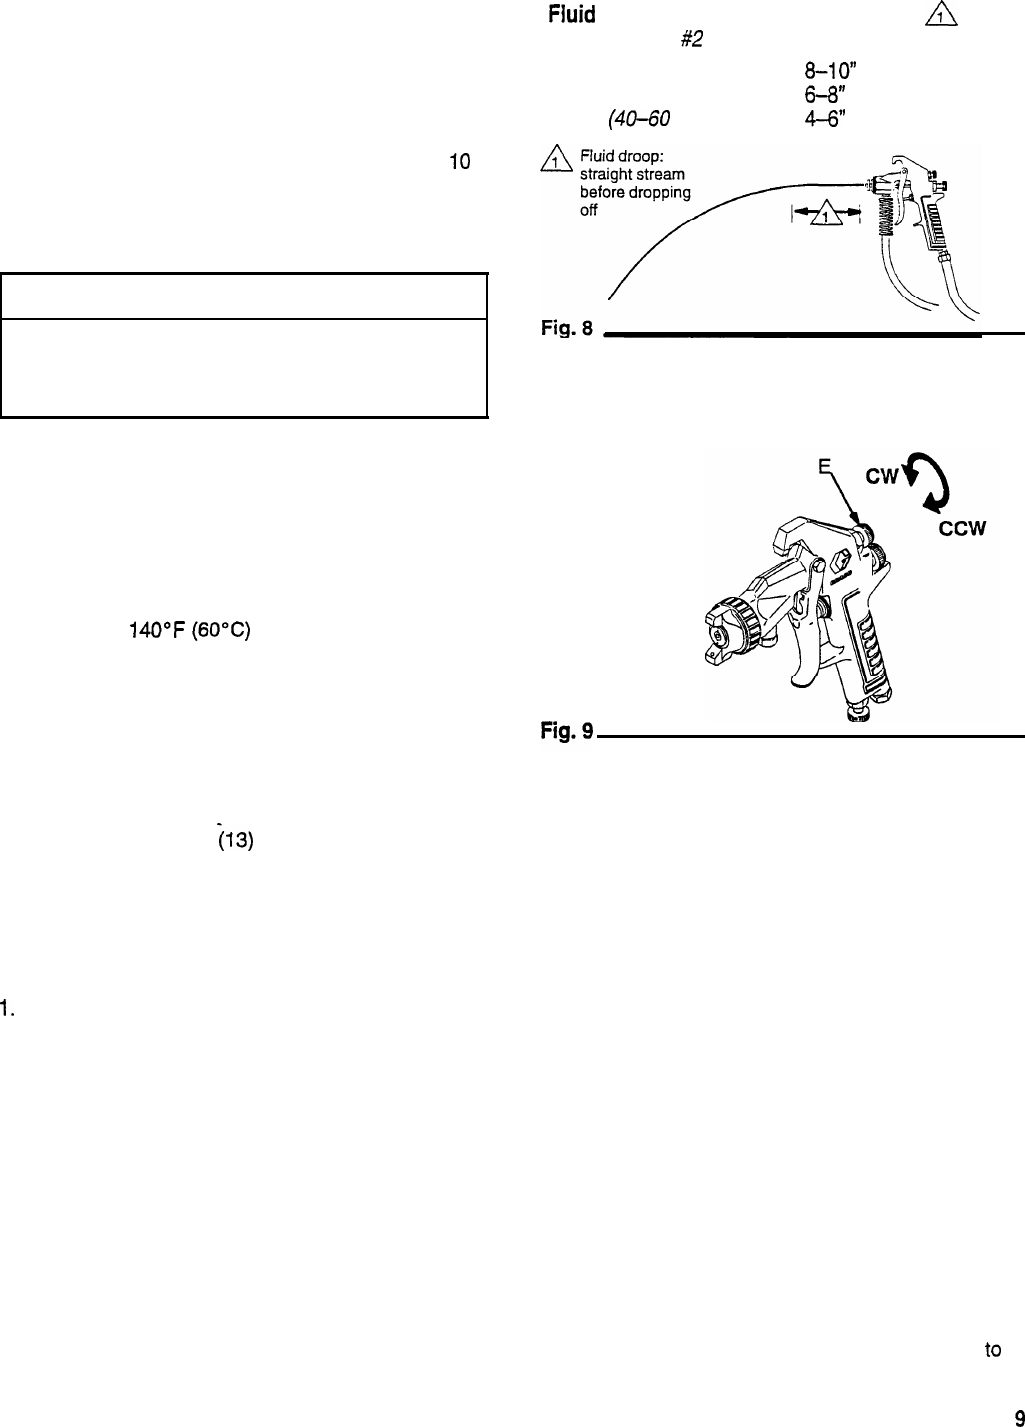
2.
To determine the fluid pressure setting, hold the
gun parallel to the floor. (Be sure to catch the fluid
in a container.) With the gun air pressure turned
OFF, trigger the gun. Adjust the fluid pressure reg-
ulator (4) until the straight fluid stream is within the
range indicated for the viscosity of your fluid before
it drops off. See Fig. 8. Make note of the pressure
on the fluid gauge it is your optimal fluid pressure
setting.
Fluid
Viscosity Fluid Droop
A
Measured with #2 Zahn cup
Light (18-25 seconds) 8-10” (200-250 mm)
Medium (25-40 seconds)
6-8”
(150-200 mm)
Heavy (40-60 seconds)
4-6”
(100-l 50 mm)
03998
3.
Be sure the gun’s fan pattern adjusting valve (E)
has been turned OUT fully clockwise and then
turned IN two full turns. See Fig. 9.
4.
Release the trigger. Install the air cap.
5.
Partially trigger the gun so only air is emitted. Set the
gun air regulator (6b) pressure to 60 psi (4.2 bar)70
psi (4.9 bar).
.
6.
Spray a stationary test pattern on scrap paper.
Hold the gun 10 to 12 in. (250 to 300 mm) from the
paper, and spray for 2 or 3 seconds. If the spray
pattern is poorly atomized, you may need to adjust
the air or fluid pressure.
If the spray pattern atomization is not fine enough,
increase the gun air pressure. If the spray pattern
atomization is too fine, decrease the gun air pres-
sure. If the atomization is still not good enough, try
lowering the fluid pressure in increments of 2 or 3
psi to achieve the desired finish quality.
NOTE: For the most efficient paint usage, use the
lowest air pressure needed to obtain a good finish.
Higher air pressures create more overspray and
uses more fluid.
7.
Adjust the fan pattern adjusting valve (E) to fine
tune the spray pattern. Turn counterclockwise
to
widen spray pattern. Turn clockwise to narrow
spray pattern. See Fig. 9.
308-448
9