


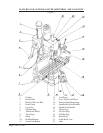


Preparing for Milling
1. Adjust the positive stop gauge to its uppermost position.
2. Using the spindle feed handle, adjust the bit to approximately the correct height. Tighten the knob in the
center of the spindle feed handle (#16).
3. Set the final vertical adjustment using the micro feed handle.
4. Lock the rack sleeve at this height with the fixed bolt.
Preparing for Tapping
1. Adjust the positive depth gauge to the required position.
2. Loosen the knob in the center of the spindle feed handle.
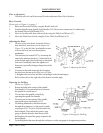
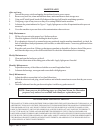
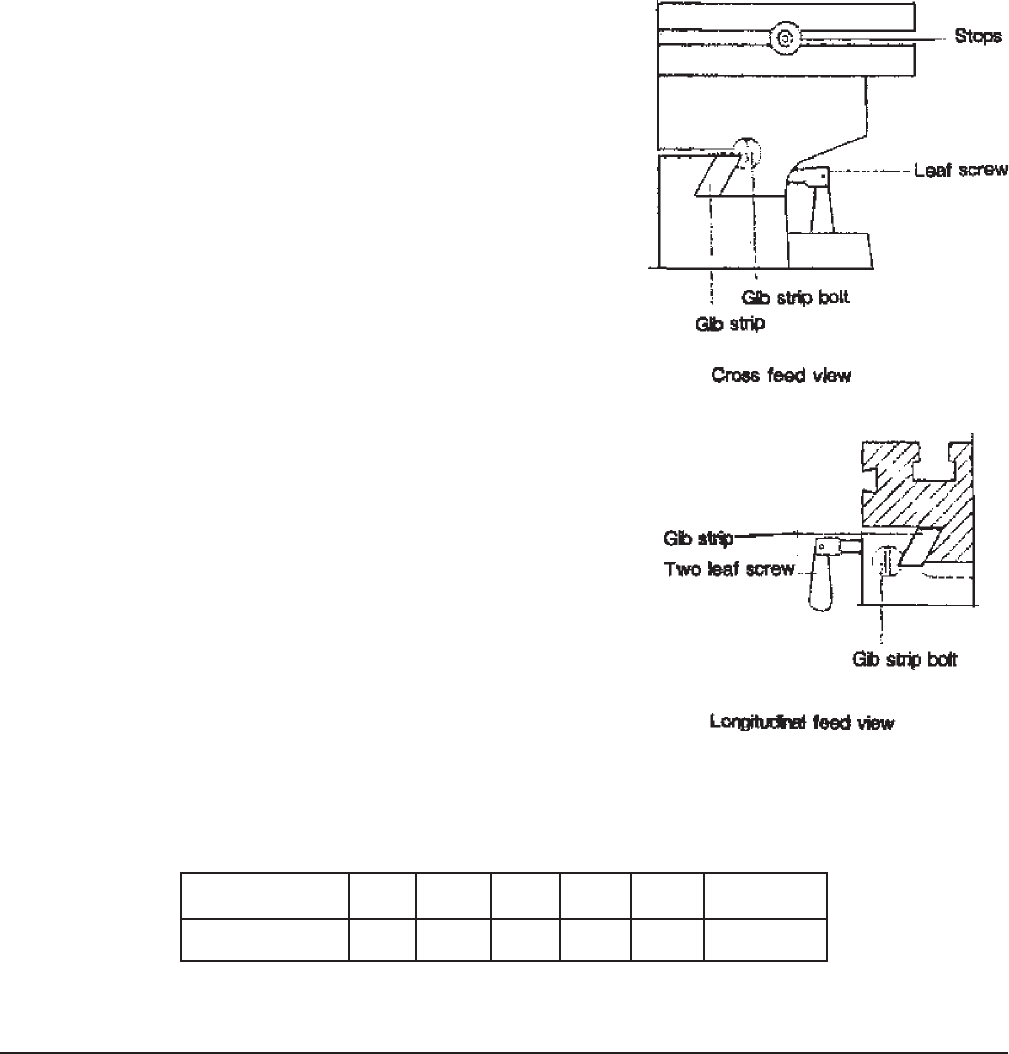
Adjusting Table Slack and Compensating for Wear
1. Your machine is equipped with gib strip adjustment to
compensate for wear and excess slack on cross and
longitudinal travel.
2. Rotate the gib strip bolt slightly counterclockwise to tighten
the gib strip. Rotate it slightly clockwise to loosen the gib strip.
3. Adjust the gib strip bolt until very slight drag is felt when
moving the table.
Locking the Table Base and Machine Base
1. When milling using the longitudinal feed, it is a good idea to
lock the cross feed table to ensure the accuracy of your
work. To do this, tighten the small leaf screw located on the
right side of the table base.
2. When milling using the cross feed, lock the longitudinal travel.
Do this by tightening the two small leaf screws on the front of
the table base.
3. Adjustable travel stops are mounted on the front of the table
to limit cross travel,and therefore milling length.
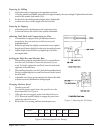
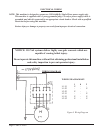
Changing Machine Speed
1. Turn the power off.
2. To select the proper speed, move the speed lever to the
desired position. See Figure 6.
3. If the gears are not engaged, remove the arbor bolt cover
(#21). Rotate the spindle slightly to engage the gears, then
replace the arbor bolt cover.
4. Recheck the lever setting, and then turn the power on.
Page 8 SKU # 42827
Figure 5. Adjusting the Gib Strips.
Levers L-1 L-2 L-3 H-1 H-2 H-3
rpm @ 60Hz 95 175 310 450 850 1500
Figure 6. Machine Speed Lever Settings.