


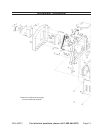
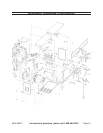
SKU 65673 For technical questions, please call 1-800-444-3353. Page 9
Note: For additional information regarding
the parts listed in the following pages,
refer to the Assembly Diagram near
the end of this manual.
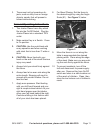
Installing the Fence and Stop
Block
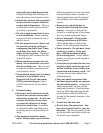
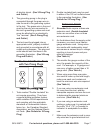
Set the Fence (76) down onto the 1.
Block (89) by setting the locating pin
at the bottom of the Fence into the
key hole slot on top of the Stand (75).
At the same time, set the cut-out 2.
notch on face of the block over the
attachment bolt on right side of Fixing
Table (53).
3.
the bolt and locating pin, making sure
that Fence is parallel with both tables.
Slide Fence slightly to the side so it 4.
Secure with Hex Nut. Do not over-5.
tighten.
Turn Screw on bottom of Fence 6.
clockwise to further secure.
Figure 1
Stop
Block (25)
7. Set the Stop Block (25) against the
points toward the Fence and it sits
-
tain not to use excessive force to
rotate the Stop Block. It should easily
move into place against the Fence.
See Figure 1.
Stop Block must always snap back in 8.
place and close instantly. Do not use
Jointer Planer if Stop Block does not
adequately snap into place.
9.
if Jointer Planer will not be used for a
Please note:
Fence must be removed.
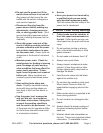
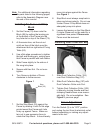
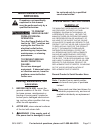
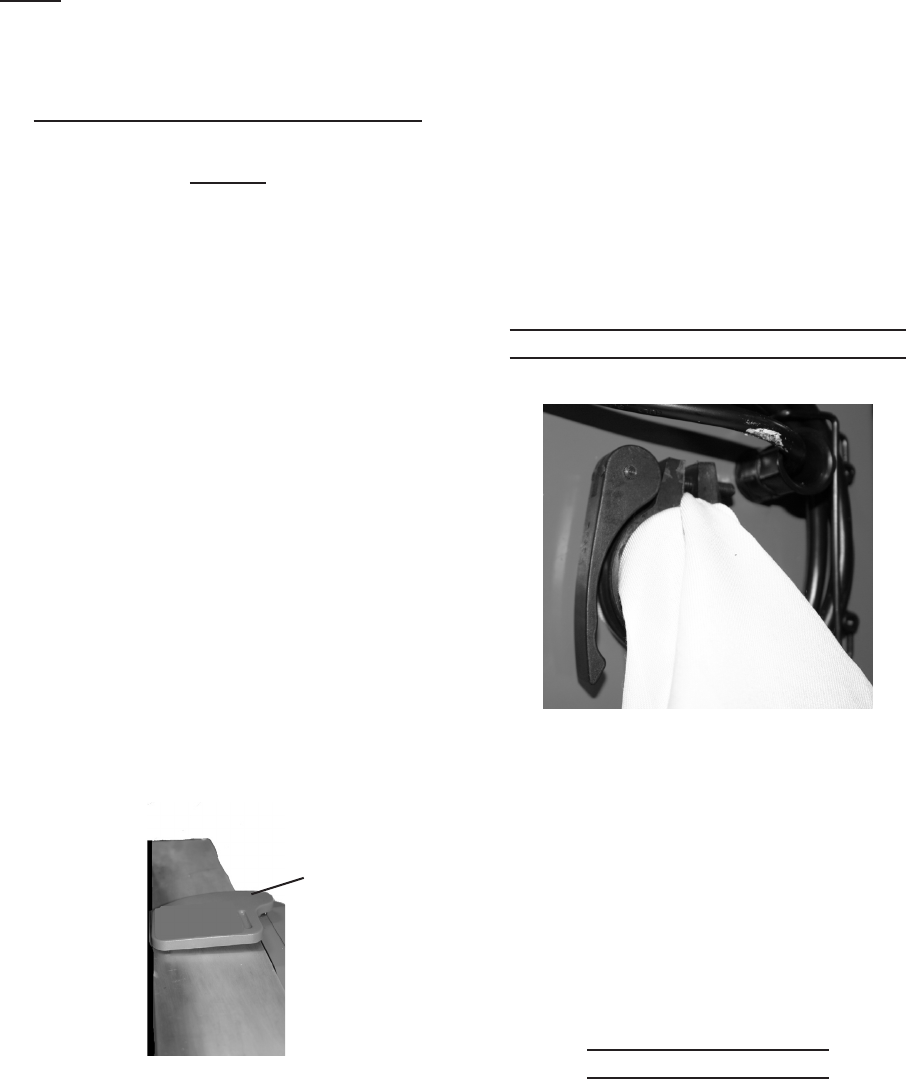
Installing Dust Collection Bag
Figure 2
1. Slide Dust Collection Collar (106)
over Dust Collection Bag (107).
Slide Dust Collection Bag (107) with 2.
Dust Collection Collar onto Port.
Tighten Dust Collection Collar (106) 3.
in place by turning Handle and then
clamping Handle down once reason-
ably tight. Do not overtighten. See
Figure 2, previous page.
Fence Adjustment
Turn the Switch (2) to its “OFF” position
and unplug the tool from its electrical outlet
before assembling or making any adjust-
ments to the tool.