


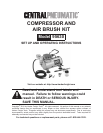


Page 10 For technical questions, please call 1‑800‑444‑3353. SKU 95630
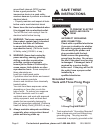
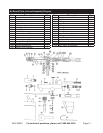
Lever (10A)) and the uid will atomize.
Continue to move the Finger Lever (10A)
to achieve the air volume you need for
your spray technique.
7. Continue to adjust the spray volume by
using the Finger Lever (10A), moving it
front to back. When you have the correct
spray volume, you may x the position
using the Adjustment Screw (9A).
8. The size of the spray pattern will be in
accordance with the distance between
the work surface and the Nozzle (3A)
of the Air Brush. For extra-ne spray,
remove the Protective Cap (1A) and hold
the Air Brush nearer the work surface.
9. When you are nished painting, gently
release pressure on Finger Lever (10A).
NOTE: If while using this Air Brush and
uid blocks the Nozzle (3A) from
working, move Needle Chucking
Guide (13A) back and forth. If this
does not clear the Nozzle (3A), try
loosening the Needle Adjustment
Screw (9A). This will allow a longer
movement for the Needle (18A) and
allow the blocked uid to escape
clearing the Nozzle (3A).
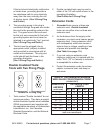
10. After ushing the Air Brush unit
completely with the proper solvent:
Lacquer thinner if you used a lacquer
paint, water if you used a latex based
paint and paint thinner for all oil based
enamels, spray remaining solvent
through the Nozzle (3A) until clear
solvent sprays from end of Airbrush tip.
NOTE: ALL paints used with this Air Brush
are fast drying by design and can
seriously damage your tool if they are
NOT ushed immediately.
11. Bleed excess air from hose and drain
water out of the Water Drain Valve (23)
on the Air Compressor only after turning
OFF Power Switch (34) and unplugging
the Compressor from the 120 V power
supply, or from your extension cord.
NOTE: The 5cc Metal Cup (28A) has two
uses. It is used for excess thinned paint,
and also for solvent when it is time to
clean the Air Brush.
NOTE: The Metal Hook (30A) can be
attached to a solid surface and used to
hang Air Brush when it is not being used.
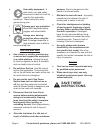
USER‑INSTRUCTIONS
Procedures not specically
explained in this manual must
be performed only by a qualied
technician.
TO PREVENT
SERIOUS INJURY
FROM ACCIDENTAL OPERATION,
make sure Power Switch of tool
is in its “Off” position and that
the tool is unplugged from its
electrical outlet before any
maintenance or repairs are done.
Note: These procedures are in addition to
the regular checks and maintenance
explained as part of the regular operation
of the air-operated tool.
1. BEFORE EACH USE, inspect the
general condition of the tool. Check for
loose screws, misalignment or binding
of moving parts, cracked or broken
parts, damaged electrcial wiring, and
any other condition that may affect
its safe operation. If abnormal noise
or vibration occurs, have the problem
corrected before further use. Do not
use damaged equipment.
2. AFTER EACH USE, wipe off with a
clean, moist cloth. Also completely ush,
User‑Maintenance Instructions