


8
en
7. Care and maintenance
Unplug the supply cord from the mains socket.
7.1 Care of blades
Clean off dirt and dust deposits and protect your blades
from corrosion by wiping them from time to time with
an oil-soaked rag.
7.2 Care of the tool
● Keep the blade clamp clean.
● The tool was lubricated adequately when it was man-
ufactured. After long periods of heavy use it is rec-
ommended that the tool is inspected at a Hilti repair
center. This will increase the life expectancy of the tool
and avoid unnecessary repair costs.
● Repairs to the electrical section of the tool may be car-
ried out only by a trained electrical specialist.
The outer casing of the tool is made from impact-resis-
tant plastic. Sections of the grip are made from an elas-
tomer material.
Never operate the tool when the ventilation slots are
blocked. Clean the ventilation slots carefully using a dry
brush. Do not permit foreign objects to enter the interior
of the tool. Clean the outside of the tool at regular intervals
using a slightly damp cloth. Do not use a spray, steam
pressure cleaning equipment or running water for cleaning.
This may negatively affect the electrical safety of the tool.
Always keep the grip surfaces of the tool free from oil and
grease. Do not use cleaning agents which contain silicone.
7.3 Maintenance
Check all external parts of the tool for damage at regular
intervals and check that all controls operate faultlessly.
Do not operate the tool if parts are damaged or when the
controls do not function faultlessly. If necessary, your
electric tool should be repaired at a Hilti repair center.
Repairs to the electrical section of the tool may be car-
ried out only by trained electrical specialists.
7.4 Checks after care and maintenance
After care and maintenance, check that the hand guard
and contact shoe are fitted and that they function fault-
lessly.
6.4 Plunge sawing ẗẻ
The plunge sawing technique should be used only on
soft materials and when the orbital action is switched
off. A little practice is required in order to be able to
plunge the blade into the material while the tool is run-
ning and thus make cut-outs without first drilling a hole.
Plunge sawing is possible only with short saw blades.
Plunge cuts may be started with the tool in one of two
different positions:
– in the normal position
– or in the reversed position
1. Hold the tool with the front edge of the contact shoe
against the workpiece.
2. Press the transport lock and then press the control
switch.
3. Press the tool firmly against the workpiece and begin
the plunge movement by reducing the angle of the
tool (contact shoe) to the workpiece. It is important
to ensure that the tool is running before the blade is
brought into contact with the workpiece. The tool may
otherwise stall or kick-back.
4. Once the blade has passed through the workpiece,
bring the tool into the normal working position (the
entire surface of the shoe in contact) and then con-
tinue sawing along the line.
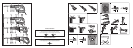
8. Blades and accessories
Saw blades
Pipe cutting adaptor
Side handle / Side handle adaptor