


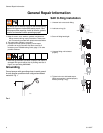
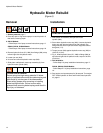
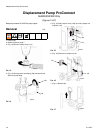
Hydraulic Motor Rebuild
14 311797F
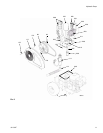
Hydraulic Motor Rebuild
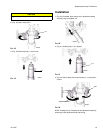
(Figure 5)
Removal
1. Relieve pressure, page 7.
2. Place drip pan or rags under sprayer to catch hydraulic oil
that leaks out during repair.
3. GH130 Models:
- Follow Steps 2-5 of pump removal instructions, page 17.
GH200, GH230, GH300 Models:
- Follow Steps 4-8 of pump removal instructions, page 18.
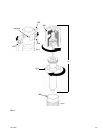
4. Remove hydraulic lines (271, 288) from fittings (266) at top
left and right side of hydraulic motor.
5. Loosen jam nut (264).
6. Unscrew and remove hydraulic motor cap (265).
7. Slide piston rod/hydraulic motor cap assembly (A) from
hydraulic motor cylinder (263).
Installation
1. Slide piston rod assembly into hydraulic motor
cylinder (263).
2. Screw down hydraulic motor cap (265). Unscrew hydraulic
motor cap until inlet and outlet align with hydraulic line
fittings and test hole in hydraulic motor cap points toward
belt guard (117).
3. Torque jam nut (264) against hydraulic motor cap (265) to
150 ft-lb (17 N·m).
4. Fig. 5. Install hydraulic lines (271, 288) to fittings (266) to
top left and right side of hydraulic motor; torque to 40 ft-lb
(54.2 N·m).
5. GH130 Models:
- Follow Step 2 of pump installation instructions, page 17.
GH200, GH230, GH300 Models:
- Follow Steps 2-7 of pump installation instructions, page
19.
6. Start engine and operate pump for 30 seconds. Turn engine
OFF. Check hydraulic oil level and fill with Graco hydraulic
oil, page 6.
FLYING PARTS HAZARD
Detent spring has high energy potential. If detent
spring is released without due care detent spring and
balls could fly into the eyes of the disassembler.
Wear safety glasses when removing or installing
detent spring and balls. Failure to wear safety
glasses when removing detent spring could result in
eye injury or blindness.
FLYING PARTS HAZARD