


English – 15
Spark plug
The condition of the spark plug is affected by:
• An incorrect carburettor setting.
• An incorrect fuel mixture (too much or faulty oil).
• A dirty air filter.
These factors cause deposits on the spark plug electrode that
may result in malfunction or starting difficulties.
If the machine is low on
power, difficult to start or
runs poorly while idling
always check the spark plug
first before taking other
action.
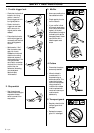
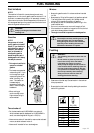
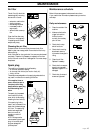
The spark plug is accessed
from under the cylinder
cover, which is removed by
loosening the four bolts (A).
If the spark plug is dirty,
clean it and at the same time
check that the electrode gap
is 0.5 mm. The spark plug
should be changed after
about one month of
operation or earlier if
necessary.
NOTE! Always use the
recommended type of spark
plug. An incorrect spark
plug can damage the
cylinder/piston.
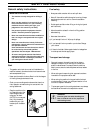
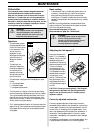
Air filter
The air filter (A) should be
cleaned regularly removing
dust and dirt to avoid:
• carburettor malfunction
• starting problems
• reduced engine power
• unnecessary wear to
engine parts
• abnormal fuel consump-
tion
Clean the filter after every
25 hours or more regularly
if operating conditions are
exceptionally dusty.
Cleaning the air filter
Dismantle the air filter cover (B) and remove the air filter.
Wash in clean, warm soapy water. Ensure that the filter is dry
before refitting.
An air filter used for a long period of time can never be cleaned
completely. Therefore it is necessary to replace the filter from
time to time with a new filter. A damaged air filter must always
be replaced.
0,5 mm
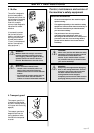
MAINTENANCE
Maintenance schedule
Below follows some general maintenance instructions.
If you need further information please contact your service
workshop.
3
1
5
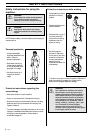
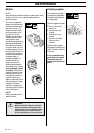
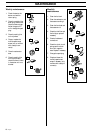
Daily maintenance
1. Clean the outside of the
machine.
2. Make sure the throttle
trigger lock and the
throttle function
correctly from a safety
point of view.
3. Check that the stop
switch functions.
4. Check that the cutting
attachment does not
move when the engine is
idling.
5. Clean the air filter.
Replace if necessary.
6. Check that the transport
guard is not damaged.
Replace the guard if it is
damaged.
7. Check that all nuts and
screws are tightened.
7
A
A
B
A
6
4
2