


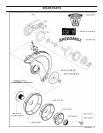

SpeedMill 7
WARNING!
ONLY CUT or BEVEL PVC plastic pipe with a machine
equipped with a Speed Mill Accessory!
DO NOT cut other materials with this machine!
DO NOT cut or bevel ductile iron pipe with a machine
equipped with a Speed Mill Accessory!
DO NOT use machine as a standard power cutter with-
out proper power cutter blade guard.
WARNING!
Use ONLY High Speed Reinforced Abrasive Blades with
a minimum speed rating of 6300 rpm.
DO NOT use carbide tipped, wood cutting, or circular
saw blades with this machine!
Uses: Cutting and beveling of 100mm (4”), 150mm (6”),
and 200mm (8”) PVC pipe of the following types; ASTM
D2241 IPS Gasketed Pipe, and ASTM D3034 Gravity
Sewer Pipe (Type SDR 35, and SDR 26). Note that this
machine, as supplied, is not designed for cutting AWWA
C900 Municipal Water Pipe, or any non-plastic material.
USES, TOOLS, AND ASSEMBLY
Tools: 12” (305mm) Diameter Abrasive Blade, with a 1”
(25.4mm) arbor (Not Included).
First Time Assembly:
Tools Required:
• Screwdriver (for Arbor Lock)(Not Included).
• 2” (50.8mm) Socket, and Socket Wrench (Not Included).
• Combination Spanner (supplied with machine).
• Torque Wrench.
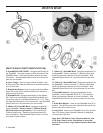
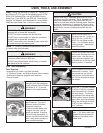
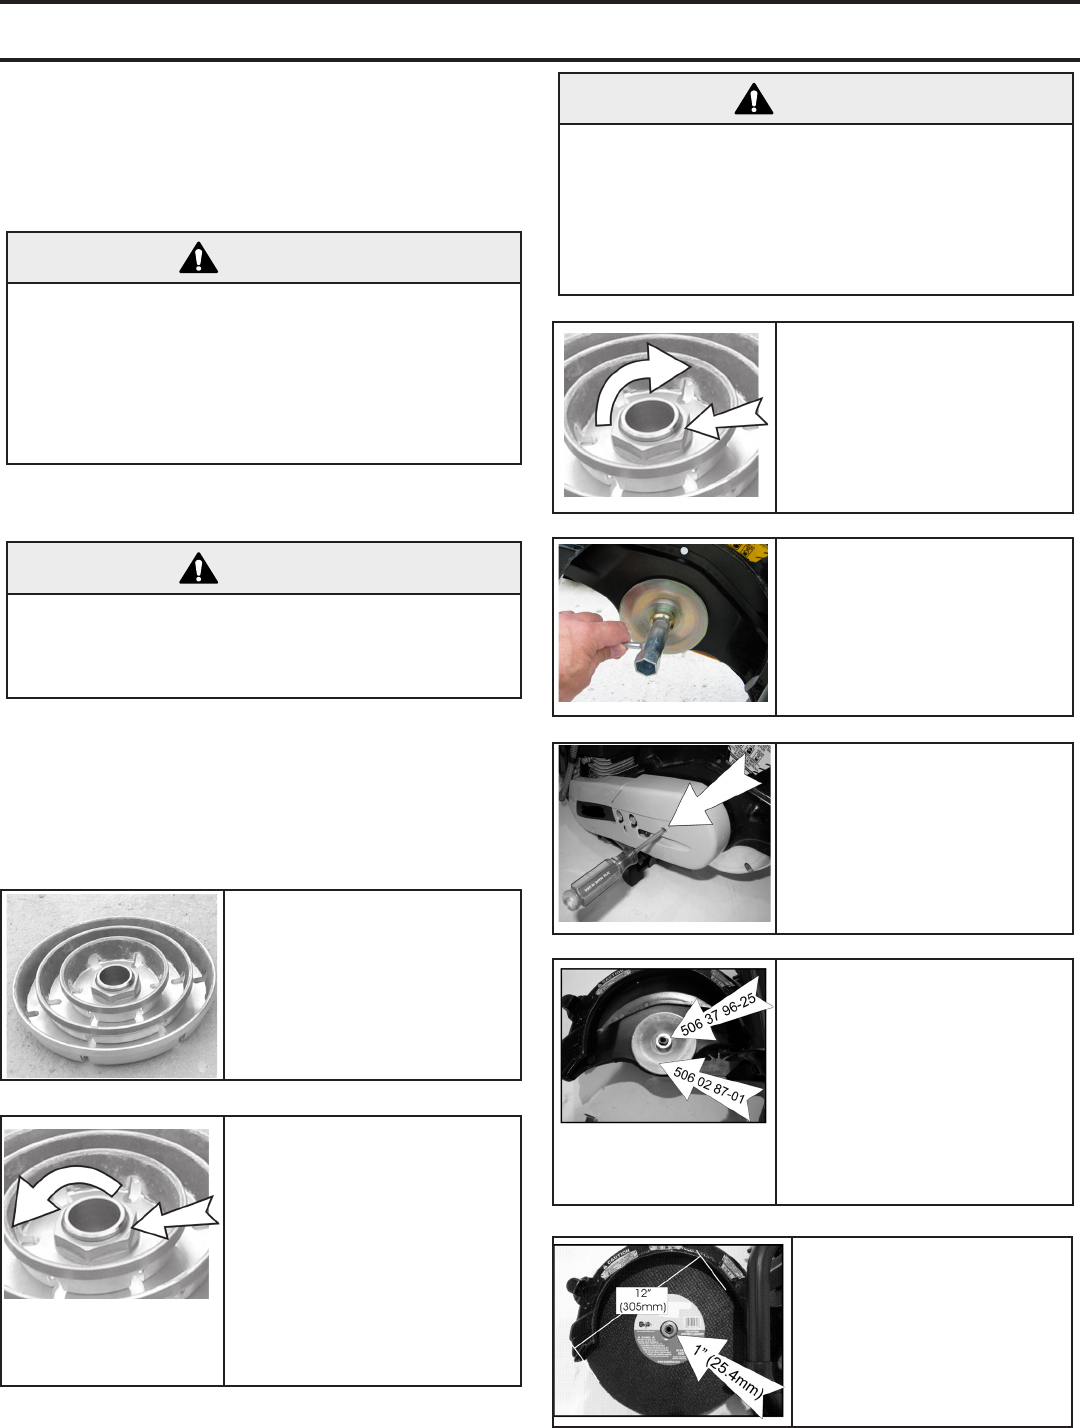
Unwrap SpeedMill bowl / Hub
Assembly from the packaging.
Initially all three sizes of Speed-
Mill Bowls (4”, 6”, 8”) are as-
sembled to the Hub Assembly.
Change the mounted bowl
sizes if desired. Turn the 2”
(50.8mm) hub nut Counter-
Clockwise to remove.
Lift off the smaller bowls, and
congure the bowl / hub as-
sembly as desired. Example:
6” and 8” bowl combination is
popular. ALWAYS mount the 8”
bowl, it may shield operator in
case of blade breakage.
Install and Re-tighten the 2”
(50.8mm) hub nut. Torque to
130-215 in-lbs. (15-25 Nm).
NOTE: Do not tighten exces-
sively – nut will tighten during
cutting process – making dis-
assembly difcult.
CAUTION!
Always install the 8” SpeedMill Bowl (P/N 542 19 61-
89) before using the machine! The 8” SpeedMill must
always be installed even if the machine will only be
used to cut and bevel smaller diameter pipes. Besides
serving as a beveller for 8” pipes the 8” ange is also
designed to cover the area between the guard and the
ange and to prevent unintentional contact with the
blade.
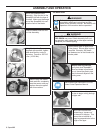
Loosen and remove the blade
shaft screw & washer from the
power cutter. Use the combi-
nation spanner supplied, and
a Screwdriver to lock the blade
shaft in position, if required.
Verify that 1” (25.4mm) adapter
(P/N 506 37 96-25) is pushed
onto blade shaft so it contacts
the inner ange. The mount-
ing surfaces of the ange and
bushing arbor must be undam-
aged, clean, and free of debris.
Verify that the ange (P/N 506
02 87-01) has a diameter of
4.13” (105mm).
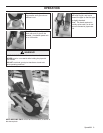
Mount a 12” (305mm) diam-
eter, 1” (25.4mm) arbor High
Speed Reinforced Abrasive
Blade (not included) on the
blade shaft.
Use a Screwdriver to lock the
blade shaft in position. Push
the screwdriver into the slot
(see picture) and rotate the ar-
bor until the screwdriver stops
the rotation.