


17
ASSEMBLY
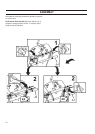
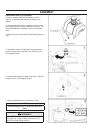
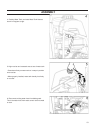
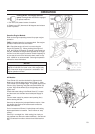
Install Front Pointer (A):
1. Using screws, washers and nuts installed in the Front
Pointer (A), install onto tube frame of Water Tank Support
(N). Adjust locking nuts to allow Pointer (A) to pivot freely.
2. Route pointer rope to avoid hot surfaces. Two loops in
rope allow attachment to Rear Handle (JJ).
Note: “Single Pointer” (A) shown. Some regions have
“Dual Pointer” as standard equipment. For all regions,
Dual Pointer is available as an accessory. See “accesso-
ries” section of this document, or spare parts list for more
information.
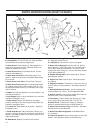
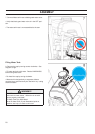
WARNING!
Blade Guard Latch Plate
(F) Must Be Installed
before operation. Failure
to Install before operating
machine could create a
Hazardous situation!
Always keep all guards
in place when operating
machine!
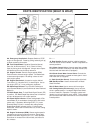
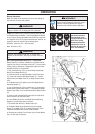
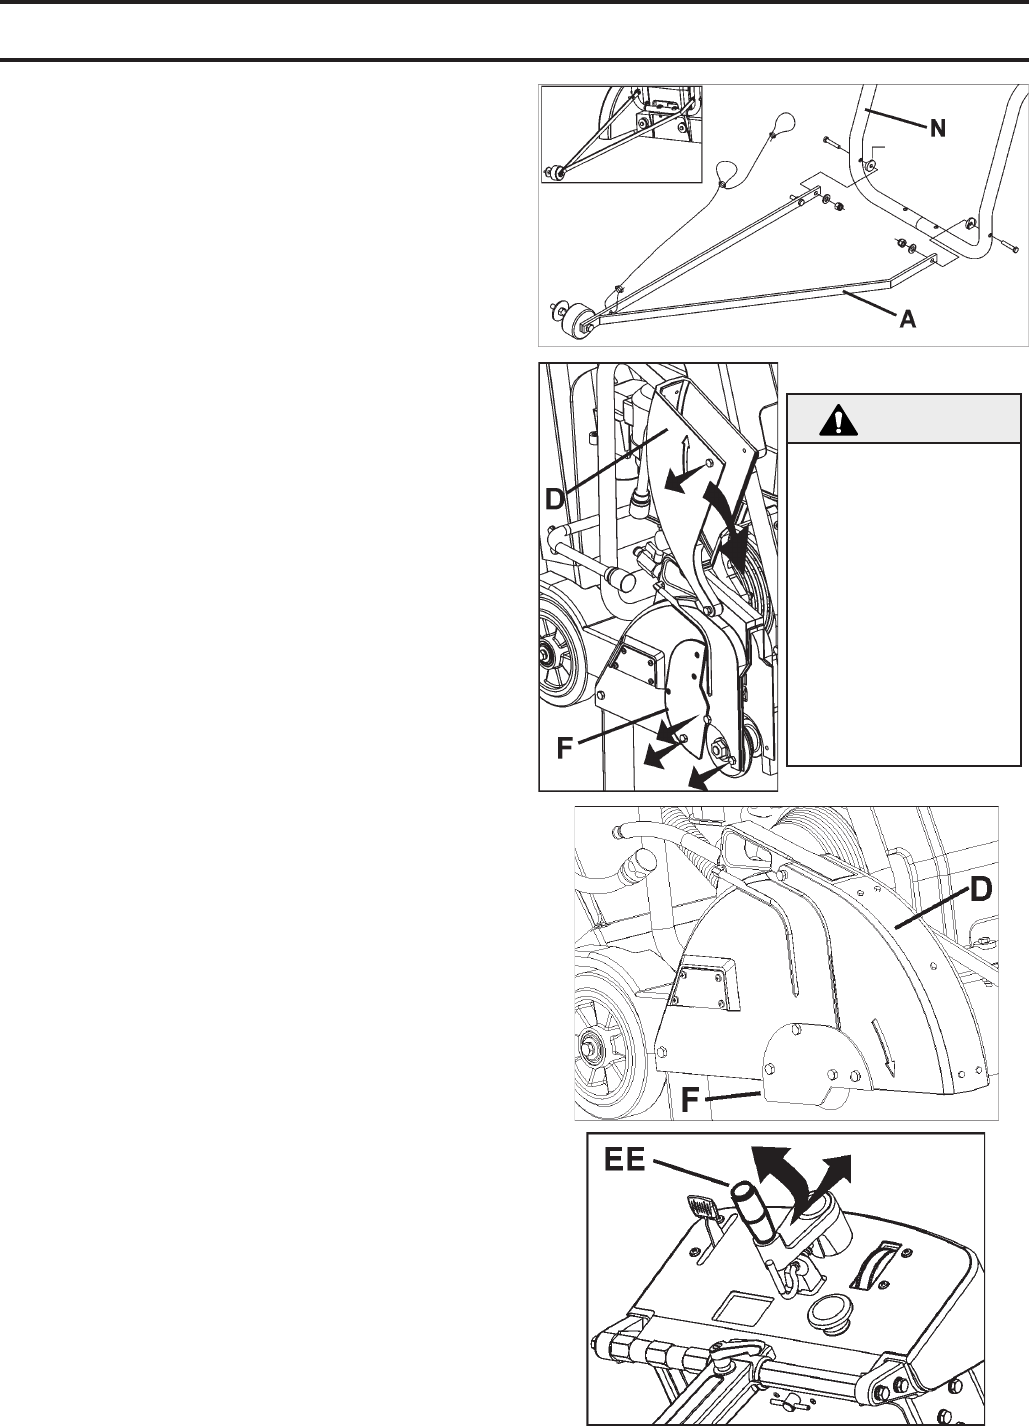
Re-Position Blade Depth Control Handle (EE):
Pull outward on Blade Depth Control Handle (EE) and
rotate 90 degrees until is snaps in position shown.
2. Reinstall three (3) M8 screws in Blade Guard Latch
Plate (F) as shown in the diagram at the right. Use the
13mm Wrench (U) (supplied) to securely tighten the four
(4) M8 bolts that hold the Blade Guard Latch Plate (F) in
position.
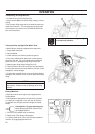
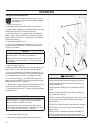
Blade Guard Front (D):
1. Using 13mm Wrench (U) provided, remove two (2) M8
screws located in front of and below Blade Guard Latch
Plate (F), and the M8 screw in Blade Guard Front (D) [as
indicated by arrows]. Lossen, but do not remove, remain-
ing screw Blade Guard Latch Plate (F). Rotate Blade
Guard Latch Plate (F), and Blade Guard Front (D) down-
ward.