


04581922_ed4 EN-8
EN
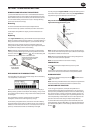
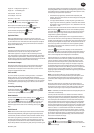
Changing the Date or Time Format
The format of how Date and Time are to be displayed can be
selected.
From the Date and Time Menu, Select Date Format or Time.
Format and use the keys to select the required format and
press ENTER.
Changing the Language
The wrench can display one of several dierent languages.
This can be found in the Main Menu / Main Setup Menu / Regional
Settings / Language.
Use the keys to select between: English, Deutsche, Francais,
Espanol, Italiano, Swedish or Czech and press ENTER to select.
Changing the Decimal Point style
There is also an option to change the decimal point in displayed
numbers from a ‘.’ (period) to a ‘,’ (comma), to suit local conventions.
This is found in the Main Menu / Setup Menu / Regional Settings /
Decimal Point.
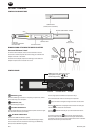
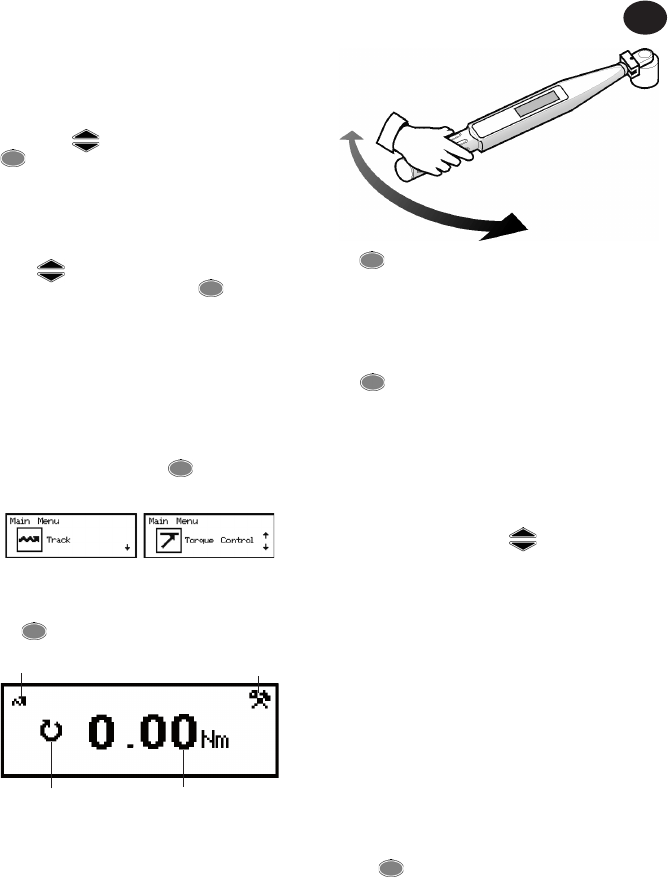
GETTING STARTED - TAKING A READING
After switching on, you will be in the Main Menu. The screen shows
just one item from the menu. Use the Up and Down arrow keys
to navigate between screens and press ENTER to access the
required mode. Shown below are the menu screens for the Track
measure mode and the Torque Control mode.
Track Mode
The simplest way to take a measurement is to use the Expert
Torque Wrench’s Track mode. Select Track from the Main menu
and Press ENTER. Track mode shows a continuous real-time
torque readout.
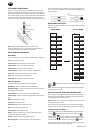
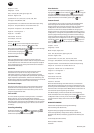
Tracking Screen
Direction of Rotation
Measurement Type (Track)
Setup Menu
Torque Readout
With a suitable drive adapter and socket in place, connect to the
required fastener and apply torque. Check the readout on the
display. When the torque is removed the display will revert back
to zero.
Press ENTER to access the Track Setup Menu. Here you can
change the units displayed next to the torque readout.
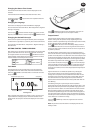
Torque Control
Torque Control mode monitors the peak torque applied to a
fastener and signals the operator to stop tightening once the
fastener is within a specied range. To access Torque Control mode,
scroll to Torque Control in the Main Menu and
press ENTER. The screen will immediately display the word
“WAIT” and both LEDs will turn red. During this time the wrench is
zeroing the angle sensor. Hold the wrench still until a single LED is
lit yellow to proceed.
The default display shows torque units in large bold numbers in
the center of the screen, with angle data (as indicated by the angle
symbol on the left) above in a smaller font. The current torque units
are displayed alongside the torque data. The bottom left corner of
the screen says “TORQUE” to indicate the current tightening mode.
The bottom right hand corner shows the current cycle number/
total number of samples. Using the keys, two other displays
can be accessed. One shows the angle data in larger font with the
torque data smaller in the middle. The other shows both torque
and angle in small font, with current subgroup/total subgroups on
the bottom.
Tighten the fastener at a moderate speed using a steady pull
on the wrench handle. As the wrench is pulled, the LEDs will
change color to represent various conditions. Both LEDs will turn
solid green when the lower torque limit is passed. Both LEDs will
turn solid red when the upper angle limit is passed. When the
measurement is nished the wrench will beep and both LEDs will
start ashing.
The ashing LEDs give a quick analysis of the completed
tightening. The top LED represents the relative torque value. It will
ash yellow if the torque is below the specied range, green if it is
within, and red if it is above. In a similar fashion the lower LED will
ash to indicate whether the resultant angle was below, within,
or above the specied range. There are also arrows that appear to
the right of the torque and angle values. An upward arrow means
that the given value is above the specied range, and a downward
value means that it is below the range.
Press the ENTER key to zero the angle sensor for the next
reading.
Note: The previous results will remain on the display until the next
reading is taken.