


11
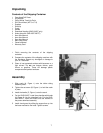
Adjustments
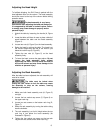
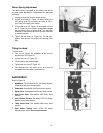
Installing a Drill Chuck (not included)
1. Disconnect the machine from the power source.
2. Clean the arbor and the inside of the chuck. The
tapers must be clean and dry.
3. Push the chuck onto the arbor.
4. Retract the chuck jaws completely, and push the
arbor into the spindle.
5. Use a rubber mallet, or steel face hammer against a
block of wood, to sharply tap the bottom of the chuck
two or three times to seat it. (Note: Never use a steel
face hammer directly against the chuck.)
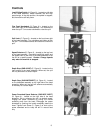
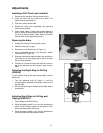
Removing the Arbor
1. Unplug the machine from the power source.
2. Make sure the drill is in gear.
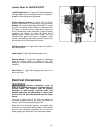
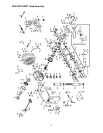
3. Remove the main shaft cover (A, Figure 11).
4. Use an adjustable wrench or box wrench to loosen
the draw bar (A, Figure 10).
5. Unscrew the draw bar approximately two revolutions.
If the arbor is not loose, gently tap on top of the draw
bar to loosen the arbor.
6. Continue to unscrew the draw bar with one hand on
the chuck and arbor so that it doesn’t drop onto the
table.
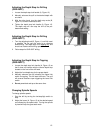
Adjusting the Depth Stop for Drilling
(GHD-20)
To drill multiple holes at the same preset depth, use the
depth stop:
1. Turn the adjusting knob (B, Figure 11) until the
correct depth is indicated on the scale on the front of
the drill head.
2. Drill several test holes to make sure the depth stop is
set correctly.
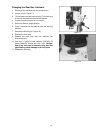
Adjusting Depth Stop for Drilling and
Tapping (GHD-20T)
1. Follow steps for GHD-20 drilling.
2. When the tapping switch is on, the limit switches are
active and will reverse rotation at the bottom of the
stroke and stop rotation at the top.
3. When the tapping switch is off, the limit switches are
inactive and do not effect spindle rotation.
Figure 10
Figure 11