


11
4. Move the belt (E, Figure 9) to the desired
pulley groove according to the speed chart
found on the inside of the headstock access
door. Be sure the belt is aligned with spindle
pulley and motor pulley.
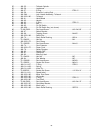
5. Tension the belt by pushing down on the
motor plate handle (D, Figure 11) and re-
tighten lock handle (C, Figure 11)
Belt Replacement
1. Disconnect the machine from the power
source (unplug).
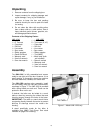
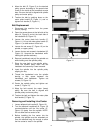
2. Open the access doors at the left side of the
base (A, Figure 9) and at the back side of
the headstock (B, Figure 10).
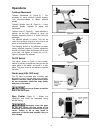
3. Loosen the motor plate lock handle (C,
Figure 11). Lift up the motor plate handle (D,
Figure 11) to take tension off the belt.
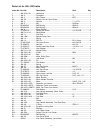
4. Loosen the set screw (F, Figure 10) on the
spindle, or upper, pulley.
5. Loosen the two set screws in handwheel (G,
Figure 10). Unscrew the handwheel while
holding the spindle stationary.
6. Remove handwheel and pull the spindle out
while holding onto the spindle pulley.
7. Place the new belt on the spindle pulley.
Place the spindle pulley back into the
headstock the same way it was removed.
8. Insert the spindle into the spindle pulley
aligning the key.
9. Thread the handwheel onto the spindle
leaving a little space between the
handwheel and headstock. Tighten set
screws (G, Figure 10).
10. Center the spindle pulley and tighten set
screw (F, Figure 10).
11. Wrap the belt around the motor (lower)
pulley. Be sure the belt is aligned with
spindle pulley and motor pulley.
12. Tension the belt and tighten the motor plate
lock handle (C, Figure 11).
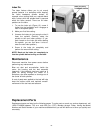
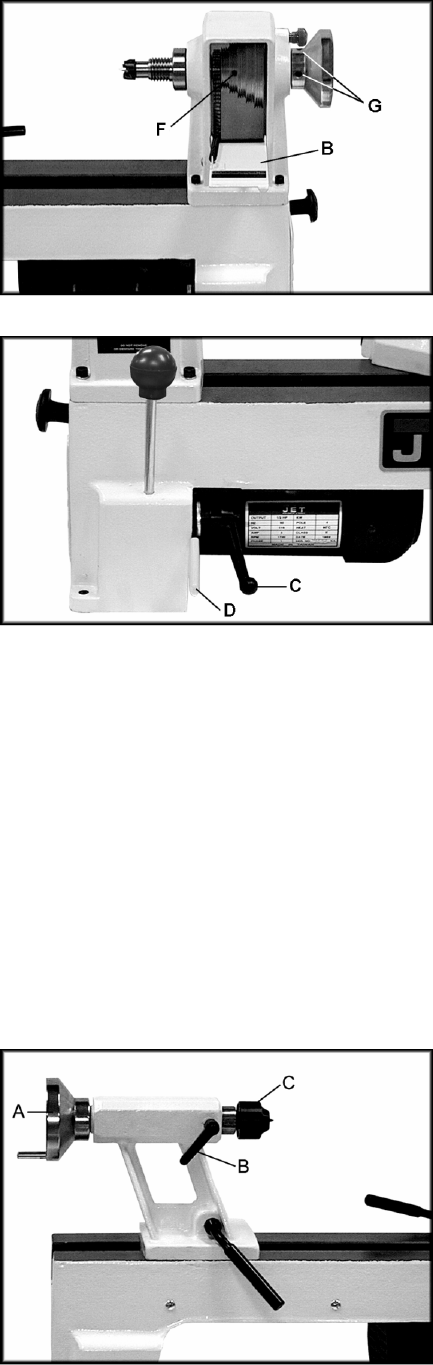
Removing and Installing Live Center
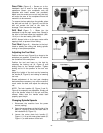
1. Loosen tailstock lock handle (B, Figure 12).
2. Turn the tailstock handwheel (A, Figure 12)
counterclockwise until the live center (C,
Figure 12) ejects from the spindle. NOTE:
Do not allow the live center to fall.
3. Before installing the live center into the
spindle, the spindle must be extended out
from the tailstock body far enough to allow
the live center to “seat” in the spindle.
Figure 10
Figure 11
Figure 12