


9
Figure 4
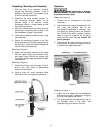
6. Plug the planishing hammer into the power
supply.
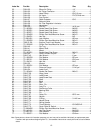
7. With the workpiece between the hammer
and anvil (Figure 5), press the foot switch to
begin planishing.
Note: Planishing blows-per-minute can be adjusted
by turning adjustment knob (see Figure 2).
Figure 5
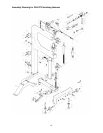
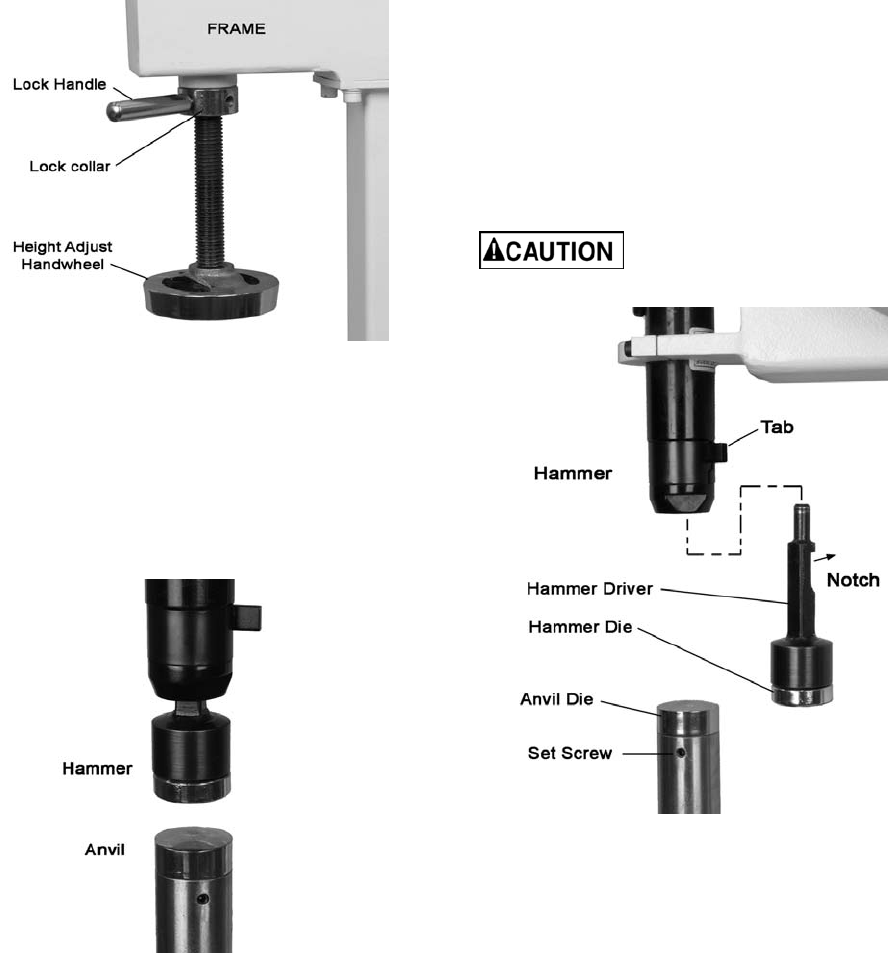
Changing Dies
Referring to Figure 6:
The PH-24T is shipped with one crowned anvil
(or lower) die, and one flat hammer (or upper)
die, which is already installed in the driver.
To remove an anvil die, loosen the set screw
and pull straight up on the anvil die. Install a new
anvil die and tighten set screw. The anvil post
accepts dies with a standard 0.79” insert end.
To remove a hammer die from the driver, use a
tool to separate them. When the die is removed,
check the condition of the o-ring inside the
driver. To reinstall a hammer die, insert it into
the driver and raise the anvil post up until it
contacts and pushes the die in.
To remove the entire driver from the hammer
barrel, push the tab on the air hammer housing
and pull down on the driver. To reinstall the
hammer drive, orient the notch toward the
general direction of the tab, and push driver
upward while still pushing back on the tab.
When the driver is properly inserted, the tab will
snap back into place.
Make sure driver and dies are
properly inserted before operating machine.
Figure 6
Maintenance
Check the following before every use:
Oil level in the lubricator; refill as needed
with ISO 32/SAE 10W non-detergent, non-
additive oil. Remove oil plug with a
screwdriver to fill.
All mounting and component hardware and
fasteners; adjust/tighten as necessary.
All air connections; replace leaking or
defective connections.
Worn or shorted wiring; replace as
necessary.
Periodically check the filter/regulator bowl for
fluids or sediment accumulation, and empty it if
needed. To remove a bowl, shut off air supply
and bleed excess air; then press the tab, rotate
bowl to the left, and pull down. Reverse
procedure to reinstall bowl. Make sure bowl is
locked in position before applying air to the
system!