


AASSSSEEMMBBLLYY
Always make sure that the power cord is unplugged and the trigger switch is
“OFF” before changing blades or attachments.
WWhheenn rreemmoovviinngg tthhee bbllaaddee ffrroomm tthhee ttooooll,, aavvooiidd ccoonnttaacctt wwiitthh sskkiinn aanndd uussee
pprrooppeerr pprrootteeccttiivvee
gglloovveess wwhheenn ggrraassppiinngg tthhee bbllaaddee oorr aacccceessssoorryy..
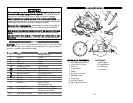
Accessories
may be hot after prolonged use.
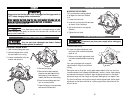
If the blade clamp screw will not loosen enough to allow
blade installation, tap gently on the end of the wrench with a mallet until the
clamp screw breaks free.
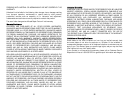
ATTACHING / REMOVING BLADE
Only use sharp and undamaged saw blades. Cracked
or bent saw blades must be replaced immediately.
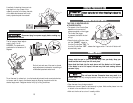
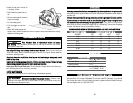
REPLACING THE SAW BLADE:
1.Hold the saw blade guard open.
2.Use the flange wrench to stop
the saw blade from moving.
3. Loosen the blade bolt with hex
wrench and remove it.
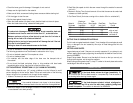
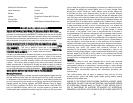
MOUNTING THE RIP FENCE
MOUNTING THE RIP FENCE:
The rip fence allows sawing parallel
to an edge at a maximum distance
of 4".
1. Loosen the lock knob.
2. Insert the rip fence into the saw base
as shown in the illustration.
3. Set the lock knob to the required
distance.
4. Tighten the lock knob.
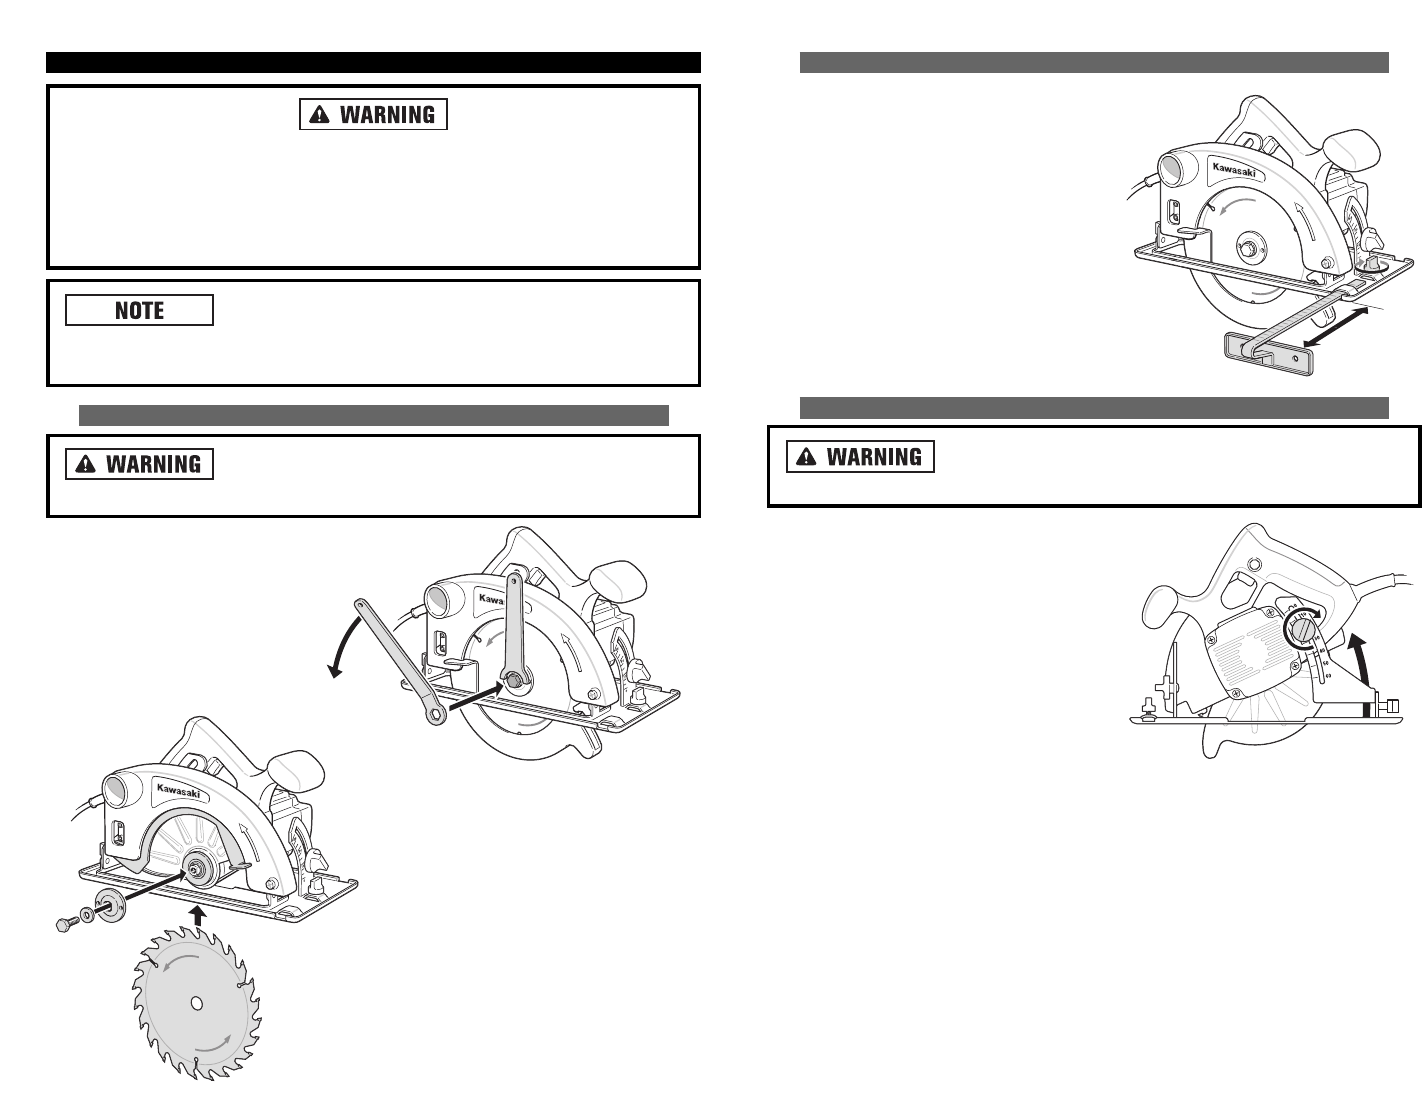
CUTTING DEPTH ADJUSTMENT
Disconnect plug from power supply before making any
adjustments to the tool.
1. Hold the saw firmly.
2. Loosen the depth adjustment knob
and move shoe to obtain the desired
depth of cut.
3. Make sure the depth adjustment knob
has been retightened before operating
saw.
Your saw is equipped with a carbide
tipped blade for long life and efficient
cutting.
Setting the saw at the proper cutting depth keeps blade friction to a minimum,
removes sawdust from between the blade teeth, results in cooler, faster sawing
and reduces the chance of kickback. Align the appropriate mark on the depth
adjustment strap with the triangle on the upper blade guard. Your depth is set.
For the most efficient cutting action using a carbide tipped blade, set the depth
adjustment so that about one half of a tooth projects below the surface of the
wood to be cut.
4. Remove the flange.
5. Remove the old saw blade and
place the new saw blade with the
teeth pointing in the direction of
rotation. See arrow on the housing.
6.Move the saw blade guard back
into its normal position.
7.Place the flange on the saw blade
and secure the blade bolt.
1211