


10
Batteries
Roteo 20HV/25H/35/35G - 1.2.0en
D
EN
F
I
E
P
NL
DK
S
N
FIN
J
CN
ROK
PL
H
RUS
CZ
unit acts as a laser receiver. With power turned OFF, the
unit performs as a remote.
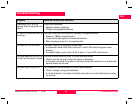
The RRC-350 has six buttons; two of which have dual
functions depending on whether the unit is being used as
a receiver or as a remote. Refer to illustration {F} on the
inside front cover of this manual.
1) Audio (Receiver), CW Scan-Stationary Beam /
Manual Slope (Remote)
2) Bandwidth (Receiver), CCW Scan-Stationary
Beam / Manual Slope (Remote)
3) Power – On (Receiver) / Off (Remote)
4) Scan / Rotation Mode (1.5 seconds - Motorized
Mount)
5) Plus – Head Speed / Scan Width / Motorized Mount
6) Minus – Head Speed / Scan Width / Motorized Mount
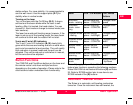
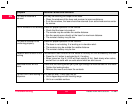
As a remote, the performance of the CCW/CW and Plus/
Minus keys is dependent on the mode of operation
selected. Please refer to the table in Section "Button
Functions" on page 4 to better understand their function-
ality.
• The RRC-350 can be used as a receiver and attached
magnetically to the ceiling grid to be used in place of
the ceiling grid target in poor visibility conditions.
• Battery – To replace the battery on your RRC-350
Receiver/Remote use a finger or small coin to open
the battery compartment {F-7} at the base of the unit.
The RRC-350 requires a 9-volt type alkaline battery.
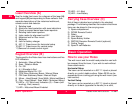
R-250 Receiver
The R-250, delivered with Roteo 25H, has all receiver
functions of RRC-350 without the remote control func-
tions. Refer to illustration {E} on the inside front cover of
this manual.
1) Audio
2) Bandwidth
3) Power ON/OFF
(Keys 4, 5 and 6 are only available on RRC-350)
Other accessories
• Laser enhancing glasses improve the visibility of the
laser beam in bright light conditions.
• The ceiling grid target is used to view the beam on
suspended ceiling applications. The target attaches
magnetically to the grid.
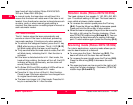
Batteries
Low battery Indicator
When the battery power is low, the laser head will stop
rotating and the low battery LED {B-13} will stay on.
Replacing alkaline batteries
Follow the steps below to replace the alkaline batteries
in your laser.
X To access the battery compartment, loosen the knobs
connecting the laser to the wall mount.
X Use a coin or small screwdriver to remove the cover of
the battery compartment at the back of the laser.
X Insert two fresh alkaline batteries (D size or LR20),
following the polarization indicated at the bottom of the