


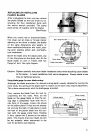
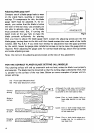
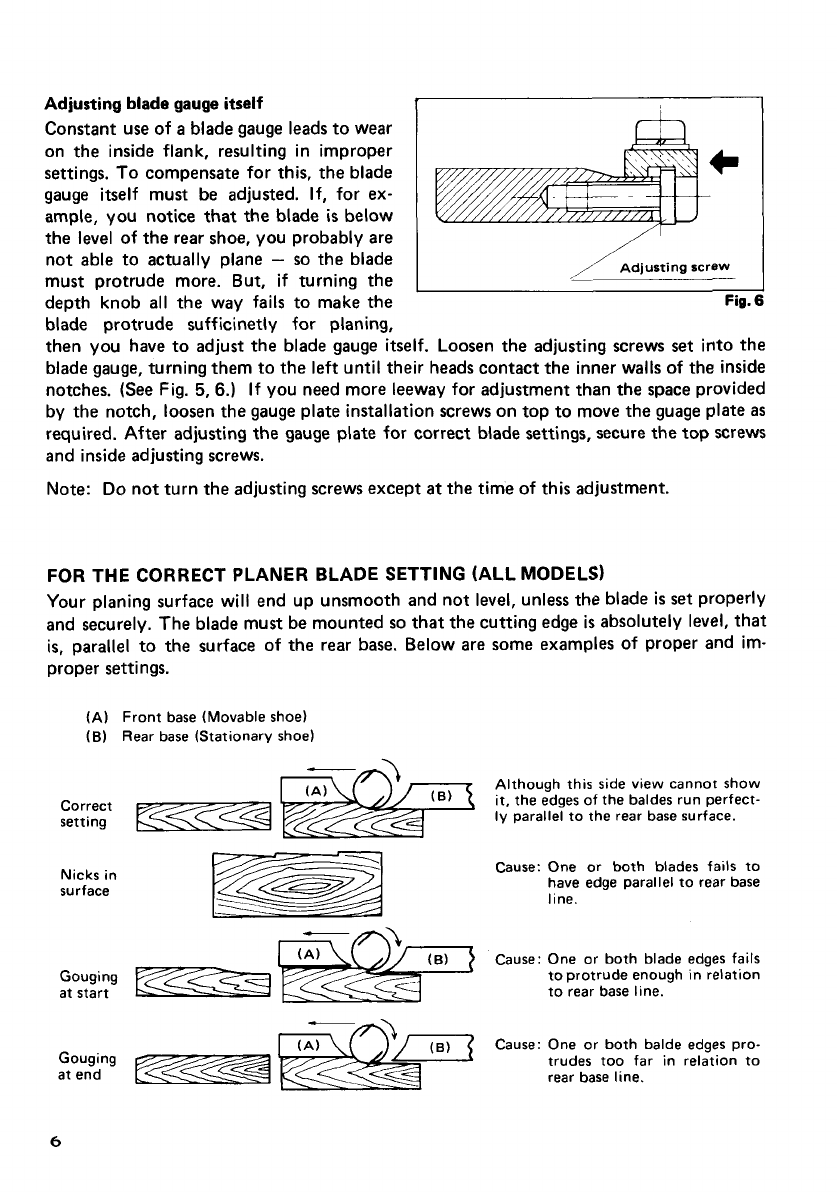
Adjusting blade gauge
itself
t
,
Constant use of
a
blade gauge leads to wear
on the inside flank, resulting in improper
settings.
To
compensate for this, the blade
gauge itself must be adjusted. If, for ex-
ample, you notice
that
the
blade
is
below
the
level
of
the rear shoe, you probably are
not able to actually plane
-
so
the blade
must protrude more. But, if turning the
depth knob
all
the way fails to make the
blade protrude sufficinetly for planing,
n
/
Adjusting screw
Fig.
then you have to adjust the blade gauge itself. Loosen the adjusting screws
set
into the
blade gauge, turning them to the left until their heads contact the inner walls of the inside
notches.
(See
Fig.
5,6.)
If
you need more leeway for adjustment than the space provided
by the notch, loosen the gauge plate installation screws on top to move the guage plate
as
required. After adjusting the gauge
plate
for correct blade settings, secure the
top
screws
and inside adjusting screws.
Note:
Do
not turn the adjusting screws except
at
the time of this adjustment.
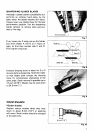
FOR
THE CORRECT PLANER BLADE SETTING (ALL MODELS)
Your planing surface will end up unsmooth and not
level,
unless the blade
is
set
properly
and securely. The blade must be mounted
so
that the cutting edge
is
absolutely
level,
that
is,
parallel to the surface
of
the rear base. Below are some examples of proper and im-
proper settings.
(A) Front base (Movable shoe)
(B)
Rear base (Stationary shoe)
setting
Correct
=
m
Although
this
side view cannot show
it,
the edges of the baldes run perfect-
ly
parallel to the rear base surface.
Cause: One or both blades fails to
have edge parallel to rear base
line.
m?)
Cause: One or both blade edges fails
to protrude enough
in
relation
to rear base line.
at start
-
Gouging
~~
E2aT(
Cause: One or both balde edges pro-
trudes too far
in
relation to
at end rear base line.
6