


12
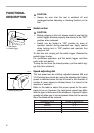
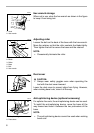
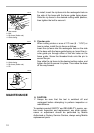
To install, insert the rip fence into the rectangular hole on
the side of the base with the fence guide facing down.
Slide the rip fence to the desired cutting width position,
then tighten the bolt to secure it.
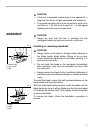
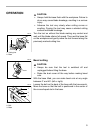
2. Circular cuts
When cutting circles or arcs of 170 mm (6 - 11/16”) or
less in radius, install the rip fence as follows.
Insert the rip fence into the rectangular hole on the side
of the base with the fence guide facing up. Insert the cir-
cular guide pin through either of the two holes on the
fence guide. Screw the threaded knob onto the pin to
secure the pin.
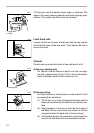
Now slide the rip fence to the desired cutting radius, and
tighten the bolt to secure it in place. Then move the base
all the way forward.
MAINTENANCE
CAUTION:
• Always be sure that the tool is switched off and
unplugged before attempting to perform inspection or
maintenance.
To maintain product SAFETY and RELIABILITY, repairs, car-
bon brush inspection and replacement, any other mainte-
nance or adjustment should be performed by Makita
Authorized or Factory Service Centers, always using Makita
replacement parts.
1. Hex wrench
2. Bolt
3. Rip fence (Guide rule)
4. Guide facing
1
2
3
4
002774
1. Threaded knob
2. Guide facing
3. Rip fence (Guide rule)
4. Pin
1. Rip fence (Guide rule)
1
2
3
4
002779
1
002780