


7
ASSEMBLY
CAUTION:
• Always be sure that the tool is switched off and
unplugged before carrying out any work on the tool.
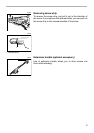
Installing or removing the bit
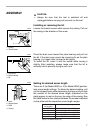
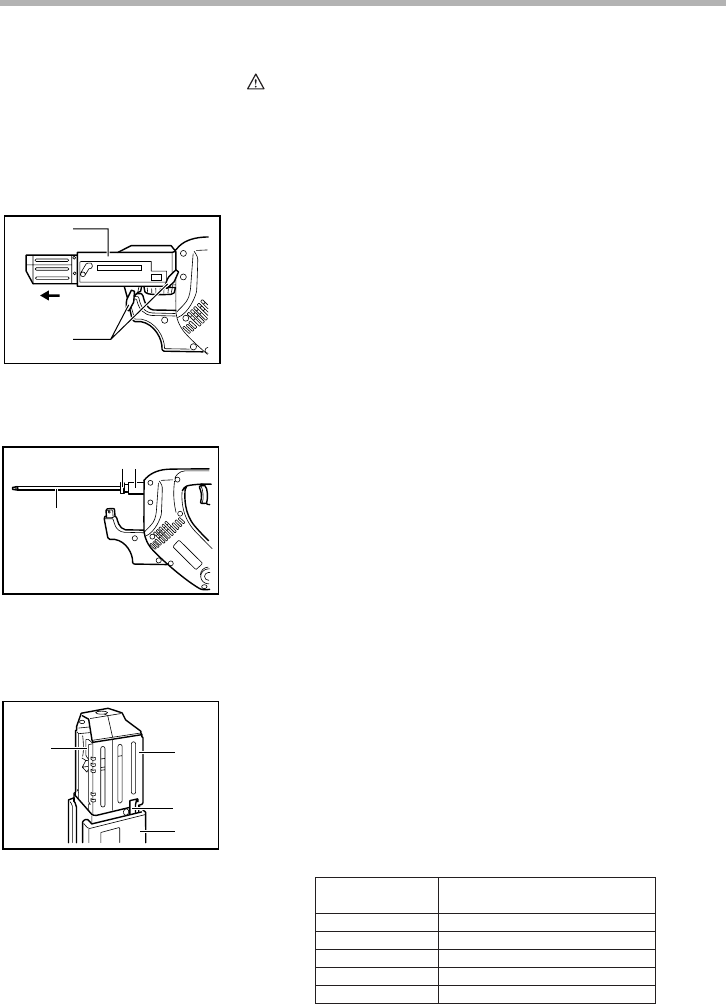
Loosen the thumb screws which secure the casing. Pull out
the casing in the direction of the arrow.
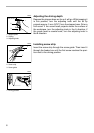
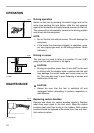
Press the dust cover toward the plain bearing and pull out
the bit. If the dust cover cannot be moved as far as the plain
bearing, try it again after turning the bit slightly.
To install the bit, insert it into the socket while turning it
slightly. After installing, always make sure that the bit is
securely held in place by trying to pull it out.
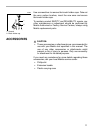
Setting for desired screw length
There are 3 (for Model 6833) or 5 (for Model 6834) positive-
lock screw length settings. To obtain the desired setting, pull
out the stopper base while depressing the lever until you see
the number of the desired screw length (indicated on the
plate) appear to rest on the very top edge of the casing. See
the table below for the relation between the number indicated
on the plate and the respective screw length ranges.
1. Casing
2. Thumb screw
1
2
002656
1. Dust cover
2. Plane bearing
3. Bit
12
3
002657
1. Lever
2. Stopper base
3. Plate
4. Casing
1
2
3
4
002663
Number indicated
on the plate
25/28
32
40
* 51
* 57
Screw length range
25 mm (1”) - 28 mm (1 - 1/8")
28 mm (1 - 1/8”) - 35 mm (1 - 3/8”)
35 mm (1 - 3/8”) - 41 mm (1 - 5/8”)
41 mm (1 - 5/8”) - 51 mm (2”)
51 mm (2”) - 57 mm (2 - 1/4”)
(Note) * for Model 6834 only