


P 2/ 8
Repair
CAUTION
:
Disconnect the machine and remove the wheel for safety before repair/maintenance!
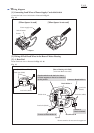
Fig. 1
Carbon brush (2 pcs)
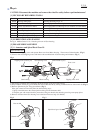
1) Remove 4x18 Tapping screw and separate Rear cover from Motor housing. Then remove Carbon brushes. (Fig. 1)
2) Unscrew four 4x30 Tapping screws and remove the assembled unit of Gear housing and Armature. (Fig. 1)
Motor housing
Gear housing cover
Tapping screw 4x18
Tapping screw 4x30 (4 pcs)
Rear cover
Gear housing
3) Pull off the assembled unit of Armature and Gear housing cover from Gear housing.
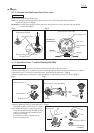
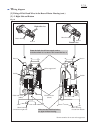
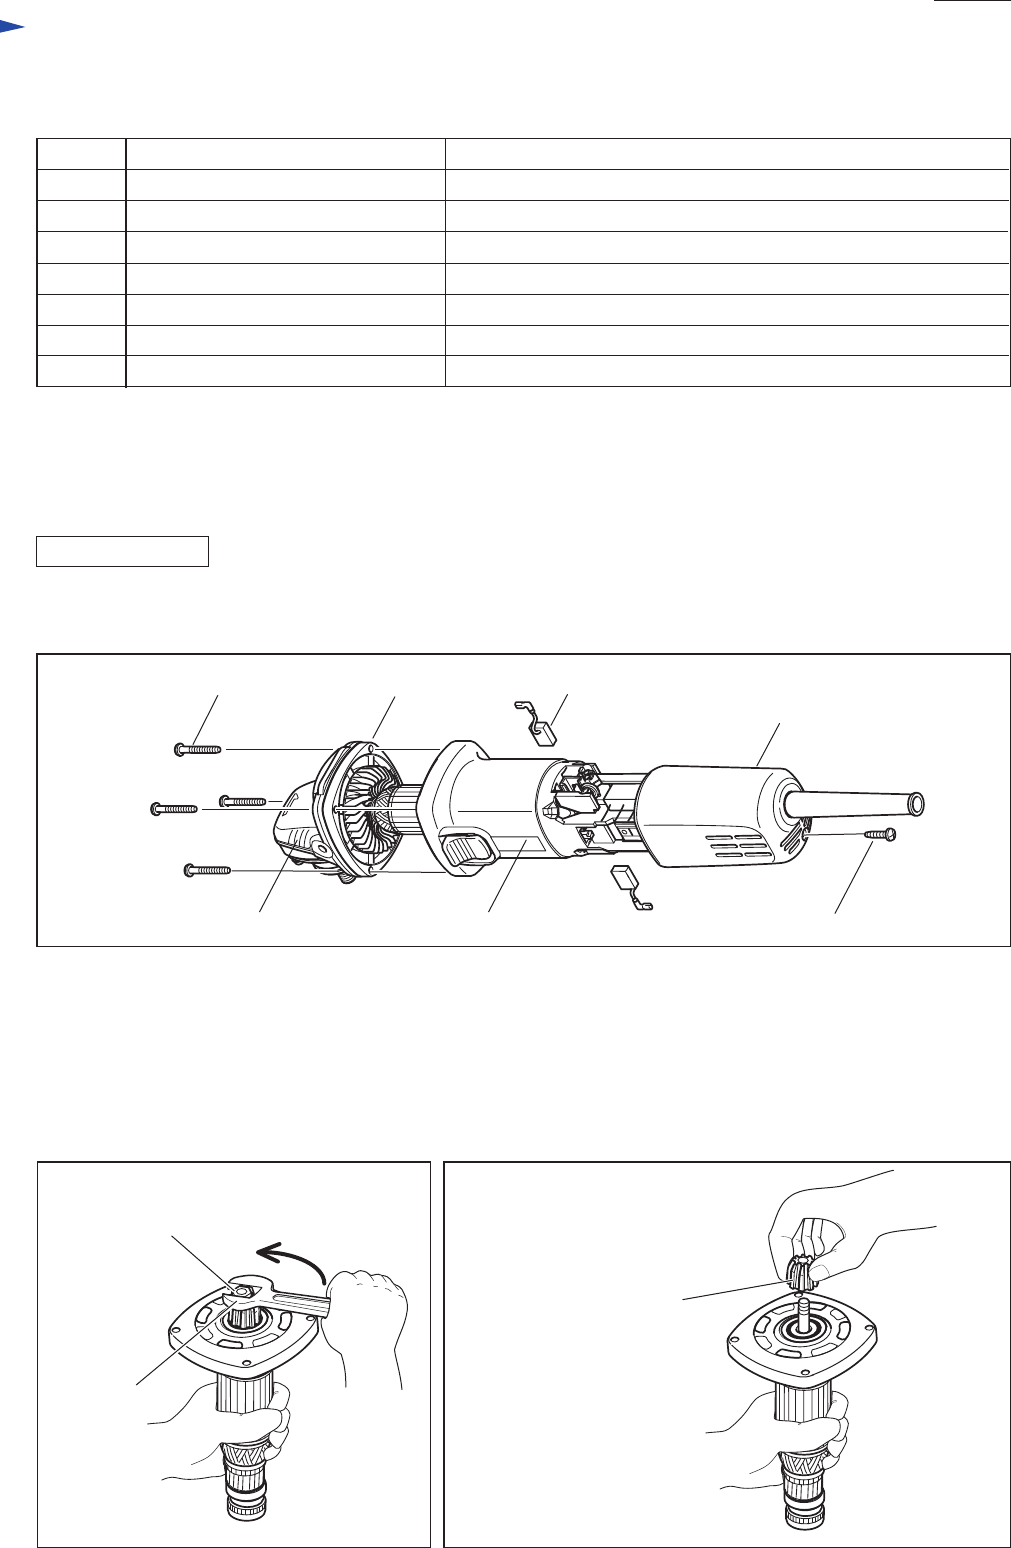
4) Grip Armature securely by gloved hand, then remove Hex nut M6 by turning counterclockwise with wrench 10. (Fig. 2)
5) Remove Spiral bevel gear 10 by gloved hand. (Fig. 3)
If the gear cannot be removed by hand, do the following steps;
1. Spray some lubricant to the contact portion of the gear and Armature shaft.
2. Wrap the gear with wasted cloth for protection of the gear threads, then turn the gear using water pump pliers.
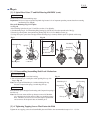
6) Remove Armature from Gear housing cover with Gear Extractor, large (No.1R045).
DISASSEMBLING
Fig. 2 Fig. 3
Hex nut M6
Wrench 10
Spiral bevel gear 10
[3] DISASSEMBLY/ASSEMBLY
[3] -1. Armature and Spiral Bevel Gear 10
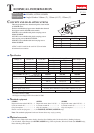
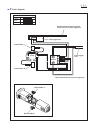
[1] NECESSARY REPAIRING TOOLS
[2] LUBRICATION AND SEALING
Put 7g of Makita Grease N. No.1 into the gear room of Gear housing.
Code No. Description
1R028 Bearing Setting Pipe
1R343 Retaining Ring Setting Jig
1R045 Gear Extractor (large)
Removing Spindle from Bearing box (for modular use with 1R045)
Removing Spindle from Bearing box
1R269 Bearing Extractor Removing Ball bearings
1R291 Retaining Ring S and R Pliers Removing Retaining ring S-12 and R-32
1R346 Center Attachment for 1R045
Installing Retaining ring S-12
Installing Retaining ring S-12
1R----- Bearing Setting Plate (of proper size) Assembling Ball bearing 629LLB and Armature to Gear housing cover
Use for