


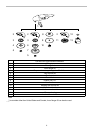

5
1
2
A
B
C
010640
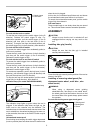
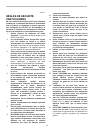
For tool with the lock-on switch
To start the tool, simply pull the switch trigger (in the B
direction). Release the switch trigger to stop. For
continuous operation, pull the switch trigger (in the B
direction) and then push in the lock lever (in the A
direction). To stop the tool from the locked position, pull
the switch trigger fully (in the B direction), then release it.
For tool with the lock-off switch
To prevent the switch trigger from accidentally pulled, a
lock lever is provided.
To start the tool, push in the lock lever (in the A direction)
and then pull the switch trigger (in the B direction).
Release the switch trigger to stop.
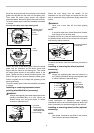
For tool with the lock on and lock-off switch
To prevent the switch trigger from accidentally pulled, a
lock lever is provided.
To start the tool, push in the lock lever (in the A direction)
and then pull the switch trigger (in the B direction).
Release the switch trigger to stop.
For continuous operation, push in the lock lever (in the A
direction), pull the switch trigger (in the B direction) and
then pull the lock lever (in the C direction).
To stop the tool from the locked position, pull the switch
trigger fully (in the B direction), then release it.
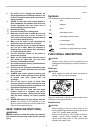
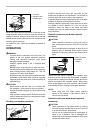
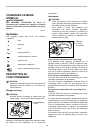
Indication lamp (For model GA7050R/GA9050R)
1
010864
The indication lamp lights up green when the tool is
plugged. If the indication lamp does not light up, the
mains cord or the controller may be defective. The
indication lamp is lit but the tool does not start even if the
tool is switched on, the carbon brushes may be worn out,
or the controller, the motor or the ON/OFF switch may be
defective.
Unintentional restart proof
Even locking lever keeping the switch trigger depressed
(Lock-on position) does not allow the tool to restart even
when the tool is plugged.
At this time, the indication lamp flickers red and shows
the unintentional restart proof device is on function.
To cancel the unintentional restart proof, pull the switch
trigger fully, then release it.
Soft start feature
These models begin to run slowly when they are turned
on. This soft start feature assures smoother operation.
ASSEMBLY
CAUTION:
•
Always be sure that the tool is switched off and
unplugged before carrying out any work on the
tool.
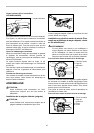
Installing side grip (handle)
CAUTION:
• Always be sure that the side grip is installed
securely before operation.
010642
Screw the side grip securely on the position of the tool as
shown in the figure.
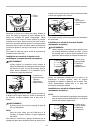
Installing or removing wheel guard (For
depressed center wheel , multi disc , wire
wheel brush )
WARNING:
• When using a depressed center grinding
wheel/Multi-disc, flex wheel or wire wheel brush,
the wheel guard must be fitted on the tool so that
the closed side of the guard always points toward
the operator.
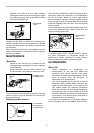
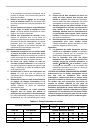
For tool with locking screw type wheel guard
1
2
3
010643
1. Wheel guard
2. Bearing box
3. Screw
1. Indication lamp
1. Switch trigger
2. Lock lever