


9
Installing or removing drill bit
For Model HP2070, HP2070F
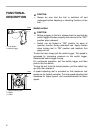
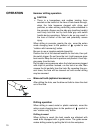
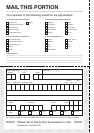
To install the bit, place it in the chuck as far as it will go.
Tighten the chuck by hand. Place the chuck key in each of
the three holes and tighten clockwise. Be sure to tighten all
three chuck holes evenly.
To remove the bit, turn the chuck key counterclockwise in
just one hole, then loosen the chuck by hand.
After using the chuck key, be sure to return to the original
position.
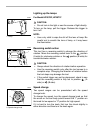
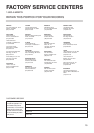
For Model HP2071, HP2071F
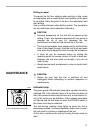
Hold the ring and turn the sleeve counterclockwise to open
the chuck jaws. Place the bit in the chuck as far as it will go.
Hold the ring firmly and turn the sleeve clockwise to tighten
the chuck.
To remove the bit, hold the ring and turn the sleeve counter-
clockwise.
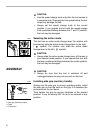
NOTE:
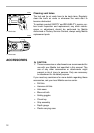
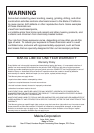
• If the keyless drill chuck cannot be loosened because of
a drill bit being caught inside the jaws of the chuck,
loosen the drill chuck as follows.
1. Hold the sleeve of the drill chuck firmly with water pump
pliers or the like (Note: Do not hold the retaining ring por-
tion.)
2. Place the wrench 19, adjustable wrench or one of other
appropriate wrenches on the hexagonal nut at the front
of the drill chuck. Turn the wrench clockwise as shown in
the figure to loosen the drill chuck.
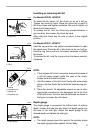
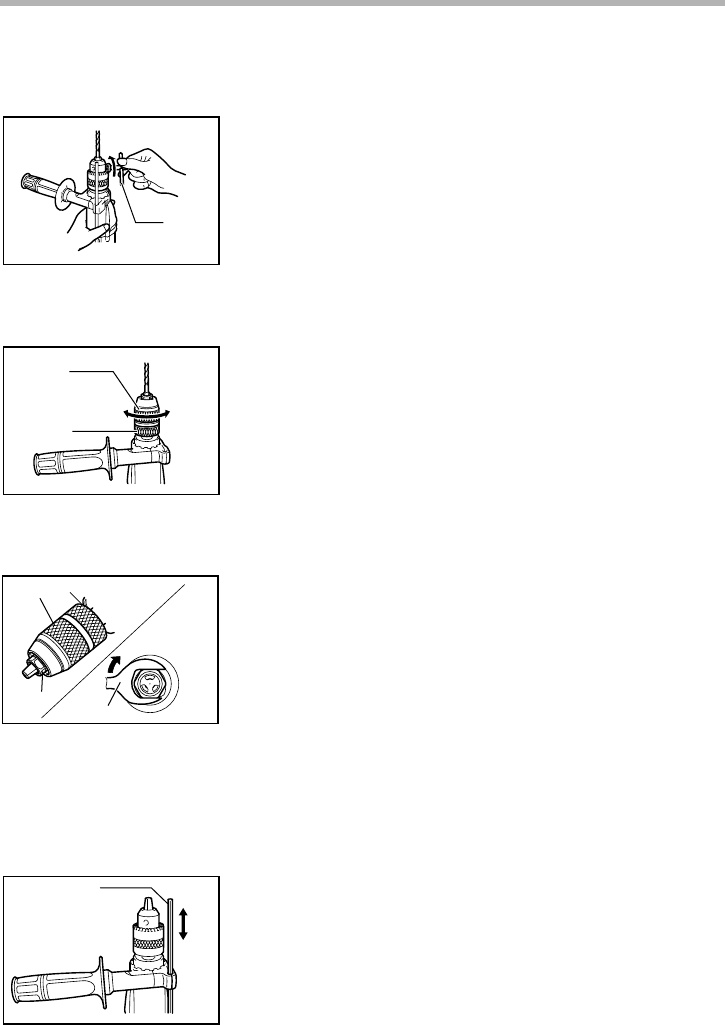
Depth gauge
The depth gauge is convenient for drilling holes of uniform
depth. Loosen the side grip and insert the depth gauge into
the hole in the side grip. Adjust the depth gauge to the
desired depth and tighten the side grip.
NOTE:
• The depth gauge cannot be used at the position where
the depth gauge strikes against the tool body.
1. Chuck key
1
002694
1. Sleeve
2. Ring
1
2
002695
1. Sleeve
2. Hexagonal nut
3. Wrench 19
4. Retaining ring
1
2
3
4
004390
1. Depth gauge
1
002696