


4
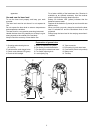
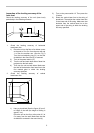
Attaching and replacing batteries (Fig.1)
Fig. 1
Makita SK20 exclusive
uses Elevating Tripod.
Fig. 2
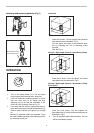
OPERATION
Fig. 3
1. Turn on the power switch (12). The unit (laser
level) projects the horizontal laser- beam line.
2. If the unit is placed in a slanting position, it will not
emit any laser lines at all. Adjust the level
adjusting ring (9) so that the air-bubble in the
round vial (4) is centered. (See the Fig. 3)
3. If you work with the receiver (optional accessory),
press the interior/exterior mode change button (2).
Exterior mode indicator LED (green) (3) will light
on.
Following 3 operation modes are available. Press
the most suitable operating-mode selecting button
(1) according to your job.
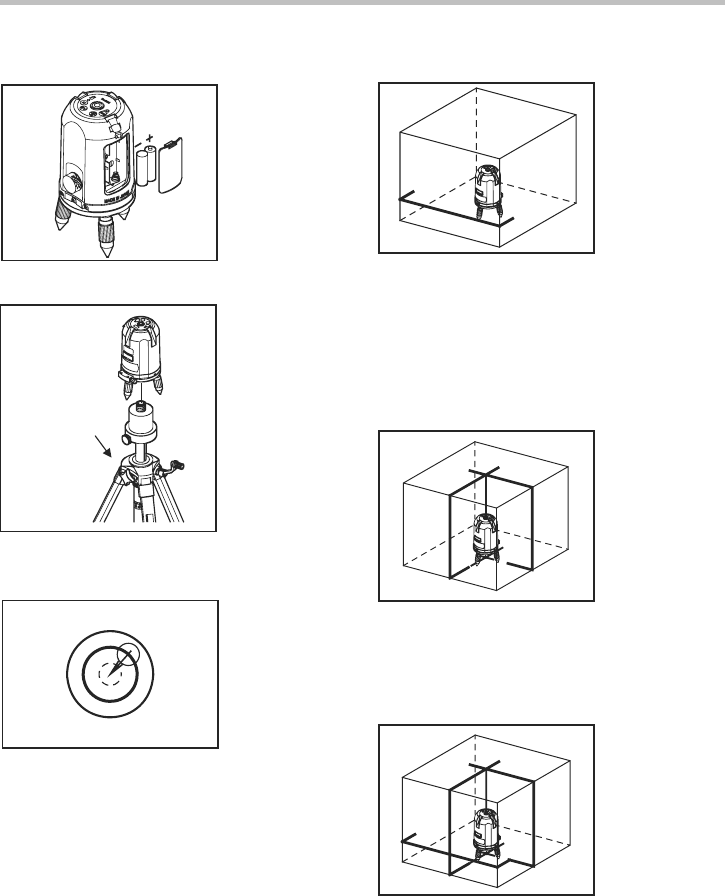
Horizontal
Fig. 4
Press the H button. The unit projects the horizontal
laser-beam line as illustrated in Fig.4.
You can adjust the height of the horizontal laser
line by mounting the unit to Elevating tripod
provided
(See the Fig. 2)
Vertical + Right angle (Vertical) + Plumb Point (floor)
Fig. 5
Press the 2V button. The unit projects the vertical
laser-beam lines as illustrated in Fig.5.
Vertical + Right angle (Vertical) + Horizontal + Plumb
Point (floor)
Fig. 6
Press the 2V/H button. The unit projects the
laser-beam lines (2 vertical and horizontal ones) as
illustrated in Fig.6.
4. Turn off the power switch after operation. The unit
will be automatically locked.