9
ENGLISH
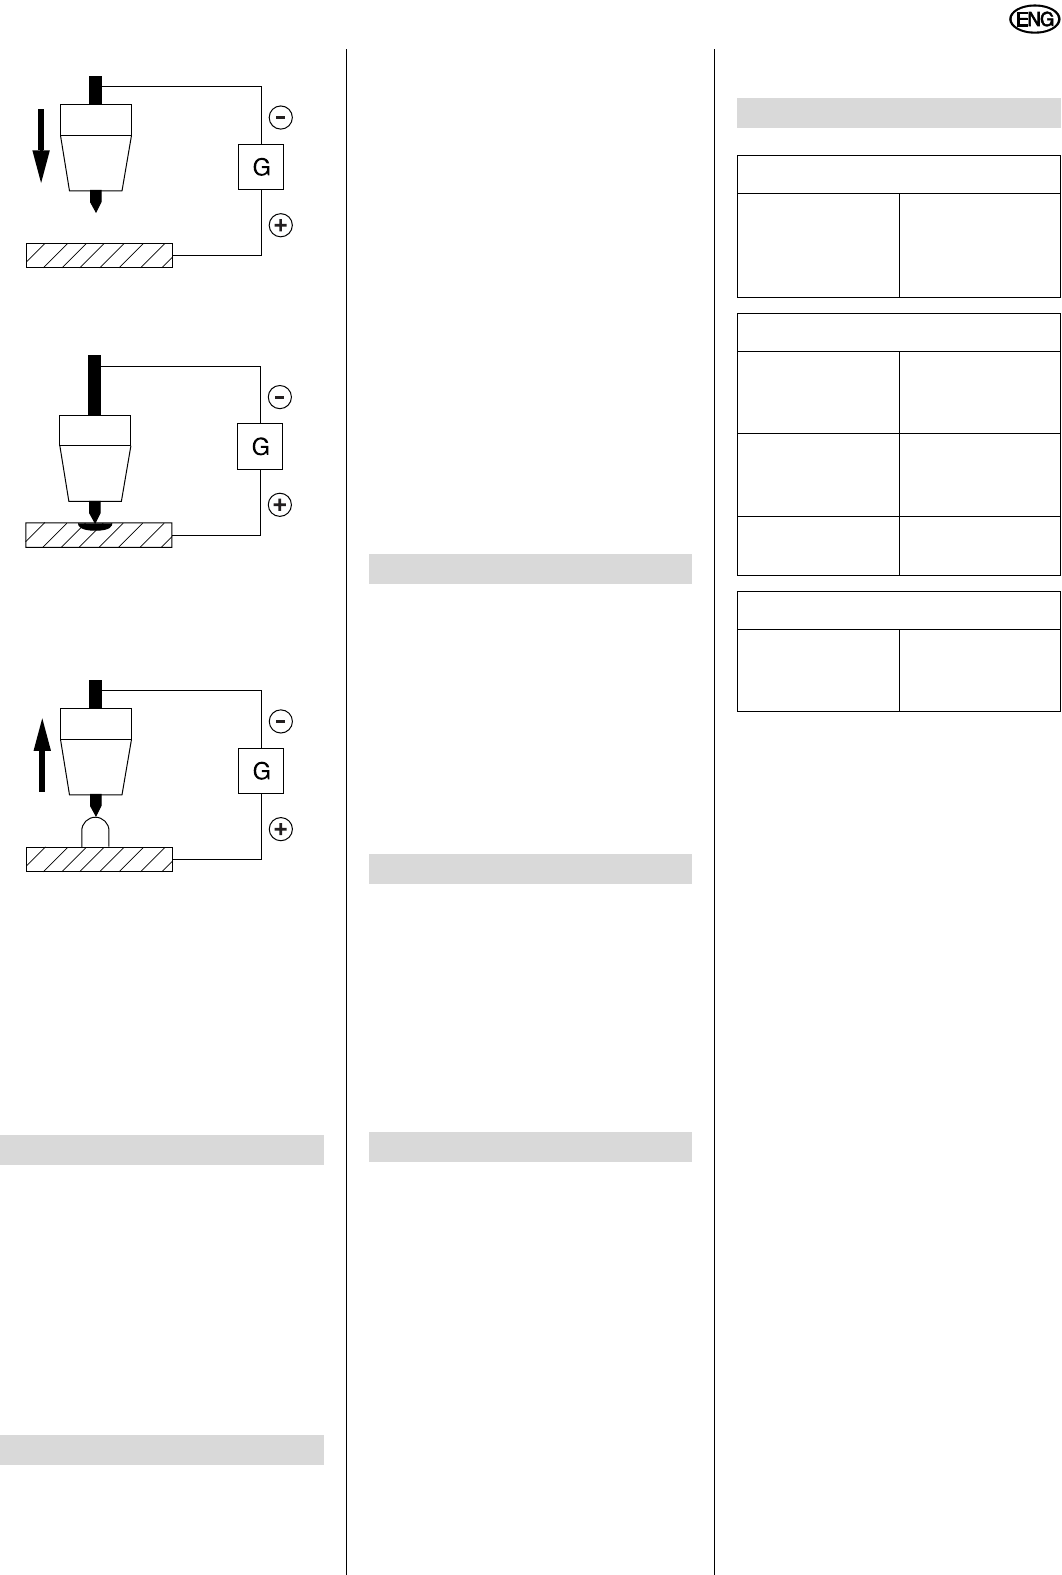
Approach the weld metal with the elec-
trode.
Contact of the electrode to the weld
metal causes a short-circuit, the welding
current is reduced. The material is
heated up and a short arc generated.
By lifting the electrode the arc is started
and will burn at the set welding current.
5.3 Shutting down
1. Set master switch to “0”.
2. Disconnect the earth cable from the
workpiece.
3. Unplug the power cable.
This welding machine contains no user-
serviceable parts.
Depending on dust accumulation the
dust should be blown out from the
machine with dry and oil-free com
-
pressed air every 4 - 6 months.
Periodically perform a check for visible
damage.
Contact a qualified electrician if any of
the cables are damaged.
For special welding tasks the following
accessories are available at specialised
dealers – see back cover for illustrations.
These accessories have been tested
with the machine and ensure operation
without any problem.
A TIG welding torch
SR 17 V for E 130/E 150,
required for TIG welding.
1) 2 m torch leads
2) 4 m torch leads
3) 8 m torch leads
B TIG welding torch
SR 26 V for E 170Si ,
required for TIG welding.
1) 4 m torch leads
2) 8 m torch leads
C Pressure regulator with 2 pressure
gauges
1) without stop valve
2) with stop valve
D Welding visor
1) helmet
2) automatic screen
A
Danger!
Repairs to power tools must be
carried out by qualified electricians
only!
Welding machines in need of repair can
be sent to the service centre of your
country. Refer to the spare parts list for
the address.
Please attach a description of the fault to
the power tool.
The machine's packaging can be 100 %
recycled.
Worn out power tools and accessories
contain considerable amounts of valua
-
ble raw and rubber materials, which can
be recycled.
These instructions are printed on paper
produced with elemental chlorine free
bleaching process.
The welding machine is equipped with
an overload protection. It will automati
-
cally turn OFF in case of excessive oper-
ating temperatures and under- or over-
voltage.
− The “Fault” indicator light is flashing.
In case of an excessive operating tem-
perature:
− DO NOT turn the machine OFF,
in order for the fan to cool the
machine down faster.
− The “Fault” indicator light will go out
when the temperature has fallen off
to normal levels.
You can now continue welding.
In case of under- or overvoltage:
− Check the mains voltage.
6. Maintenance
7. Available Accessories
8. Repairs
9. Environmental Protection
10. Disorders
11. Trouble Shooting
Brittle or porous weld seam
Workpiece not
clean?
Remove rust,
grease or other
contamination
prior to welding.
No welding current
Earth cable mak-
ing poor contact?
Check earth
cable for proper
contact.
The “Fault” indi-
cator light is
flashing.
Check mains
voltage and fan
Electronics
faulty?
Contact
service centre.
No function of machine
Supply circuit
fuse blown or
cut-out?
Replace or turn
ON again.


