


OM-1603 Page 4
SECTION 3 − INSTALLATION
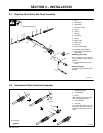
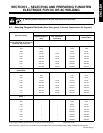
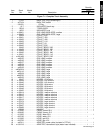
3-1. Required Torch Parts And Torch Assembly
Ref. 802 676
Assembling Torch Parts
8
7
5
4
3
6
1
2
13
14
15
10
12
11
1 Cup
2 Collet Body
3 Heat Shield
4 Backcap Insulator
5 Collet
6 O-Ring
7 Backcap
8 Torch Body
9 Handle
10 Power Cable
11 Water Hose
12 Gas Hose
13 Power Cable Adapter
14 International Style Adapter
15 Water Hose For International
Style Adapter
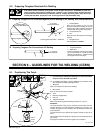
Assembling Torch Body
Keep connections tight. Replace
cup, heat shield, and backcap as
needed.
16 Tungsten Electrode (See Sec-
tion 5)
Installing Tungsten
To adjust tungsten position, loosen
backcap.
9
16
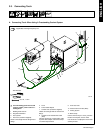
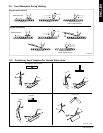
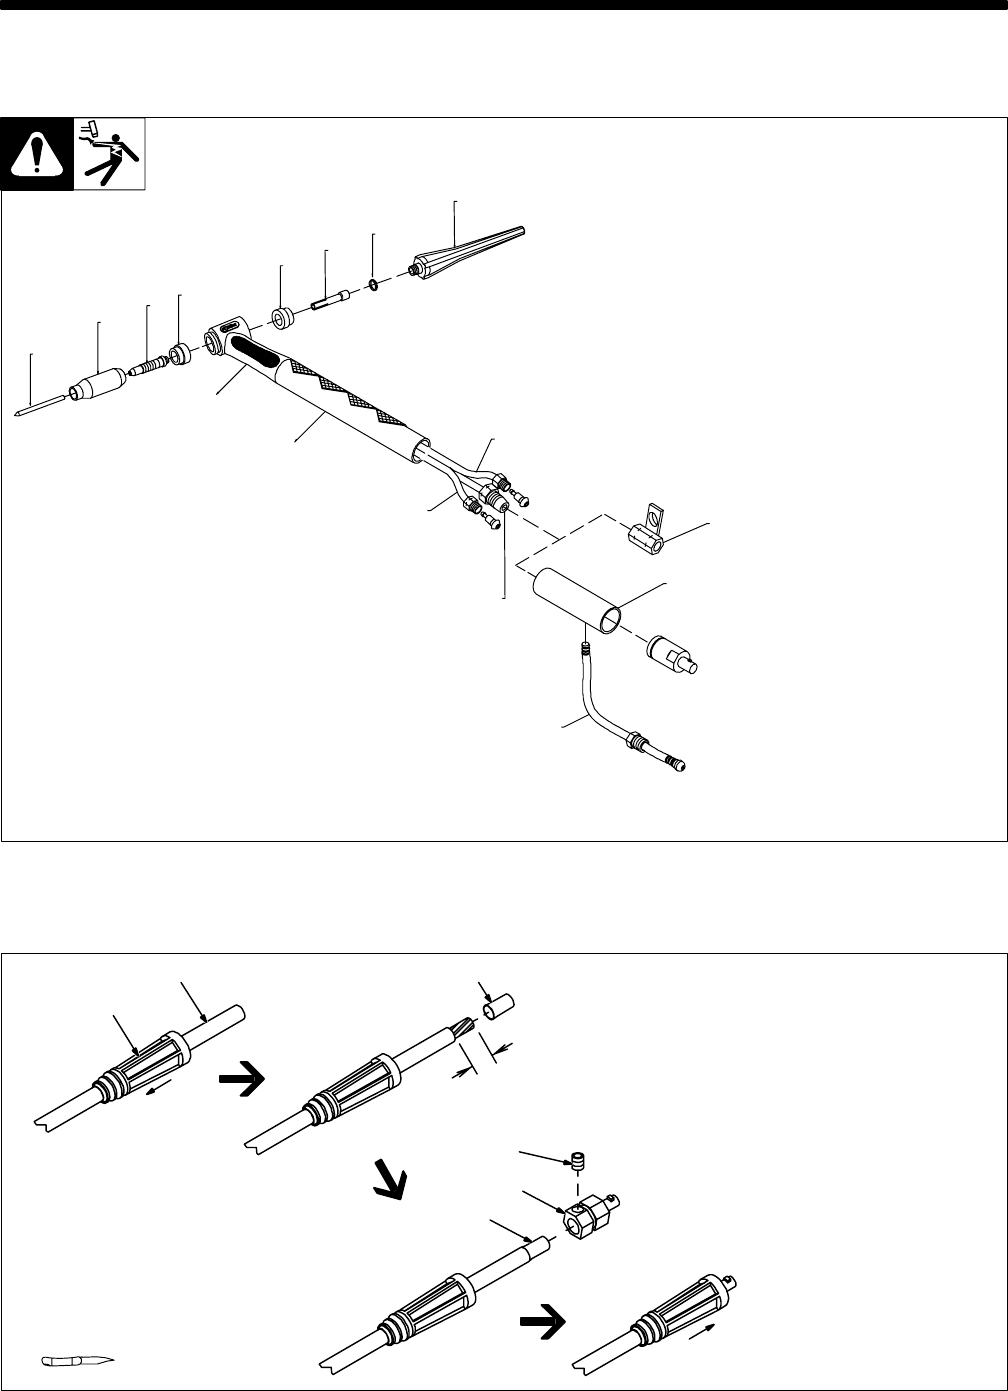
3-2. International Style Connector Assembly
1 Weld Output Cable
2 Insulating Boot
3 Sleeve
Slide insulating boot onto cable;
strip cable and install sleeve.
4 Connector Body
5 Setscrew
Insert cable with sleeve fully into
connector body, tighten setscrew,
and slide insulating boot over con-
nector.
ST-156 496
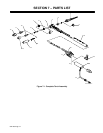
Tools Needed:
1
2
3
1 in
(26 mm)
3
4
5