


OM-1603 Page 6
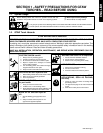
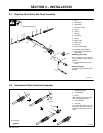
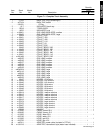
B. Connecting Torch To A Dynastyt 300 DX Or MaxstarR 300 DX TIGRunnert Unit
803 311
Tools Needed:
5/8, 7/8, 1-1/8 in
2
3
1
10
5
6
8
11
4
7
9
12
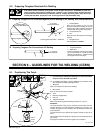
Y Turn Off welding power source
power before installing torch.
1 Gas Hose With 5/8-18 Right-
Hand Fittings (Customer Sup-
plied)
Connections:
2 Regulator/Flowmeter
3 Gas Cylinder
4 Coolant System
5 Torch
6 Coolant-Into Torch Hose (Blue)
7 Torch Gas Hose
8 Coolant-Out Of Torch/Power
Cable (Red)
9 International Style Adapter
Connect coolant-out of torch/power
cable to power cable adapter, and con-
nect adapter to weld output terminal.
10 Work Clamp
Connect work clamp to a clean, paint-
free location on workpiece, close to
weld.
Use wire brush or sandpaper to clean
metal at weld joint area.
11 Welding Power Source
12 Foot Control
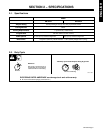
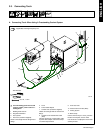
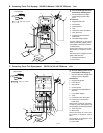
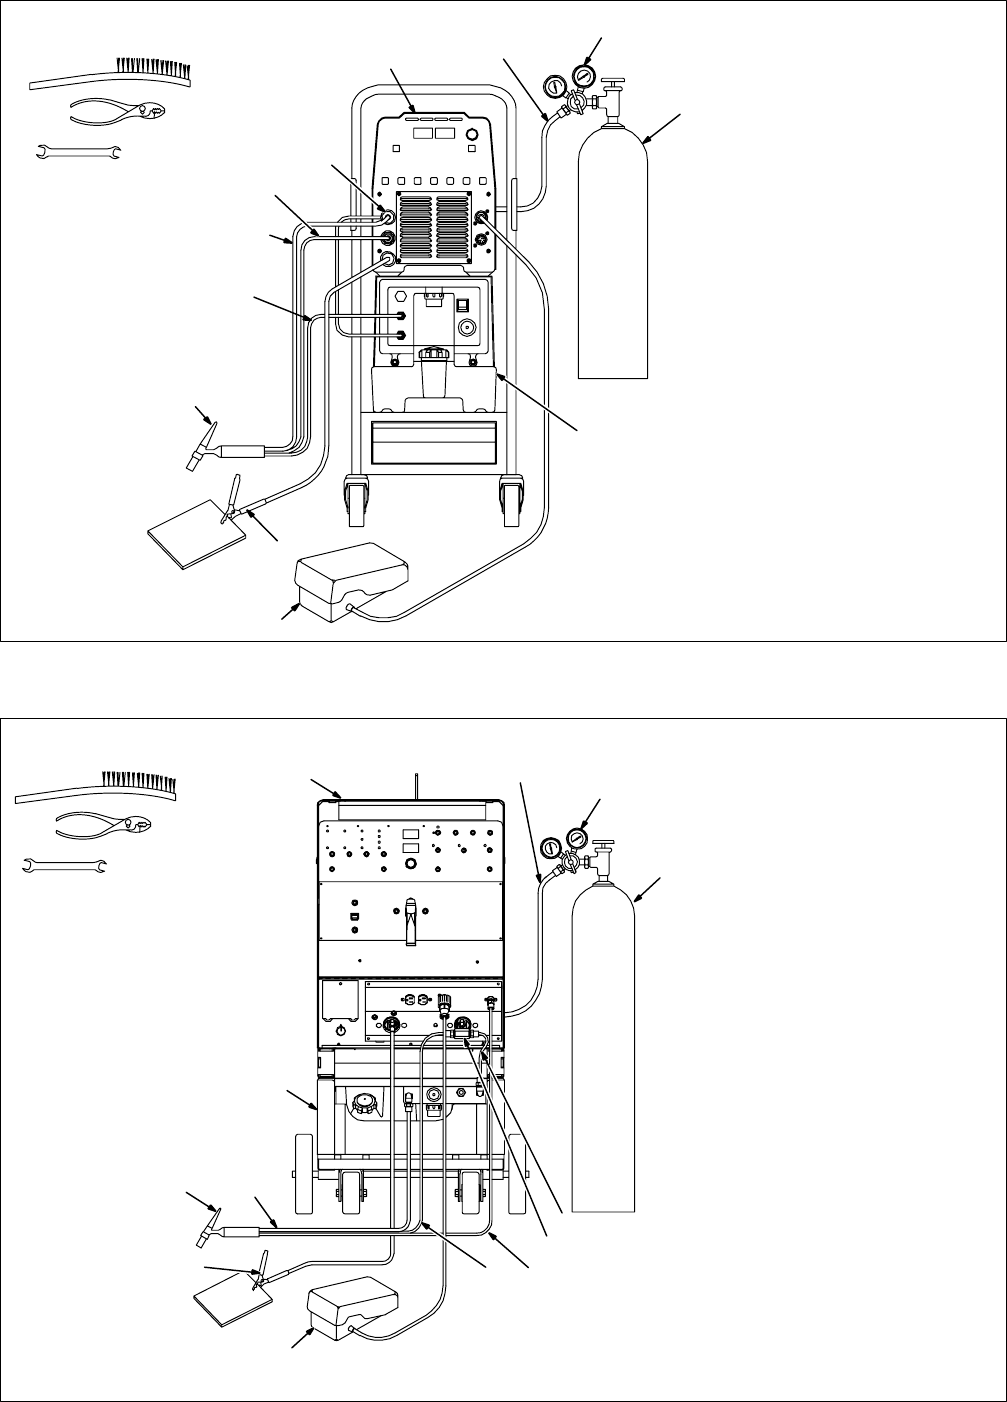
C. Connecting Torch To A SyncrowaveR 250 DX Or 350 LX TIGRunnert Unit
803 311
Tools Needed:
5/8, 7/8, 1-1/8 in
Y Turn Off welding power source
power before installing torch.
1 Gas Hose With 5/8-18 Right-Hand
Fittings (Customer Supplied)
Connections:
2 Regulator/Flowmeter
3 Power Source
4 Gas Cylinder
5 Coolant System
6 Coolant Hose (Supplied With TI-
GRunner)
7 Power Cable Adapter
8 Torch
9 Coolant-Into Torch Hose (Blue)
10 Coolant-Out Of Torch/Power
Cable (Red)
Connect torch coolant-out of torch/pow-
er cable to power cable adapter, and
connect adapter to weld output terminal.
11 Torch Gas Hose
12 Work Clamp
Connect work clamp to a clean, paint-
free location on workpiece, close to
weld.
Use wire brush or sandpaper to clean
metal at weld joint area.
13 Foot Control
4
3 1
2
5
6
11
8
10
9
12
7
13