


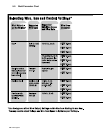


OM-1330 Page 27
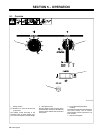
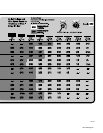
6-3. Unit Overload
Thermostats TP1 in rectifier SR1 and TP2 in stabilizer Z1 protect the unit from damage due to overheating. If TP1
and/or TP2 opens welding output will shut off. Wait several minutes before trying to weld.
Supplementary protector CB2 (Power switch) protects transformer T1 from overload. If CB2 opens, unit power will
shut off. Check input power supply, and press Power switch to turn unit back on.
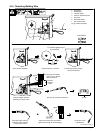
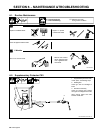
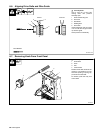
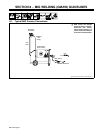
6-4. Replacing Gun Contact Tip
Ref. 800 797-C
Y Turn Off power.
1 Nozzle
2 Contact Tip
Cut off welding wire at contact tip.
Remove nozzle.
Remove contact tip and install new
contact tip. Reinstall nozzle.
Tools Needed:
1
2
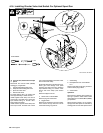
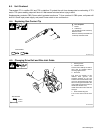
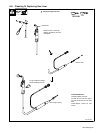
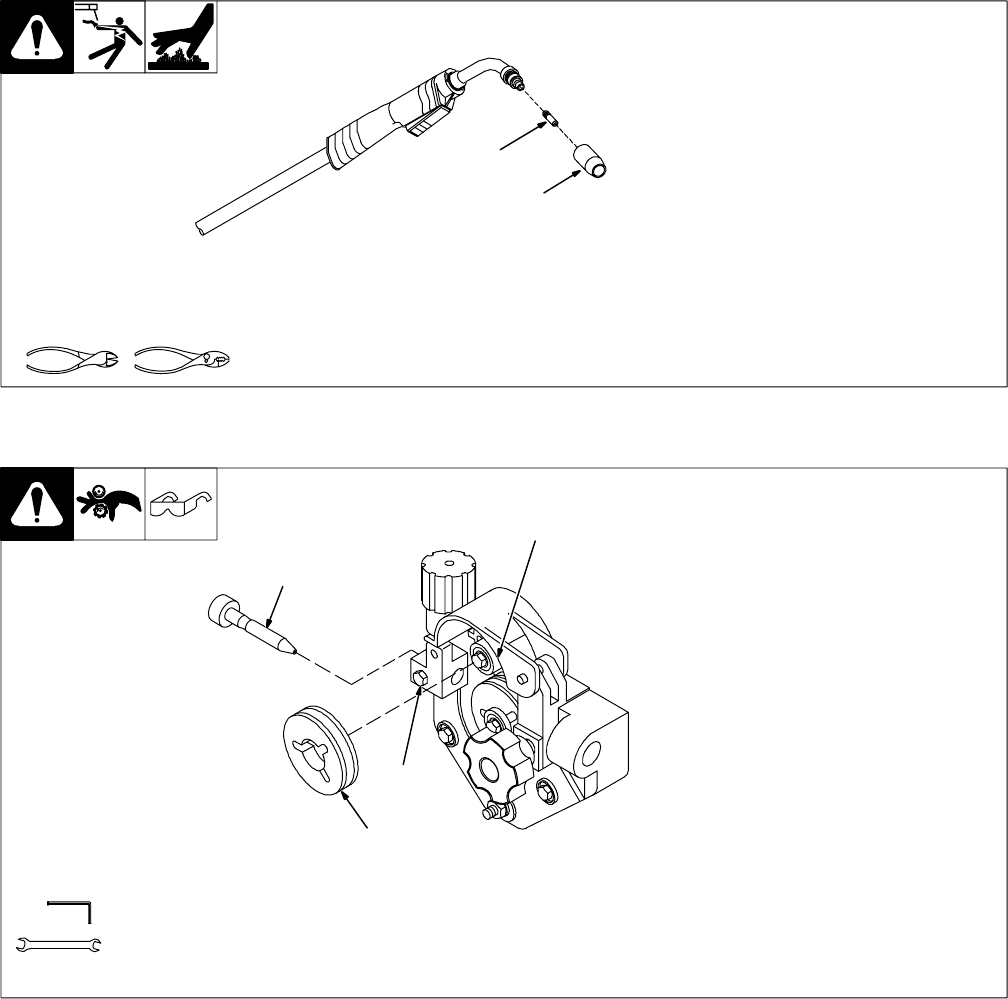
6-5. Changing Drive Roll and Wire Inlet Guide
1 Securing Screw
2 Inlet Wire Guide
Loosen screw. Slide tip as close to
drive rolls as possible without
touching. Tighten screw.
3 Drive Roll
The drive roll consists of two
different sized grooves. The
stamped markings on the end
surface of the drive roll refers to the
groove on the opposite side of the
drive roll. The groove closest to the
motor shaft is the proper groove to
thread (see Section 4-15).
Install correct drive roll for wire size
and type.
4 Drive Roll Securing Nut
Turn nut one click to secure drive
roll.
Tools Needed:
5/64 in
7/16 in
Ref. 802 990-A
1
2
3
4