


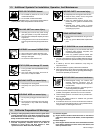
OM-1213 Page 11
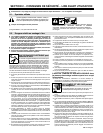
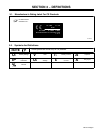
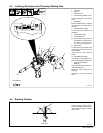
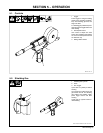
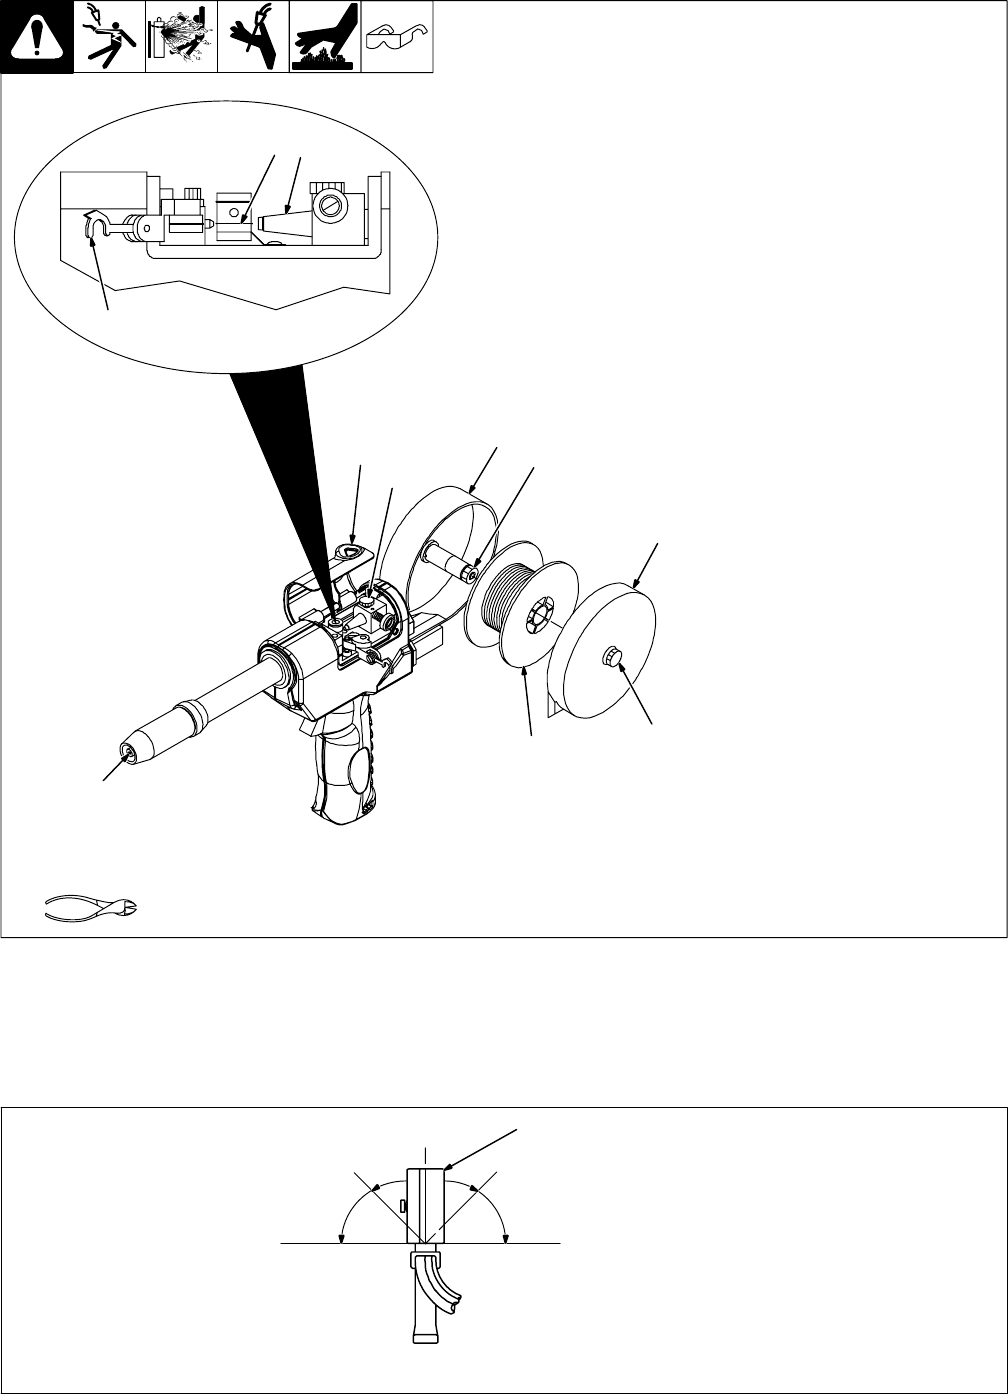
4-3. Installing Wire Spool And Threading Welding Wire
150 436-F
1 Top Cover
2 Canister
3 Canister Cover
4 Thumbscrew (Canister Cover)
Loosen thumbscrew and remove
cover.
5 Wire Spool
Loosen wire from spool, cut off bent
wire, and pull 6 in (150 mm) of wire
off spool.
6 Pressure Roll Assembly
Lift arm and open pressure roll
assembly.
7 Canister Inlet Guide
8 Drive Roll Groove
. For wire sizes .035 in (0.9 mm)
and smaller use small groove,
and .047 in (1.2 mm) and 1/16
in (1.6 mm) use large groove.
9 Contact Tip
Thread wire through canister inlet
guide, along drive roll groove, and
out contact tip.
Install spool so wire feeds off
bottom.
10 Spool Brake Thumbnut
If necessary, turn thumbnut coun-
terclockwise slightly to install spool.
11 Thumbscrew (Canister
Rotation)
Loosen thumbscrew to rotate can-
ister (see Section 4-4).
Close and secure pressure roll
assembly.
Reinstall top cover and canister
cover.
Tools Needed:
9
1
2
10
3
4
5
6
7
8
11
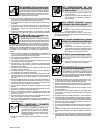
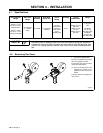
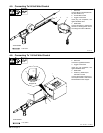
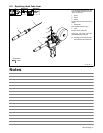
4-4. Rotating Canister
150 433-A
1 Canister
Loosen canister rotation thumb-
screw (see Section 4-3). Move can-
ister to desired position. Tighten
thumbscrew.
1
Rear View