


OM-1594 Page 34
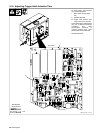
Ref. 151 599-F / Ref. 801 556-C / 801 564−E / Ref. 151 666-G / Ref. 200 371
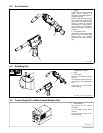
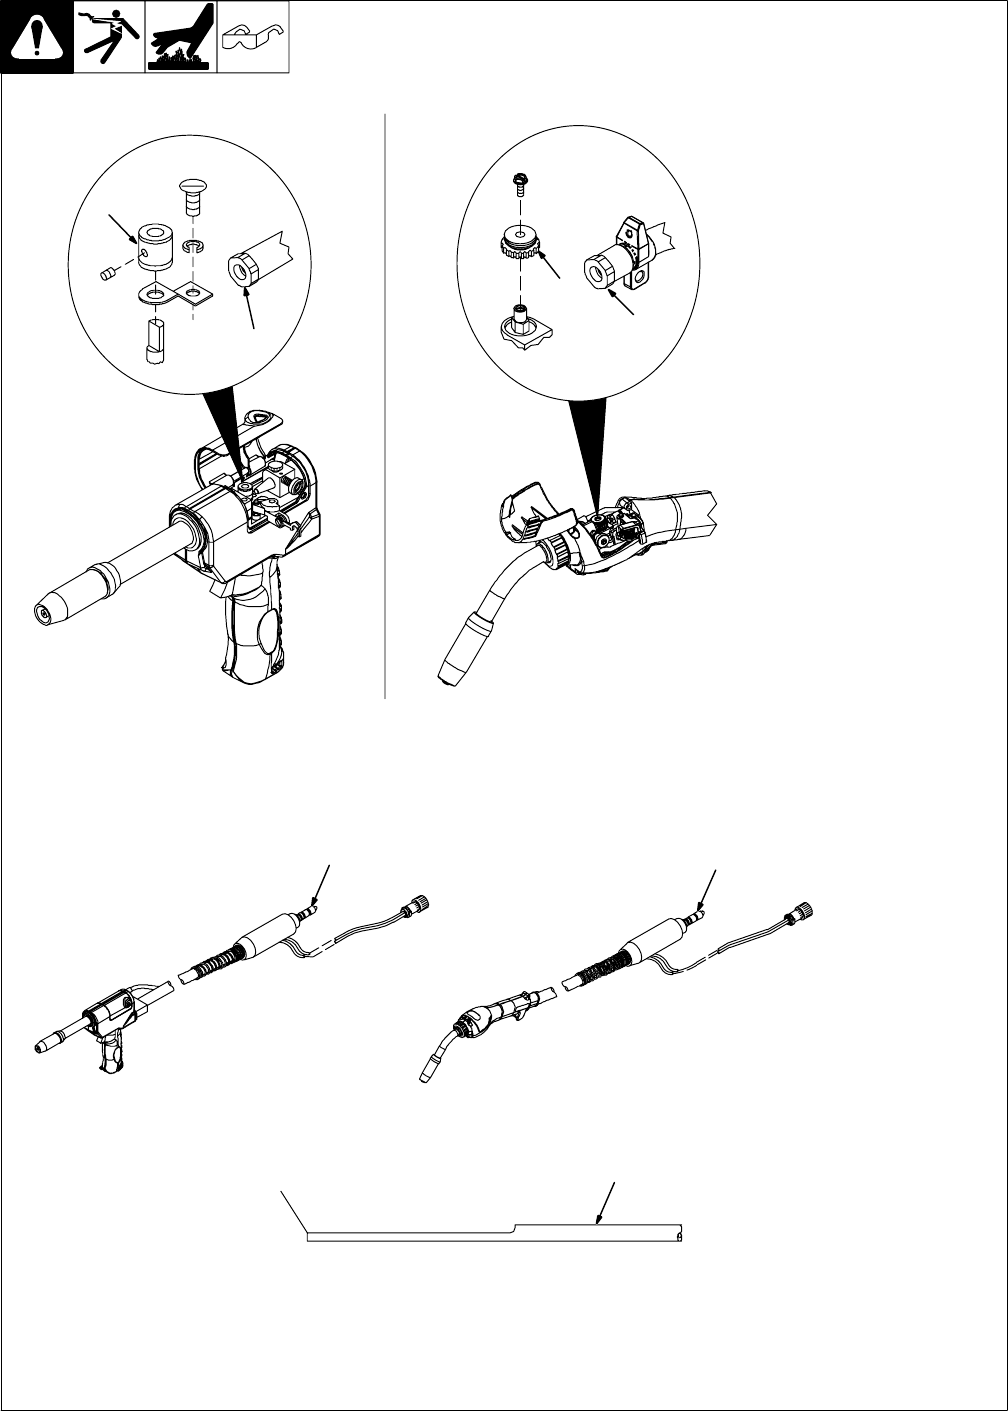
7-4. Replacing The Liner
Y Turn Off welding power
source and wire feeder.
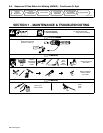
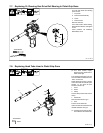
1 Drive Roll
2 Collet Nut
Lay gun cable out straight. Remove
drive roll on gun and collet nut on lin-
er tube assembly.
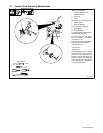
3 Gun Connector
Remove inlet guide from gun con-
nector, and remove old liner.
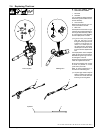
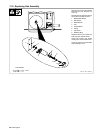
4 New Liner
Insert split end of new liner into gun
connector and continue feeding lin-
er through cable assembly until lin-
er is through liner tube assembly
and all of split portion is visible.
. If gun is a 15 ft (4.5 m) model,
push the split end of liner
through until the opposite end
is sticking out of the gun con-
nector 1 to 2 inches (2.5 to 5
cm). After trimming, the section
with the split on it can be saved
to use as another replacement
liner.
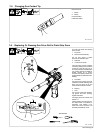
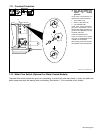
Cut off split portion of liner. Replace
collet nut with new nut from this kit.
Reinstall inlet guide at gun connec-
tor and tighten onto liner.
The liner end will not stick out of the
collet nut supplied with this kit.
At the gun connection end, cut liner
as close as possible to control
(push motor) drive rolls.
Refer to Owner’s Manual for in-
structions on rethreading wire.
. On pistol grip models it may be
easier to replace the collet nut
with the liner conduit removed
from the gun housing block.
XR-Edge Gun
Split End
1
3
Pistol Grip Gun
3
4
2
2
1