


4
5
ASSEMBLY
Loading/Changing the batteries
Replace the batteries when the
symbol
fl ashes permanently in the display. Only
use alkaline batteries. If the meter will not
be used for a long time, remove the bat-
teries as a protection against corrosion.
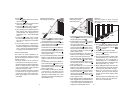
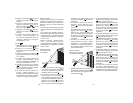
1. To open the compartment lid, twist a
coin pressed into compartment slot.
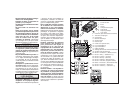
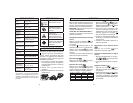
SYMBOLOGY
Volts Direct Current
Laser product
Avoid Exposure: Laser Radiation
Is Emitted From This Aperture
CAUTION Laser Light -
Do Not Stare Into Beam
To reduce the risk of injury, user
must read operator’s manual.
2. Insert two (2) AAA batteries, as
displayed.
3. Replace compartment lid securely.
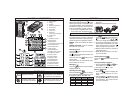
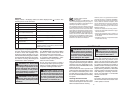
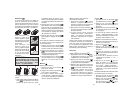
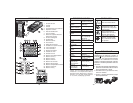
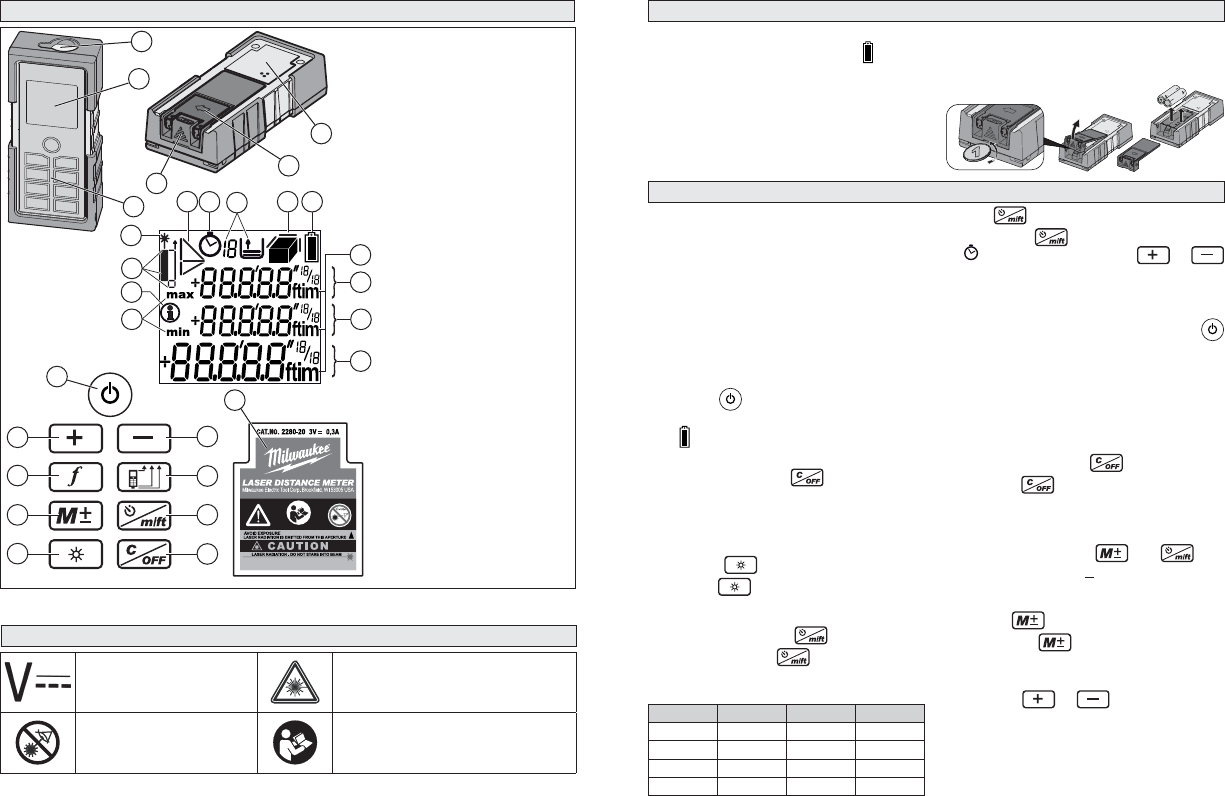
FUNCTIONAL DESCRIPTION
1. Laser window
2. Display
3. Keypad
4. Battery compartment
5. End bracket
6. Nameplate
7. Laser "ON"
8. Reference
(front/rear/end bracket)
9. Pythagorean
10. Timer
11. Historical memory
12. Area/Volume
13. Battery status
14. Units with exponents (2/3)
15. Intermediate line 2
16. Intermediate line 1
17. Main targets
18. Min/Max display
19. Display notice symbol
20. On/Measure button
21. Add (+) button
22. Function button
23. Memory button
24. Backlight button
25. Clear/Off button
26. Timer/Units button
27. Reference button
28. Subtract (
-
) button
7
8
9
10
11
12
13
14
15
16
17
18
19
MAXIMUM POWER <1mW WAVE LENGTH 630-670nm
CLASS II LASER PRODUCT COMPLIES WITH 21
CFR 1040.10 AND 1040.11
READ OPERATOR’S MANUAL
Made In Hungary
21
22
23
24
25
26
27
28
20
1
2
3
4
5
6
6
OPERATION
Timer
Press the1.
button to set the timer
to 5 seconds. Use the or
buttons to change the time lapse.
On the fi rst measurement, the count-2.
down begins immediately. For addi-
tional measurements, press the
button to begin the count-down.
When the timer reaches 5 seconds, it 3.
will begin to beep.
When the timer reaches 0, the mea-4.
surement is taken.
Clearing last entry
Press the button to clear the last
action.
Turning the beep on and off
Press and hold the 1.
and but-
tons together for 5 seconds.
The beep is turned on or off. 2.
Memory recall
Press the 1.
button to display the
latest value (measured or calcu-
lated).
Use the 2. or buttons to scroll
through the last 10 values (measured
and calculated). The values can also
be used in functions.
Button use
For some buttons, the way it is pressed
determines its function. These terms ap-
pear throughout the operation section:
PRESS - press and release the button
briefl y.
PRESS and HOLD - press in and hold
the button for 2 seconds.
Switching on/off
Press the
button once to turn on the
meter and laser.
The
symbol is displayed until the next
button is pressed.
Press and hold the button to turn
off the meter.
The meter turns off automatically after
three minutes of non-use.
Backlight
Press the button to turn the display
backlight on or off.
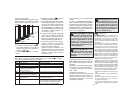
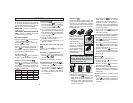
Selecting the units
Press and hold the button to change
the measurement units. Repeat to scroll
through the settings. Possible units:
Setting Distance Area Volume
- - - m 0.000 m 0.000 m² 0.000 m³
- -' -" 0'0'' 1/16 0.00 ft² 0.00 ft³
- - - in 0 in 1/16 0.00 ft² 0.00 ft³
- - - ft 0.00 ft 0.00 ft² 0.00 ft³