


Page 8
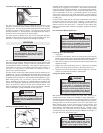
Grinding wheels should be dressed when worn, out of round or the
surface face is clogged or worn smooth. New wheels should be bal-
anced by dressing to eliminate vibration. For dressing abrasive wheels,
a diamond dresser is preferred. A more common disc-type dresser con-
tains a replaceable set of star or gear-shaped pieces of hard metal.
These discs rotate freely and rapidly when held in contact with the
moving face of the wheel and dig in to remove the loading and small bits
of dulled grain.
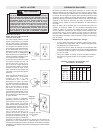
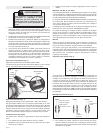
To dress wheels, adjust the tool rest away from the wheel so the heel of
the dresser hooks over the rest and is guided by it as the dresser is
moved evenly across the wheel face. Dressing should start at the
highest surface of the wheel face. If vibration is still evident after
dressing, loosen the wheel, rotate 90° and tighten. Repeat the dressing
procedure.
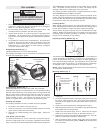
For Wire Wheel Brush Application
OPERATION
Too much pressure applied to a cold wheel is a common cause of wheel
failure and must be avoided. Work should never be forced against a cold
wheel but applied gradually, giving the wheel an opportunity to warm
and minimize the chance of breakage. This applies to starting work on
used wheels as well as to new wheels which have been stored in a
cool place. Do not grind on a wheel while it is coasting to a stop or
before it has reached full speed.
For best results, always keep grinding wheels properly dressed and in
good balance. The use of well balanced wheels will add to the life of the
bearings of the grinder by eliminating the most common cause of vibration
and permits more accurate work. (See "Dressing Grinding Wheels", Fig. 5.)
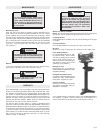
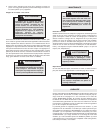
When making heavy cuts, use the face, not the sides of the cutting
wheel. Grinding on the flat sides of a straight wheel is hazardous and
should not be attempted. Special abrasive disc wheels should be used
when it is necessary to grind on the flat side of straight wheels. The
discs are designed to be mounted with one flat side against a suitable
steel machine plate to safely withstand the side pressure.
Wrong
Fig. 5
Unplug tool before removing or attaching
accessories. Maximum Safe Operating
Speed of wire brush or grinding wheel must
be greater than no load RPM of tool. Guards
must be used with grinding wheels and wire
wheels. Only use specifically recommended
accessories. Others may be hazardous.
To reduce the risk of personal injury and
damage to the tool, use ONLY accessories
rated at or above the RPM listed on the tool's
nameplate.
To reduce the risk of personal injury, always
use safety glasses. Every day eye glasses
only have impact resistant lenses. They are
NOT safety glasses.
Because the wires on wire wheel
brushes are directed towards the opera-
tor, a guard must be used to protect the
operator when fatigued wires break.
Never exceed Maximum Safe Operating
Speed of brush. Do not use a damaged brush
or one which is functioning improperly
(throwing wires, out-of-balance, etc.). These
conditions increase the possibility of further
brush failure and possible injury. Discard
and replace damaged brushes immediately.
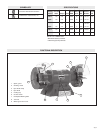
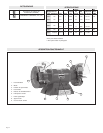
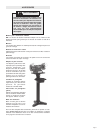
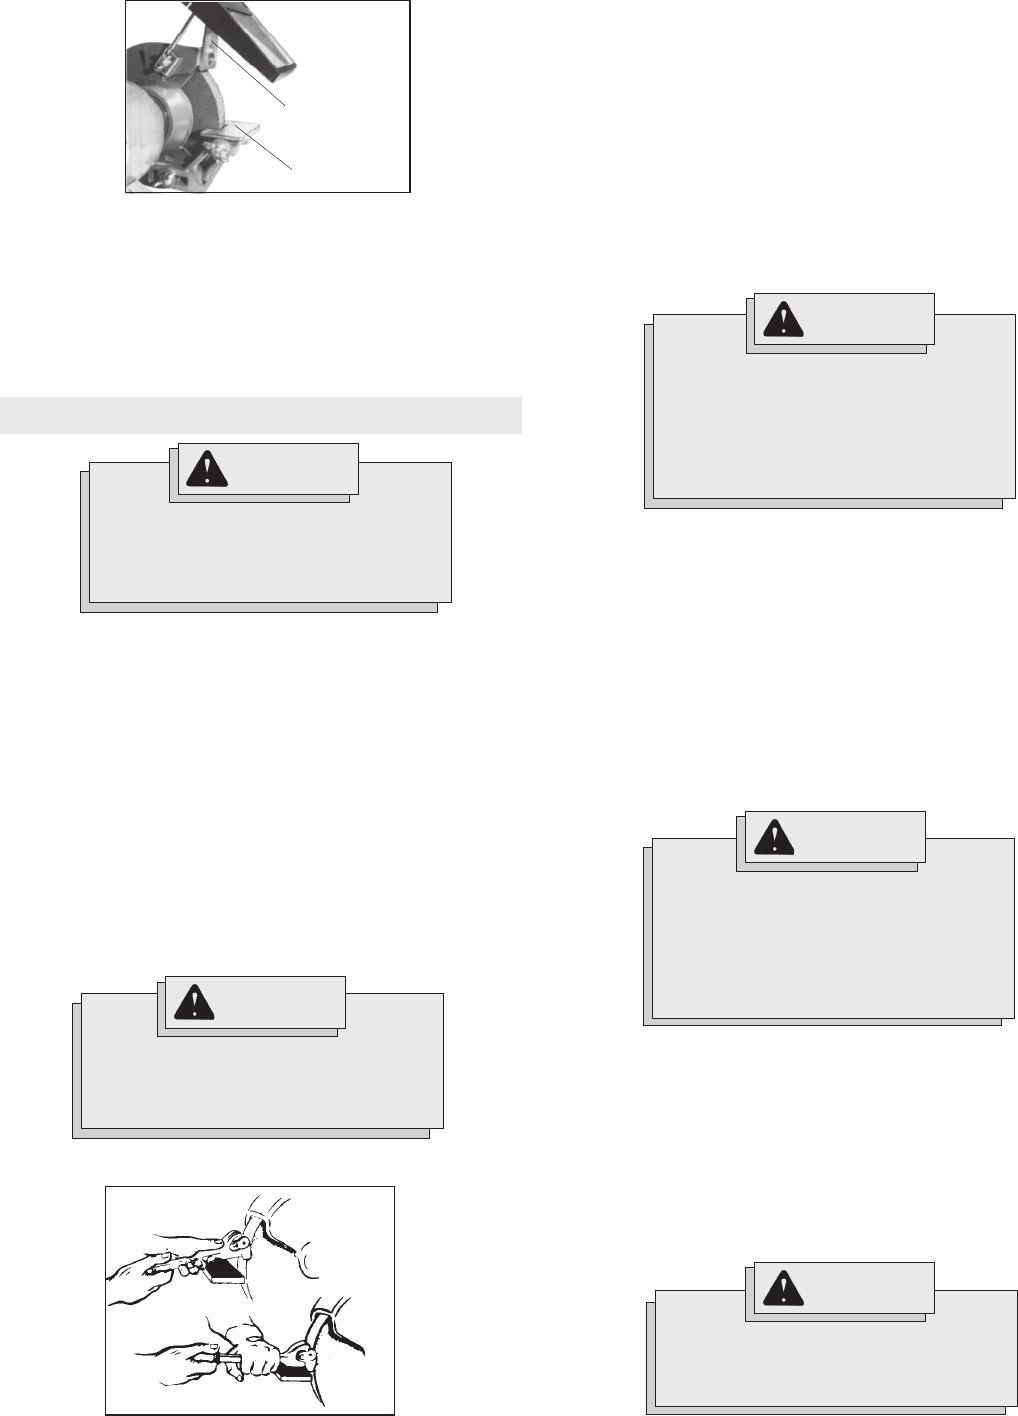
Spark Guard
Tool Rest
Fig. 4
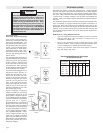
Tool Rests and Spark Guards (Fig. 4)
WARNING!
WARNING!
WARNING!
WARNING!
Dressing Grinding Wheels (Fig. 5)
Right
WARNING!
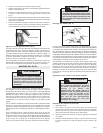
Installing Wire Wheel Brushes
1. Unplug tool.
2. To mount the wire wheels, remove the wheel guard covers from the
guards. Remove the hex nuts - the threads on the spindle are such that
the nut tightens as the wheel rotates when the tool is in operation.
3. Slide the wire wheel on to the spindle so that the wheel rests firmly
against the flange.
4. Replace the outer wheel flange and nut. Make sure the cupped
portion of the outer flange is resting on the wheel (See Fig. 3).
5. Tighten the end nuts only enough to hold the wheel firmly. Too much
pressure may damage the wheel or related parts.
Using Wire Wheel Brushes
Wire brushes are useful for removing rust, scale, burrs, weld sag, etc.
A wide variety of wire brushes are available for many applications.
Test wire brush for balance and loose or damaged wires by running tool
at no load speed for at least 30 seconds before applying it to your work.
During this time, no one should stand in front of or in line with the tool.
When applying brush to work, avoid using too much pressure. This
causes over-bending of wires and heat buildup resulting in premature
wire breakage, rapid dulling and reduced brush life. Instead of using
more pressure, use a wire brush with more aggressive cutting action
(increased wire size, decreased wire length or different brush type, i.e.
knot type instead of crimped wire type).
The tool rests and spark guards are adjustable and should be reset
whenever a wheel has been replaced, after dressing or as a wheel
becomes worn. The tool rest should be positioned close to the wheel at
all times to provide maximum support. The distance from the wheel
should not exceed 1/8". A level tool rest, set slightly below the center of
the wheel, is the most practical and safest position.
The spark guards are located at the top of each wheel and should be
adjusted for wheel wear so that the guard is approximately 3/16" from
the wheel. This will prevent sparks from striking the operator.