


page 7
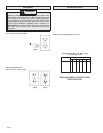
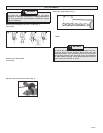
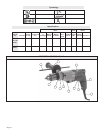
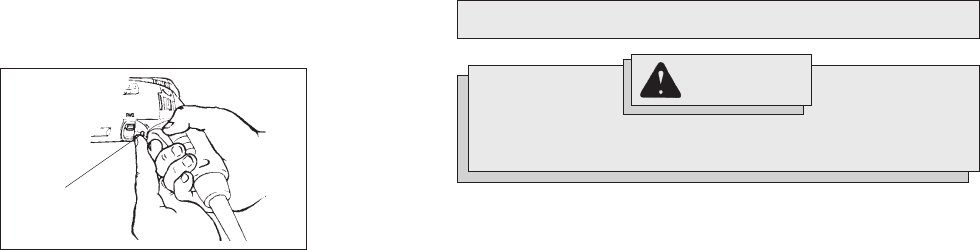
Locking Trigger Switch (Fig. 8)
The lock button holds trigger in the ON position for continuous full speed
use.
1. To lock the trigger switch, push in the lock button while pulling the
trigger. Then release the trigger.
2. To unlock the trigger switch, pull the trigger and release. The lock
button will pop out.
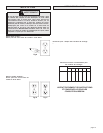
Selecting Speed
The speed can be changed when the tool is at a complete stop or
running under no load.
1. For Low speed (up to 1 000 rpm), turn the speed selector to
position 1.
2. For High speed (up to 2 500 rpm), turn the speed selector to
position 2.
Starting, Stopping & Controlling Speed
Place the drill bit on the work surface and apply firm pressure before
starting. A center punch may be used, in steel, to make starting easier.
Start the drill slowly to permit maximum control and to prevent the bit from
wandering. When the hole has been properly started, increase the speed
until maximum cutting efficiency is reached.
Increasing the speed of the drill permits increasing the amount of pres-
sure applied. However, too much pressure will slow the drill bit and
retard drilling efficiency. Too little pressure will cause the bit to slide over
the work and cause excessive friction which will dull the point of the bit.
See Specifications for RPM and blows per minute information.
1. To start the tool, pull the trigger.
2. To stop the tool, release the trigger.
3. To vary the speed, increase or decrease pressure on trigger. The
further the trigger is pulled, the greater the speed.
Stalling
If the drill slows due to loading, increase the speed intil it operates
properly. If stalling occurs, reverse the motor and remove the bit from the
work and start again.
Operating
Position the tool, grasp the handles firmly and pull the trigger. Always
hold the tool securely using both handles and maintain control. This tool
has been designed to achieve top performance with only moderate
pressure. Let the tool do the work.
If the speed begins to drop off when drilling deep holes, pull the bit
partially out of the hole while the tool is running to help clear dust. Do not
use water to settle the dust since it will clog the bit flutes and tend to
make the bit bind in the hole.
Lock
button
Fig. 8
APPLICATIONS
Drilling in Wood, Composition Materials and Plastic
When drilling in wood, composition materials and plastic, select the drill
operating mode. Start the drill slowly, gradually increasing speed as you
drill. Select low speeds for plastics with a low melting point.
Drilling in Metal
When drilling in metal, select the drill operating mode. Use high speed
steel twist drills or hole saws. Use a center punch to start the hole.
Lubricate drill bits with cutting oil when drilling in iron or steel. Use a
coolant when drilling in nonferrous metals such as copper, brass or
aluminum. Back the material to prevent binding and distortion on break-
through.
Drilling in Masonry
When drilling in masonry, select the hammer-drill operating mode. Use
high speed carbide-tipped bits. Drilling soft masonry materials such as
cinder block requires little pressure. Hard materials like concrete require
more pressure. A smooth, even flow of dust indicates the proper drilling
rate. Do not let the bit spin in the hole without cutting. Do not use water
to settle dust or to cool bit. Do not attempt to drill through steel reinforcing
rods. Both actions will damage the carbide.
To reduce the risk of electric shock, check work area for
hidden pipes and wires before drilling.
WARNING!