


page 5
WARNING!
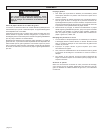
TOOL ASSEMBLY
To reduce the risk of injury, always unplug tool before
attaching or removing accessories or making adjustments.
Use only specifically recommended accessories. Others
may be hazardous.
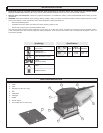
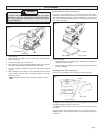
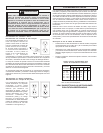
Attaching Sandpaper (Fig. 1)
Pad
Fig. 1
Clamp lever
Clamp grip
1. Unplug sander.
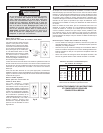
2. Use 1/4 sheet of sandpaper (4-1/2" x 5-1/2") (see “Selecting Sand-
paper and Grits”).
3. To open clamp grip, pull out clamp lever.
4. With grit side out, place sandpaper between clamp grip and base
plate while aligning edges of sandpaper with pad edges.
5. To secure sandpaper, release clamp grip and return it to its original
position.
6. Wrap sandpaper around length of pad and attach free end of sheet
under opposite clamp as above. Pre-folding sandpaper will make
attachment easier.
NOTE: Sandpaper must be drawn as tight as possible for best
results.
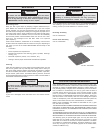
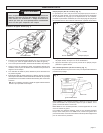
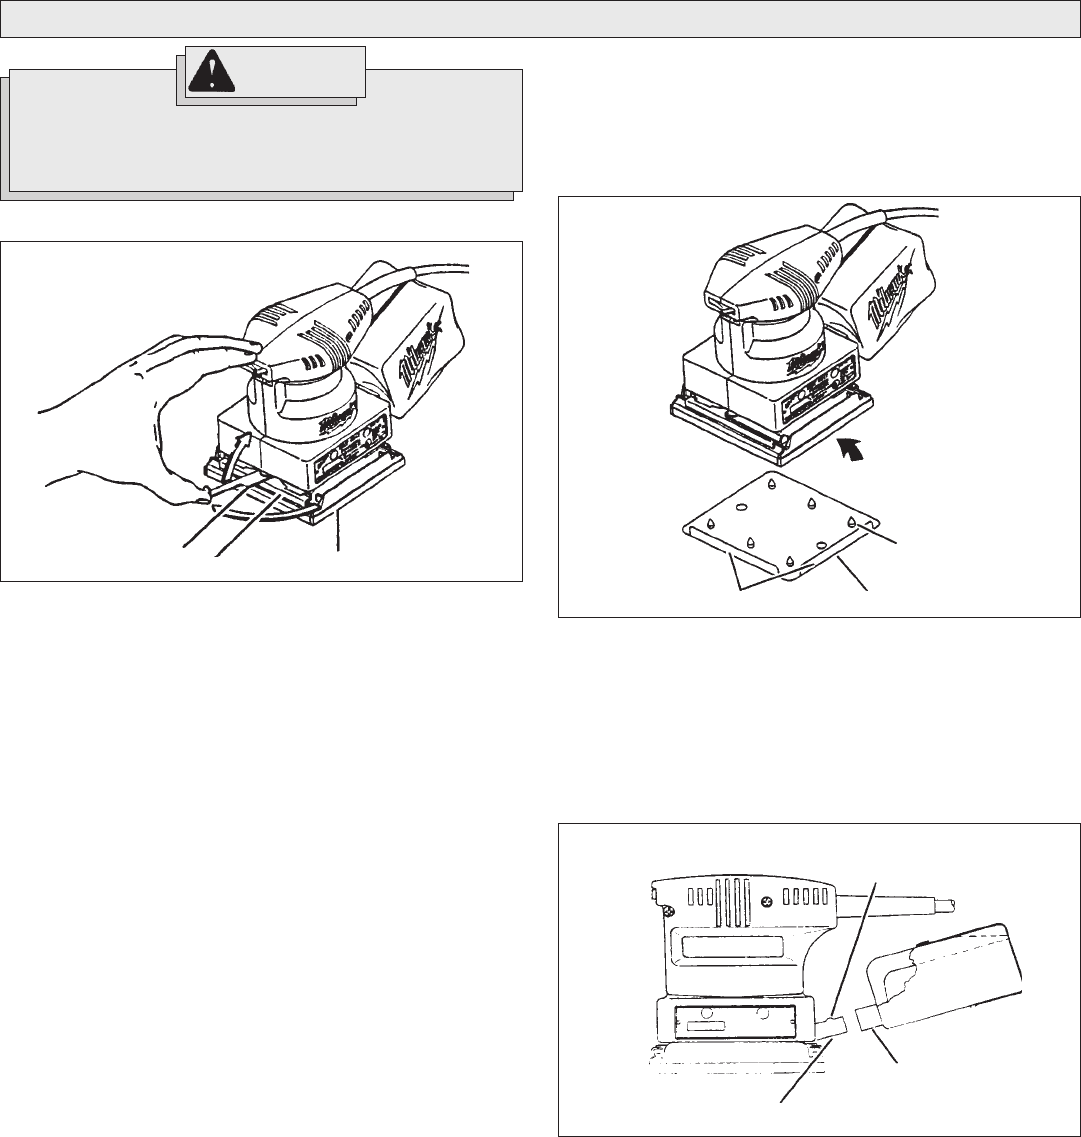
To use punchplate:
1. Align bent edges of plate with edges of sandpaper so sandpaper is
completely covered by plate.
2. Puncture holes in sandpaper by firmly pressing punch plate spikes
through sandpaper.
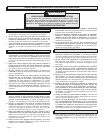
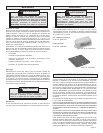
Dust Bag (Cat. No. 6017 only) (Fig. 3)
Cat. No. 6017 is equipped with a dust bag for easy dust pickup.
To attach dust bag, slide bag’s entry port over sander’s dust exit spout
until detent engages with hole in entry port.
To remove dust bag, gently twist entry port and pull it away from dust
exit spout.
For best results, empty dust bag when it is no more than half full. To
empty dust bag, remove bag from sander. Unzip bag and gently tap to
remove dust.
Entry port
Fig. 3
Detent
Dust exit spout
Bent edges
Fig. 2
Spikes
Punch plate
Punch Plate (Cat. No. 6017 only) (Fig. 2)
Cat. No. 6017 is equipped with a punch plate which punctures holes in
sandpaper. These holes allow dust to be removed from work surface
and vacuumed into the dust bag. It may be necessary to re-punch holes
with punch plate during Sander operation to keep the dust pick-up sys-
tem working efficiently.