EN-5
1
Start the Projector-Control Device Installer.
• Select [Start] - [All Programs] - [Mitsubishi] -
[Mitsubishi Projector - Control Device Installer] (in
the case of Windows
®
XP).
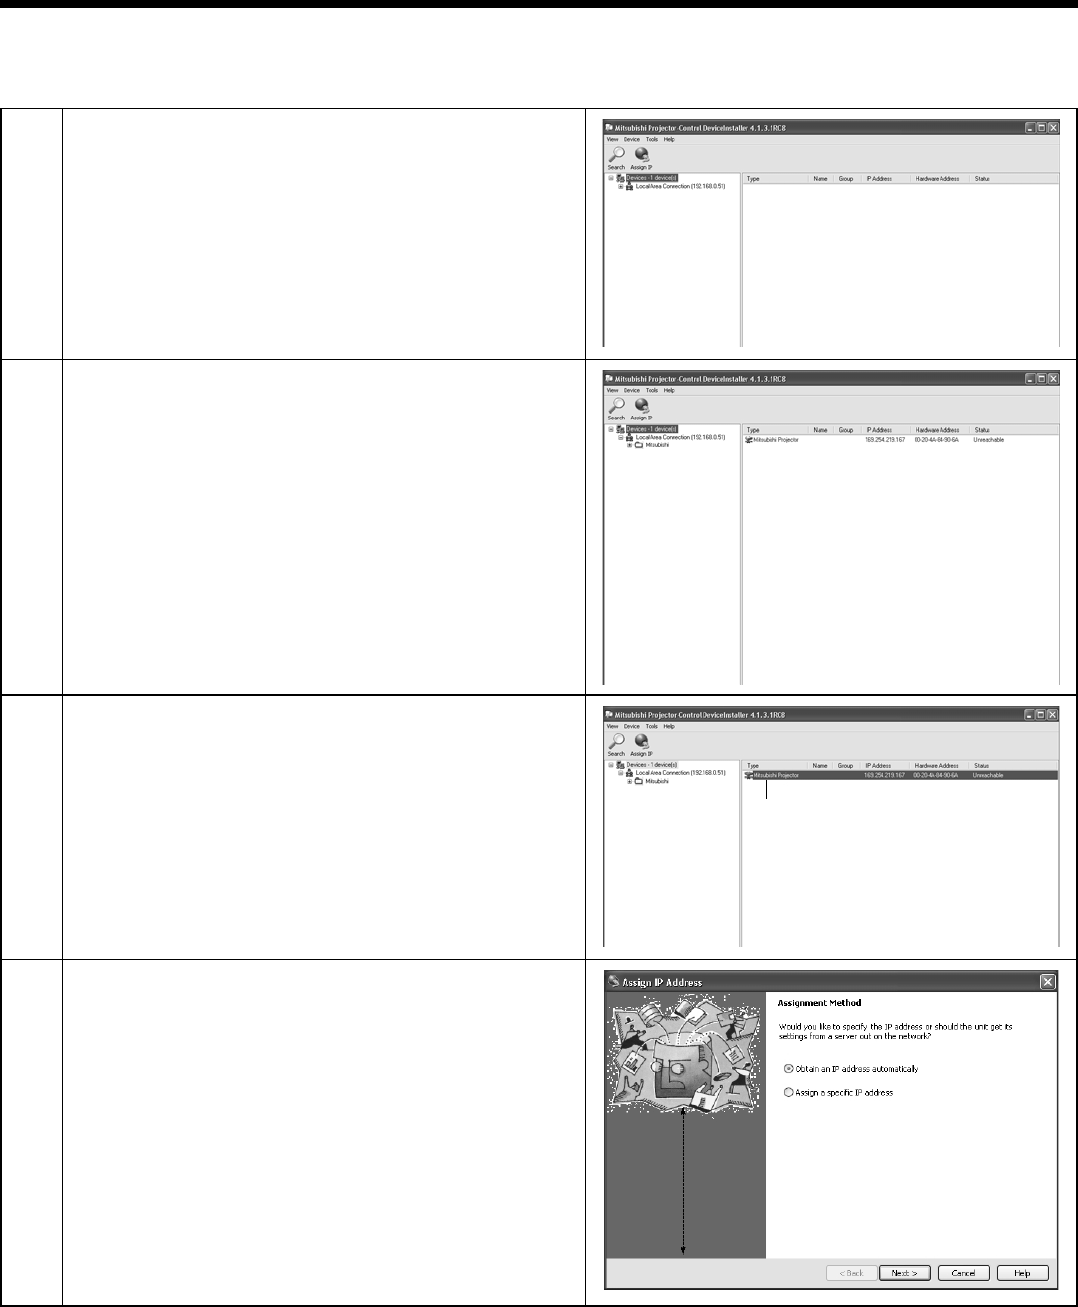
2
Click the Search button.
• Mitsubishi projector is recognized.
(Note)
When Mitsubishi projector isn’t recognized, check
the following.
• The fi rewall function has been disabled. (When it
has been enabled, search may not be conducted.)
• The personal computer and the projector are on
the same network. (For preventing unauthorized
access.)
• More than one Projector-Control Device Installer
isn’t running.
3
Select a projector by clicking the line showing the
projector and click the Assign IP button.
4
The Assign IP Address screen appears.
Setting the IP address of the projector
Before setting the IP address, check that the projector has been LAN-networked and turn on the main power of the
projector.
• For automatic IP address setting by the DHCP server, go to page 6. For IP address setting without using the
DHCP server, go to page 7.
Preparation/SetUp (continued)
Click here


