


VI) Quick Start
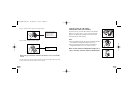
Battery Installation
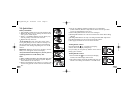
1. Turn and pull to release the cover at the end of the unit.
2. Release the battery tray by pushing the release hook
with a pen or similar object.
3. Insert 2 x AA alkaline batteries into the battery tray
with the polarity in the direction as shown.
4. Replace the tray and cover.
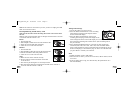
Be careful!! The edge of the clip is sharp, when
turning and pulling the cover, make sure the clip is in
the same direction as the lens. Observe the following
precautions when turning and pulling the cover of the
camera.
Important: When the camera is low in battery, the low
battery icon will appear on the LCD display.
Always download video footages to your PC prior to
replacing batteries to avoid memory loss.
Note:
a) Battery installation should be done under adult supervision.
b) Do not mix old and new batteries together. Replace
all the batteries at the same time.
c) Remove the batteries if the camera is not going to be
used for long periods of time. This will save battery
life.
11
d) Do not mix alkaline, standard (carbon-zinc) or rechargeable
(nickel-cadmium) batteries. Only batteries of the same or equivalent
type as recommended are to be used.
e) Non-rechargeable batteries are not to be recharged.
f) Rechargeable batteries are to be removed from the camera before being
charged.
g) Rechargeable batteries are only to be charged under adult supervision.
h) Exhausted batteries are to be removed from the camera.
i) The supply terminals are not to be short-circuited.
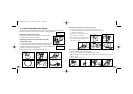
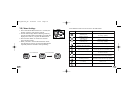
Turning On the Camera
Press and hold the for 2 seconds (two beeping
sounds). The LCD display will light up.
For your safety, do not press any buttons on the camera
during sports activities.
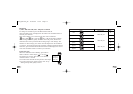
Turning Off the Camera
1. Press and hold the for 2 seconds (two beeping
sounds). The LCD display will turn off.
2. The camera will be turned off automatically after 10
minutes of not being used unless it is in USB mode.
12
AT18_manual_US 10/20/06 14:31 Page 8