


8 Pelco Manual C2434M (7/01)
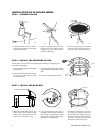
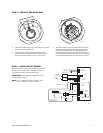
STEP 5 - INSTALL DOME DRIVE
LABEL
SW1
L
A
B
E
L
S
W
2
SW1
SW2
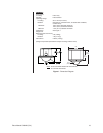
RS-422 TERMINATION SWITCH
ON
1
2
3
4
5
6
7 8
ON
1
2
3
4
5 6
7
8
SW2
00538
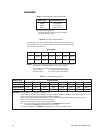
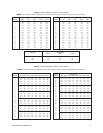
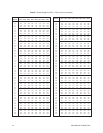
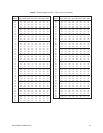
a. Set the DIP switches for SW1 and SW2 on the bottom of
the dome drive for the appropriate receiver address. Refer
to the labels on the dome drive or Tables C through E in
the
Appendix
in the back of this manual.
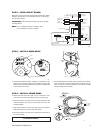
b. Daisy Chain Operation Only – When connecting more
than one Spectra dome system to a single controller,
terminate the last unit in the chain (farthest from the
controller). To terminate the dome drive set the RS-422
termination switch to the left.
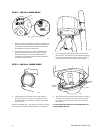
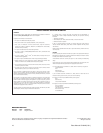
c. Line up the green and red tabs with the green and red
labels. Push in on the tabs. Insert the side with the green
tab, and then the side with red tab. Continue pushing on
the ends of the tabs until both sides click into place.
01083
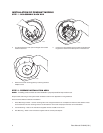
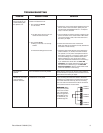
STEP 6 - INSTALL LOWER DOME
00543
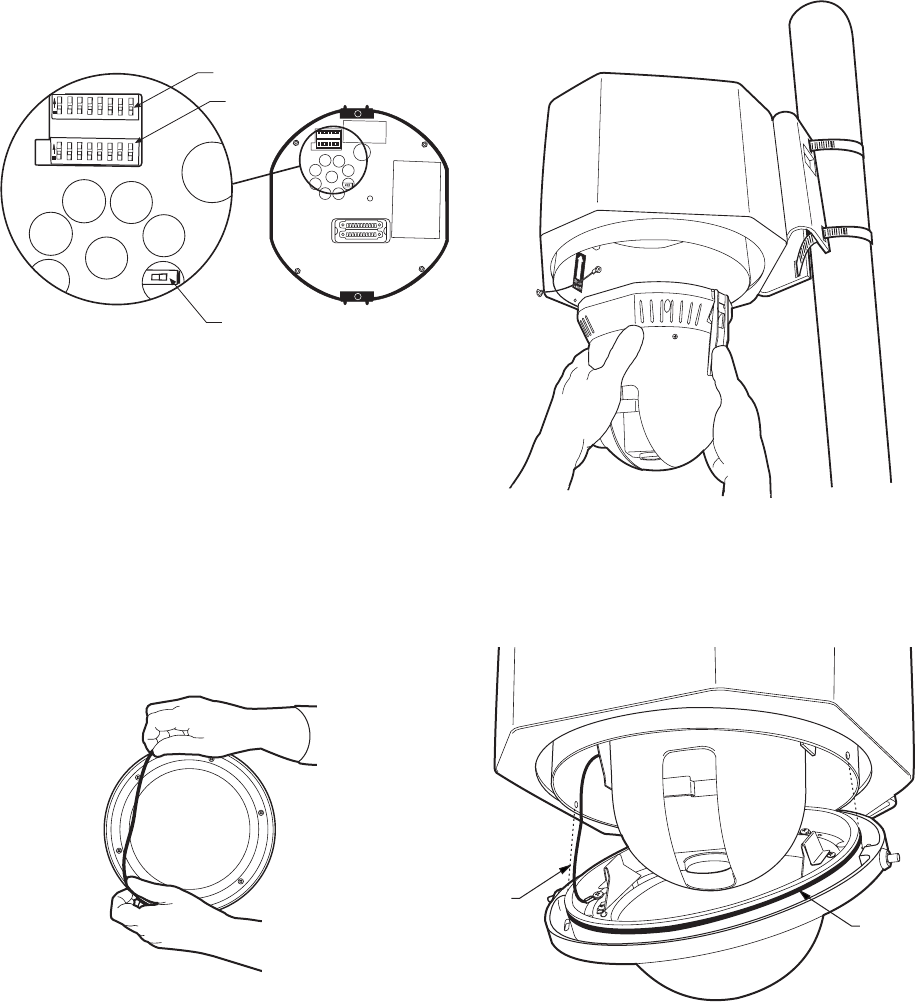
TRIM
LEASH
O-RING
BARREL
LOCK
01084
a. Lightly apply O-ring lubricant to the O-ring. Install the
O-ring in the groove on the trim ring of the lower dome.
Attach the back box trim leash to a retainer screw inside
the lower dome.
Environmental Model only – Plug the two-pin heater connection
in the lower dome into the mating connector in the back box.
b. Align barrel locks in lower dome with the holes located on
each side of the back box. Push lower dome onto back
box. Press the pins of the barrel locks IN to secure the
lower dome.
TO USE YOUR DOME, REFER TO THE OPERATION AND
PROGRAMMING MANUAL.