3139 116 19662 (ENG)
23
RECORDING CLOCK
STANDBY
ON
MINI HIFI SYSTEM
BANDC1 • 2 • 3
CDR
STOP•CLEAR
SEARCH•TUNING PLAY PAUSE PREV
NEXT
DUB
(HSD)
RECORD
A. REVDIM
CLOCK/
TIMER
PROG
BASS
TREBLE
wOOx
TECHNOLOGY
IR SENSOR
SIDE
V
O
L
U
M
E
PLUS
LEVEL
PRESET
▲
▲
B
A
S
S
/
T
R
E
B
L
E
TAPE
CD
TUNER
AUX
V
E
C
TAPE 1•2
CD 1•2•3
FM•AM
CDR/DVD
D
I
G
I
T
A
L
S
O
U
N
D
C
O
N
T
R
O
L
4 Press DUB (HSD) once for
normal speed dubbing or twice
(within 2 seconds) for high speed
dubbing.
™ "NORMAL" (normal speed) or
"FAST" (high speed) will be
displayed, followed by "DUB" with
"! or @" scrolling left or right
depending on the tape side
selected.
™ The HSD appears on the display
during high speed dubbing.
• Dubbing will start immediately.
™ The REC starts flashing.
5 Press Ç to stop dubbing.
Notes:
– Only å mode is available during
dubbing.
– At the end of side A, flip the tapes to
side B and repeat the procedure.
– Dubbing of tapes is only possible from
tape deck 1 to tape deck 2.
– To ensure good dubbing, use tapes of
the same length.
– During high speed dubbing in Tape
mode, the sound is reduced to a low
volume.
– You can listen to another source while
dubbing.
CD Synchro Start
Recording
1 Load a blank tape into tape deck 2
and a disc into a disc tray.
2 Press CD to select CD mode.
• You can program the tracks in the
order you want them to be recorded
(see Programming Tracks). If not,
select the disc by pressing CD 1•2•3
and the tracks are recorded
according to the order on the
selected disc.
3 Press RECORD to start recording.
™ The REC starts flashing.
• CD will start playback automatically.
4 Press Ç to stop recording.
One Touch Recording
• For One Touch Recording, as soon as
you press RECORD, the current
source (CD, TUNER or AUX) will be
recorded on tape deck 2.
1 Load a blank tape in tape deck 2.
2 Press RECORD to start recording.
™ The REC starts flashing.
3 Press Ç to stop recording.
Note:
– When you press RECORD while in
TAPE mode, "SELECT SOURCE" will
be displayed. One Touch Recording is
not possible in TAPE mode.
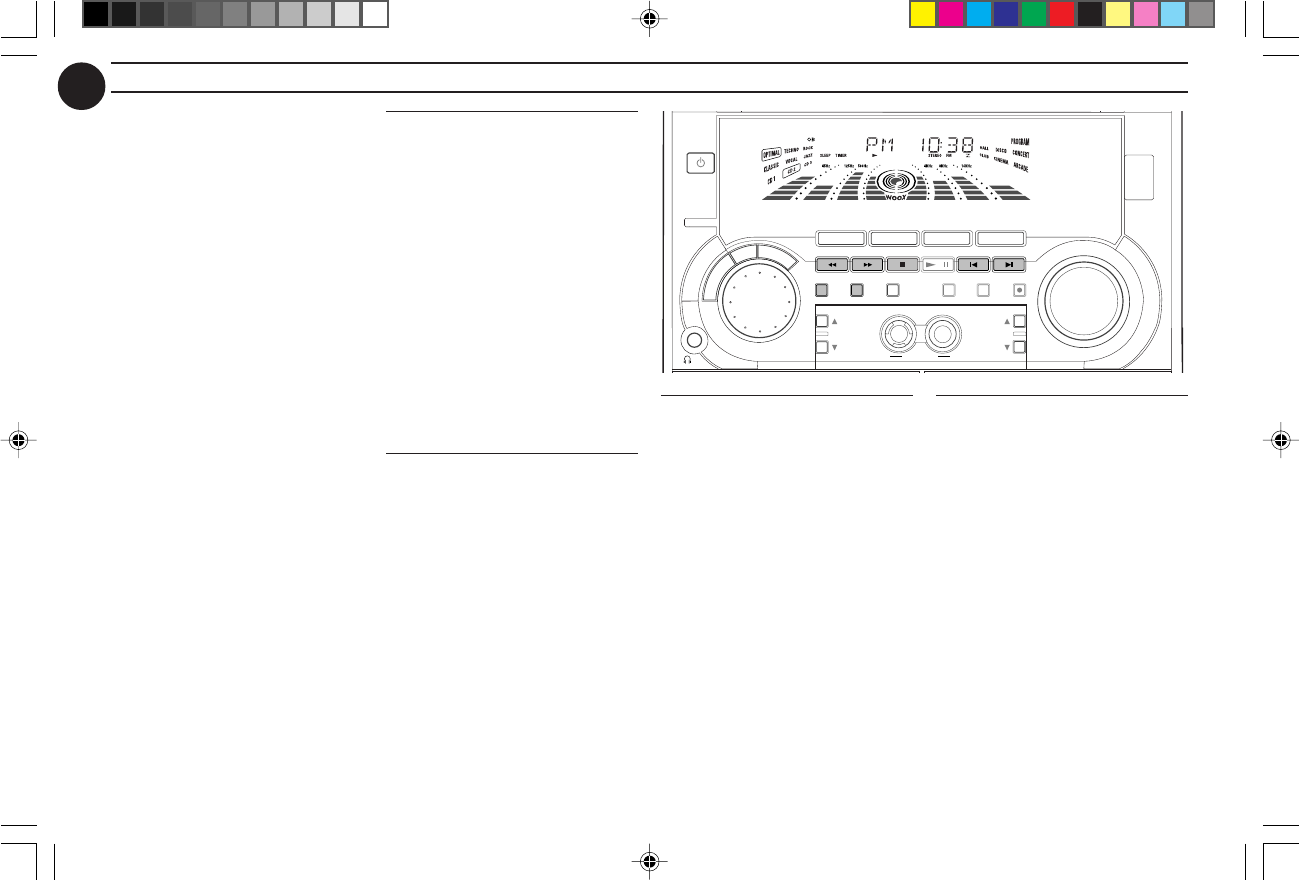
View Clock
You can view the clock (if it is set) if the
system is in Standby mode or when any
sound source is selected (CD, TUNER,
etc.). The clock will be displayed for
about seven seconds.
• Press CLOCK/TIMER briefly (or
CLOCK on the remote control).
™ "PM 10:38 or 22:38" (the
current time) will be displayed
depending on whether you have
selected 12- or 24-hour mode.
™ "--:--" will be displayed if the
clock is not set.
Clock Setting
The clock can be set in either 12- or
24-hour mode, e.g. "AM 12:00" or
"00:00". Before setting the clock, you
must be in the View Clock mode.
1 Press CLOCK/TIMER to select
clock mode.
2 Press PROG (on the system only) to
select 12- and 24- hour mode.
™ If 12-hour mode is selected,
"AM 12:00" starts flashing.
™ If 24-hour mode is selected,
"00:00" starts flashing.
3 Set the hour with␣ à or á on the
system.
4 Set the minute with␣ í or ë on
the system.
pg 01-28/C80/37-Eng 2/16/00, 9:06 AM23


