17
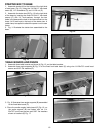
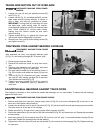
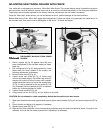
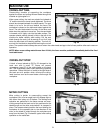
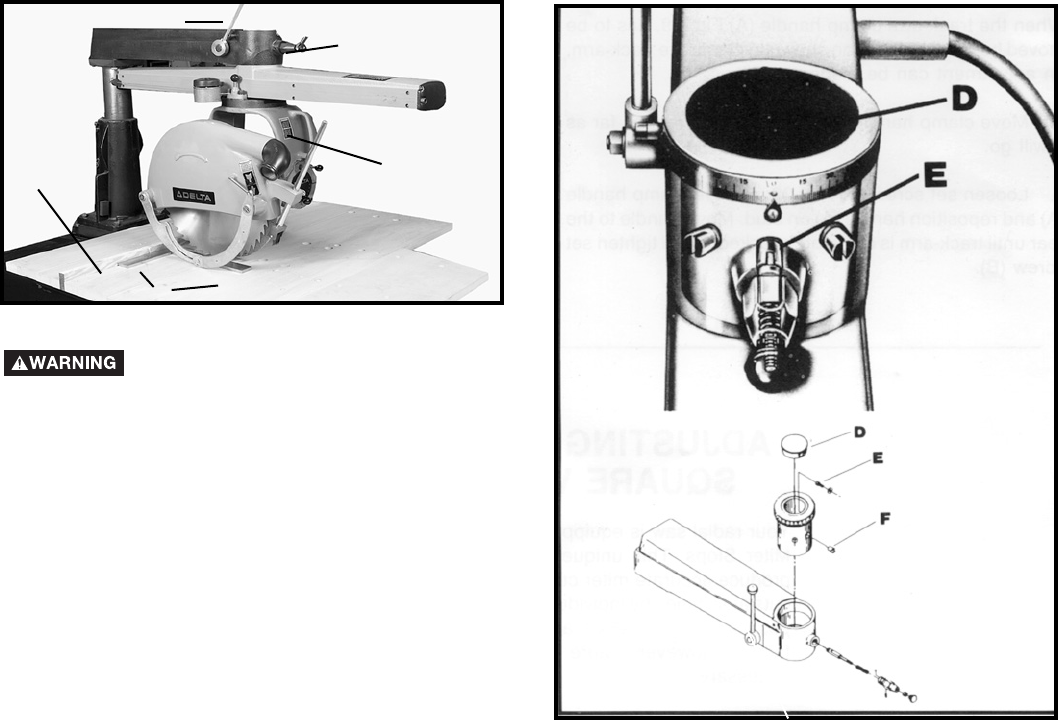
1. Place a square (A) Fig. 40 against fence (B), and
lower cuttinghead (C) so that saw blade just clears
table top.
2. Pull cuttinghead (C) Fig. 40, along square (A). If saw
blade does not travel parallel to the square, the
following adjustment is necessary.
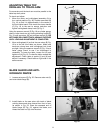
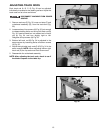
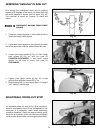
3. Remove cover plate (D) Fig. 41.
4. Locate center cap screw (E) Fig. 41 inside pivot
column and loosen slightly. Tap center cap screw (E)
sharply with a block of wood or insert a thin wooden
wedge inside the column to loosen the tapered plug
(F) Fig. 41 that is attached to the cap screw (E). It is
very important that the tapered plug (F) is loosened
before any further adjustment is made.
5. Loosen clamp handle (G) Fig. 40.
6. Using wrench on hex nut (H) Fig. 40, turn slightly to one side.
CAUTION: Do not attempt to rotate completely. Notice that the entire track also moves.
7. When saw blade tracks evenly against steel square, tighten clamp handle (G) Fig. 40 and center cap screw (E) Fig.
41.
8. Check pointer and adjust to 0 degrees, if necessary.
9. Replace cover plate (D) Fig. 41.
10. Right and left miter positions can be independently adjusted using the same procedure as above. If square is not
available, trial cuts can be made to determine if adjustment is necessary.
ADJUSTING SAW TRAVEL SQUARE WITH FENCE
Your radial saw is equipped with exclusive "Micro-Set" Miter Stops. This unique feature makes it possible to produce
accurate miter cuts and perfectly square cross-cuts at all times by individual adjustment of the three stop positions.
These stops are accurately adjusted at the factory. However, adjustments can be made if necessary.
Once the "Micro-Set" stops are set, you can be assured of quick, positive settings at the three positions.
Before determining if the "Micro-Set" stops require adjustment, check saw travel for squareness with table fence. To
do accurate work, saw travel must be 90 degrees to the fence. To check and adjust:
Fig. 40
Fig. 41
B
A
G
H
C
DISCONNECT MACHINE FROM POWER
SOURCE.


