


10
TEMPLATE SUPPORT
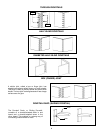
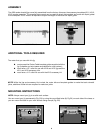
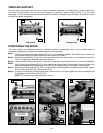
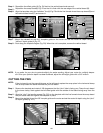
For every type of joint, place wood in the top clamp, whether a workpiece or a scrap piece, to provide support for
the router on the template. You can add extra support by inserting a second board (A) Fig. E1 (of the same
thickness) in the top clamp to ensure that the template is parallel to the base across its length. This practice works
very well for narrow workpieces.
Unsupported
Supported
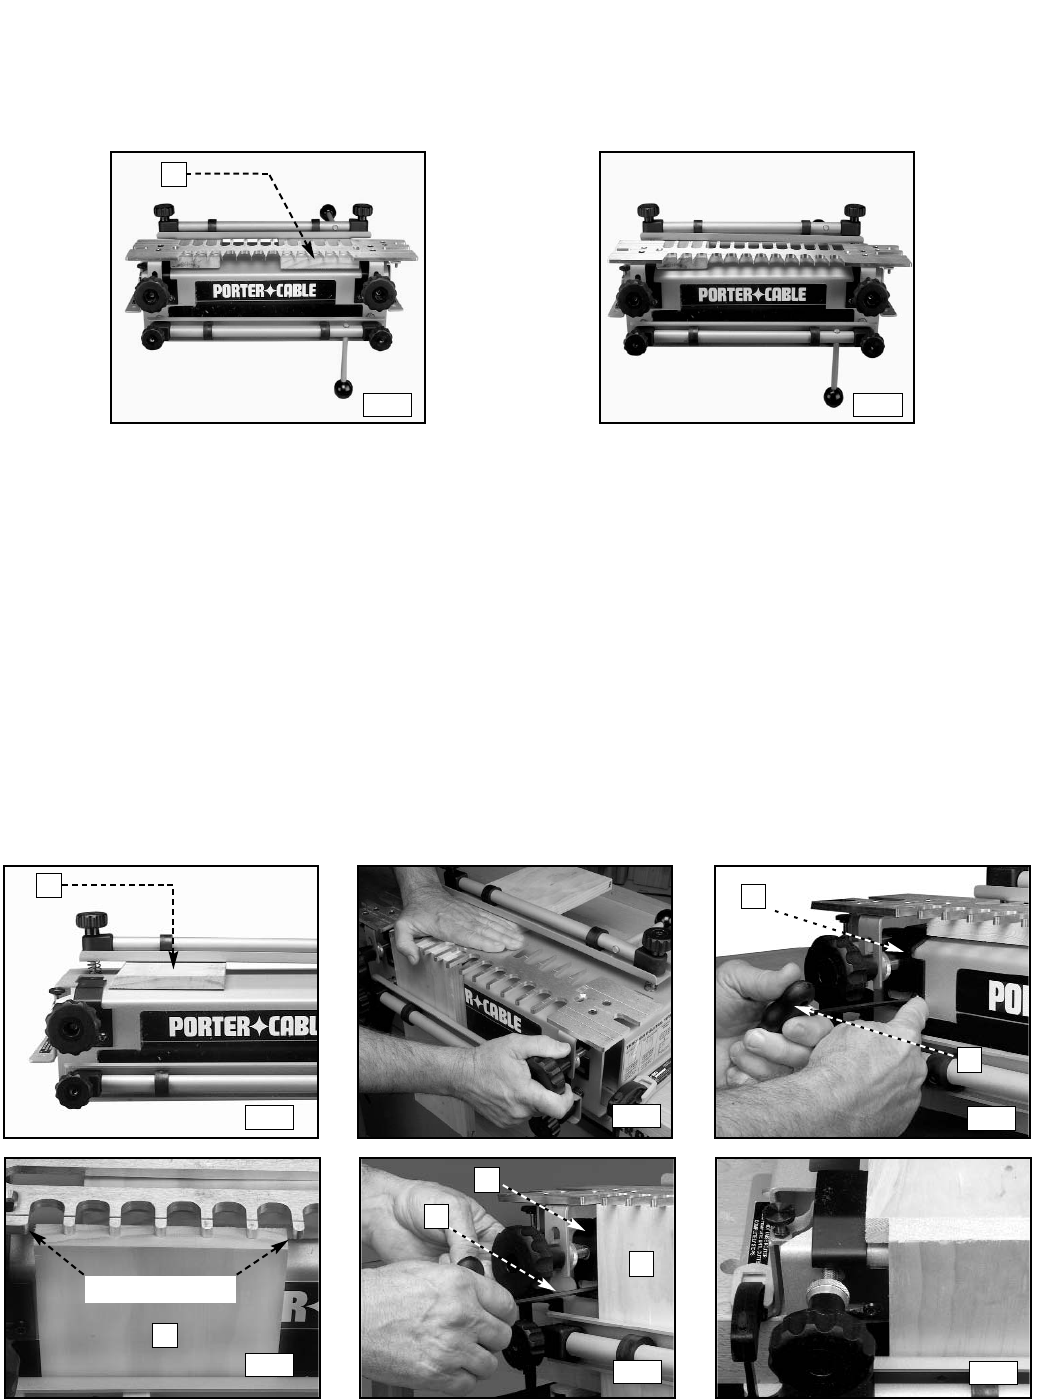
E1 E2
Step 3 -
Step 4 -
Step 5 -
Step 6 -
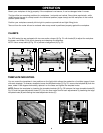
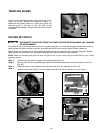
POSITIONING THE WOOD
You must position the workpiece correctly to produce attractive symmetrical joints. Use the offset guides to
consistently position the workpiece for optimal alignment and symmetry.
Step 1 -
Step 2 -
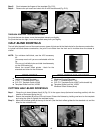
Clamp the workpiece (or spacer board) (A) Fig. F1 in the horizontal position. The position is not critical, but
the workpiece must not extend beyond the front edge of the base.
Mount the template (Fig. F2) on top of the horizontal workpiece. Press down on the template (A) with one
hand, and tighten the template knobs with the other.
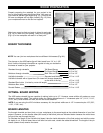
Loosen the left offset guide (A) Fig. F3 with the T-handle hex wrench (B) and move it to the far left position.
Align the vertical workpiece (A) Fig. F4 flush against the bottom side of the template. Center and clamp the
workpiece between the farthest finger to the left and the nearest finger to the right of the template.
Move the left offset guide (A) Fig. F5 to the right so that it is flush against the vertical workpiece (B). Tighten
the left offset guide with the T-handle wrench (C).
Unclamp the horizontal workpiece and slide it forward so that it is flush against the vertical workpiece and
flush against the left offset guide (Fig. F6).
NOTE: The template has been removed for clarity.
F1
F2
F3
F4
F5
F6
CENTER
A
A
B
A
B
C
A
A