


16
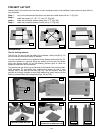
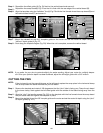
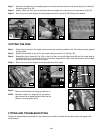
Step 4 -
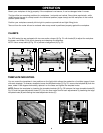
Reposition the offset guide (A) Fig. P4 flush to the vertical board and secure it.
Reposition the scrap board(A) Fig. P5 so that it is flush with the rear edge of the vertical board (B).
Align the template using the “tails/box” line (A) Fig. P6 with the line formed where the scrap board (B) and
the vertical board meet (C) and secure it.
Step 5 -
Step 6-
A
A
B
A
C
B
P4
P5
P6
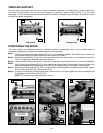
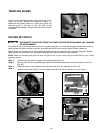
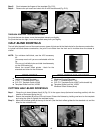
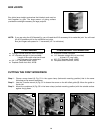
Mount the dovetail bit and 3/4" template guide on the router and set the router bit depth using the
“tail/box” depth guide (A) Fig. P7.
Rout along the template fingers (Fig. P8). When the cut is complete, remove the vertical board.
Step 7 -
Step 8 -
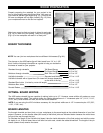
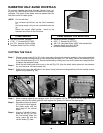
CUTTING THE PINS
NOTE:
If you prefer for your pins to protrude slightly for easier sanding, Adjust your router for a slightly deeper
cut. Once your optimum depth has been achieved, adjust the bit height guide with a 3/8" wrench.
NOTE:
If the pin board is not the same thickness as the tail board, replace the scrap piece in the horizontal clamp
with a scrap board the same thickness as your tail board.
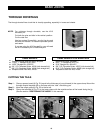
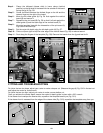
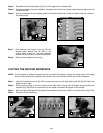
Step 1-
Remove the template and rotate it 180 degrees so that the “pins” side is facing you. Clamp the pin board
in the lower clamp, flush against the left offset guide with the outside of the board facing away from the
jig.
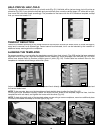
Align the “pins” line (see the arrows) Fig. P10 on the template with the line formed where the scrap board
and pin board meet and tighten the template in place.
Mount the straight bit and the 5/8" templet guide on the router and set the router bit depth using the “pins”
bit depth guide (Fig. P11).
Step 2 -
Step 3-
A
P7
P8
P10
P11